13-11-614 Page 33
4.
This step is only encountered if the AUTO RESTART function was set to ON in the previous step. In
the top line, “
RESTART DELAY
” is displayed. The bottom line will indicate a time between 5 and 60
seconds. It is factory set at 10 seconds. This is the amount of delay introduced before restarting
after power has been restored. Set it as desired to allow for power to stabilize before starting
compressors.
5.
The display now reads “
JOG MOTOR?
” and indicates the amount of time to energize the starter.
Adjust with the [+] or [-] key to the smallest value needed to bump the motor and check rotation. 0.1
o 0.2 seconds is normally adequate for factory-furnished full-voltage starters; Wye-Delta or remote
starters may require a little more time. Set back to zero to proceed to the next step.
6.
In the top line, “
AUX SD MESSAGE
” is displayed. The bottom line will display the message which
will appear if power is removed from the shutdown input on the optional expansion board. Select the
most appropriate message for user-furnished shutdown devices, and press [ENTER] to proceed.
7.
This completes the unit setup adjustments. The controller will return to the main adjustments menu.
OTHER CONTROL FEATURES
Auto restart after power failure - The AUTO SENTRY W controller normally displays “SHUTDOWN -
POWER FAILURE” after power has been interrupted and restored. Press the [STOP/RESET] key and
select an operating mode to restart the compressor.
If programmed for automatic restart, the controller pauses and begins counting down when power is
restored. This time is adjustable in the programming steps noted above. This must be at least several
seconds, but may be set longer to allow other plant loads to start up first. After the countdown is
complete, the controller resumes the mode of operation prior to the power interruption.
When auto restart is enabled, the green power indicator will blink whenever power is on. With auto
restart disabled, the power indicator lights steadily while power is on.
SEQUENCING COMPRESSORS WITH THE AUTO SENTRY W
An accessory expansion board, part number 301EWC1173, is required in each controller for sequencing
operation. This accessory is included with the AUTO SENTRY W controller installed in your package.
Sequencing compressors with the AUTO SENTRY W controller is as simple as plugging in a telephone to
a wall jack. The only item required to make the system functional is a standard telephone cable identical
to cables that connect nearly every telephone to its wall jack. One less cable than the number of
compressors to be sequenced is required. For example, to sequence four compressors, three cables are
required. A kit, 200EAP752, is available which contains all material needed to sequence up to five
compressors. This kit contains 500 feet of cable, eight modular connectors, and a crimping tool to install
the connectors.
In spite of its inherent installation simplicity, the sequencing function of a multi-compressor AUTO
SENTRY W system provides all the necessary features for maintaining pressure over a wide range of
plant demands.
Installation
A proper sequencing installation requires two or more Champion rotary air compressors complete with
AUTO SENTRY W controllers, piped into a common air system, interconnected as described above. For
best performance, the units must be piped directly to the receiver, without any intervening check valves,
dryers, or other restrictions. The receiver should also be sized to prevent excessive drops or rapid rises
in pressures during the operation as described below. All standard practices common to sound air
Summary of Contents for ROTORCHAMP EWF99C-100
Page 7: ...13 11 614 Page 7 Figure 1 2 PACKAGE ILLUSTRATION AIR COOLED 309EWF797 A Ref Drawing ...
Page 8: ...13 11 614 Page 8 Figure 1 3 PACKAGE ILLUSTRATION WATER COOLED 310EWF797 A Ref Drawing ...
Page 9: ...13 11 614 Page 9 Figure 1 4 AIR COOLED SCHEMATIC 307EWF797 A Ref Drawing ...
Page 10: ...13 11 614 Page 10 Figure 1 5 WATER COOLED SCHEMATIC 308EWF797 A Ref Drawing ...
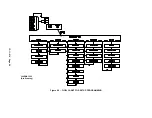
Page 29: ...13 11 614 Page 29 Figure 4 2 FLOW CHART FOR SETUP PROGRAMMING 300EWC1255 Ref Drawing ...
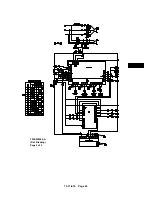
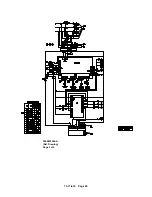
Page 43: ...13 11 614 Page 43 303EWF546 A Ref Drawing Page 2 of 2 ...
Page 45: ...13 11 614 Page 45 304EWF546 A Ref Drawing Page 2 of 2 ...
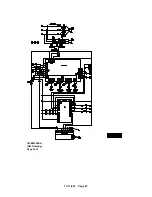
Page 47: ...13 11 614 Page 47 305EWF546 A Ref Drawing Page 2 of 2 ...

