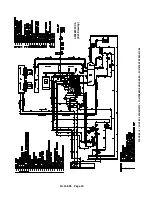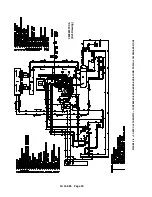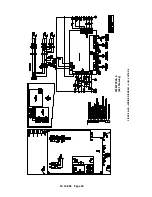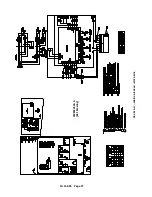
13- 11- 605
Page 28
Remote On / Off
-- Remote on-- off control of the sys-
tem requires only a simple two-- wire control, with an
isolated contact suitable for 120 volts, 1 amp. This may
be a switch, a timer contact, a relay contact, or a PLC
output. To connect, simply run the two wires to the con-
trol enclosure, remove the jumper (if present) between
terminal 9 and 23, and connect the pair of wires from
the switch to terminals 9 and 23.
The air compressor will operate normally in its selected
mode whenever this contact is closed (turned on).
Note that the keypad is always the master control; the
[RUN] key must be pressed to place the control into an
operating mode. The remote is not capable of starting
a unit after the [STOP/RESET] key has been pressed
to place the controller in the READY state. When the
contact is opened (turned off), operation depends on
how the controller has been programmed and what it
is doing prior to opening the contact.
If the compressor was already stopped in automatic or
sequence modes, it will remain stopped and will not re-
start until the contact is closed. The display will flash
the message “REMOTE STOP” to indicate that it is
waiting for the remote signal.
If the compressor was running in any mode when the
contact was opened, and the remote response is pro-
grammed for “IMMEDIATE”, the compressor will im-
mediately unload and blowdown. After completion of
blowdown, the motors will stop, and the unit will be in
the “REMOTE STOP” mode as indicated above.
If the compressor was running in any mode when the
contact was opened, and the remote response is pro-
grammed for “TIMED UNLOAD”, the compressor will
immediately unload and blowdown. It will then continue
to run unloaded for whatever period has been pro-
grammed for “AUTO TIME” (or will complete the re-
maining auto time if already blown down).
After
completion, the motors will stop, and the unit will be in
the “REMOTE STOP” mode as indicated above. This
is the preferred setting for automatic remote controls
which may cycle in less than 1/2 hour, as the motor is
always cooled evenly and rapid start cycles are pre-
vented.
If remote control is not desired, this input must be jump-
ered to operate the compressor. Connect a jumper be-
tween terminals 9 and 23.
Auxiliary Shutdown
-- This input allows factory or field
connection of shutdown switches not included on the
standard package. Simply connect a two-- wire switch
to terminals 9 and 24. The switch must be selected
which has contacts closed for normal conditions, and
open to shutdown the compressor. If the contact is
opened, the compressor will be shut down, and will dis-
play a user selectable message (refer to unit setup ad-
justments for list of messages).
If no additional switch is desired, this input must be
jumpered to operate the compressor. Connect a jump-
er between terminals 9 and 24.
Alarm Relay
-- The expansion board is provided with
an alarm relay which may be connected to a remote
mounted indicator light, horn, or into a PLC input of a
plantwide control system. The contact is commercial
rated 2 amps at 120 volts. The relay is turned on when-
ever there is a shutdown condition requiring service at
the compressor, and remains off during normal opera-
tion, stopping, or power off conditions. The external
connections from the controller are from an isolated
form C (single-- pole, double-- throw) contact. This al-
lows control of either a ”compressor okay” or a ”com-
pressor shutdown” remote indicator.
To use this relay, connect the supply wire for the remote
circuit to terminal 21 (relay common) on the terminal
strip. Connect a wire to the indicator from either termi-
nal 19 (normally open) or from terminal 20 (normally
closed). Connect the other side of the indicator to its
neutral.
OTHER CONTROL DEVICES
In addition to the electronic controller noted above, the
following components are also used to control opera-
tion of the compressor unit.
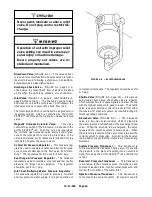
Relief Valve
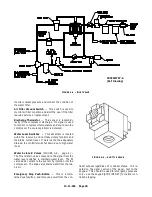
(FIGURE 1-- 5, page 3) -- A pressure relief
valve(s) is (are) installed in the final discharge line and
set to approximately 120-- 125% of the unit’s full load
operating pressure for protection against over pres-
sure. Periodic checks should be made to ensure its
(their) operation.
The relief valve should be tested for proper operation
at least once every year. To test the relief valve, raise
the system operating pressure to 75% of the relief valve
set pressure and manually open the valve with the hand
lever. Hold the valve open for a few seconds and allow
it to snap shut.
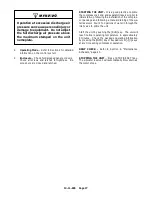
When the relief valve opens, a stream
of high velocity air is released, result-
ing in a high noise level and possible
discharge of accumulated dirt or oth-
er debris. Always wear eye and ear
protection and stand clear of the dis-
charge port when testing the relief
valve to prevent injury.
Summary of Contents for ROTORCHAMP RCOF20
Page 13: ...13 11 605 Page 4 FIGURE 1 6 AIR WATER SCHEMATIC 300EWC797 B Ref Drawing ...
Page 16: ...13 11 605 Page 7 DECALS 206EAQ077 300EWC077 301EWC077 211EAQ077 207EAQ077 ...
Page 17: ...13 11 605 Page 8 DECALS 216EAQ077 206EWD077 222EAQ077 221EAQ077 208EAQ077 ...
Page 31: ...13 11 605 Page 22 FIGURE 4 2 FLOW CHART FOR SET UP PROGRAMMING 300EWC1255 Ref Drawing ...
Page 41: ...13 11 605 Page 32 FIGURE 4 6 CONTROL TUBING SCHEMATIC 300EWC797 B Ref Drawing ...
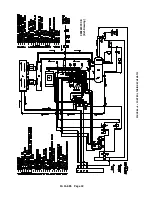
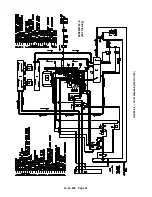
Page 45: ...13 11 605 Page 36 FIGURE 4 10 WIRING DIAGRAM FULL VOLTAGE 301EWC546 A Ref Drawing ...
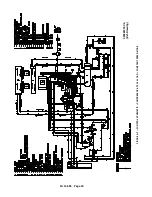
Page 46: ...13 11 605 Page 37 FIGURE 4 11 WIRING DIAGRAM WYE DELTA 302EWC546 A Ref Drawing ...
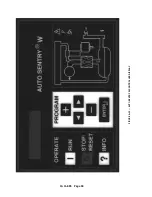
Page 47: ...13 11 605 Page 38 FIGURE 4 12 AUTO SENTRY W CONTROLLER DISPLAY ...
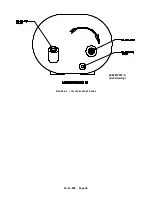
Page 49: ...13 11 605 Page 40 FIGURE 5 1 OIL LEVEL SIGHT GLASS 306EWC797 A Ref Drawing ...
Page 50: ...13 11 605 Page 41 FIGURE 5 2 FLOW DIAGRAM AIR COOLED 300EWC797 A Ref Drawing ...

