background image

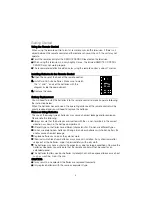
Turning on and off the TV                                                                                                               

 Turn on the TV 

Connect the power cable, and press the 

  button to turn on the TV. 

 Turn off the TV 

Press the 

  button on the remote control to enter standby mode.   

Do not leave your set in standby mode for long periods of time. It is best to unplug the 
set from the mains and aerial.   
When there is an accident power off, it is recommended to unplug the power cable 
from the power socket. 

 No signal 

There is No Signal menu on screen when there is no input signal. In TV mode, if there 
is no signal in 5 minutes, the TV will turn off automatically. In PC mode, the TV set will 
automatically turn off in 60 seconds if there is no input signal. When the VGA cable is 
connected, the TV turns on automatically. 

Program Selection                                                                                                                     

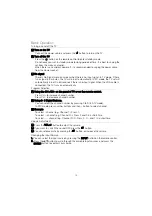
 Using the CH+/CH- on the panel of TV or on the remote control. 

Press CH+ to increase channel number. 
Press CH - to decrease channel number. 

 Using 0- 9 Digital Buttons. 

You can select the channel number by pressing 0 to 9 (in ATV mode). 
In DTV mode, press number buttons and then – button to select channel. 

 Example 

To select - channel (e.g. Channel 1): Press 1. 
To select -- channel (e.g. Channel 20): Press 2 and 0 in a short time. 
To select --.- channel (e.g. Channel 20.1): Press 2, 0, – and 1 in a short time. 

Volume Adjustment                                                                                                                         

 Press the VOL+/- button to adjust the volume. 

 If you want to switch the sound OFF, press the 


button. 

 You can release mute by pressing the 


button, or increase the volume. 

Changing the Input Source                                                                                                           

1. You can select the input source by pressing the 

  button on the remote control.   

2. Press the

/

button to cycle through the available input sources, and press the 

 button to confirm your choice. 


Basic Operation 

 ENTER

INPUT

10

Summary of Contents for UD42YC5500UA

Page 1: ...al Service E mail info changhongusa com CHANGHONG TRADING CORP USA 17800 Castleton St Suite 306 City of Industry CA 91748 TEL 1 626 965 2688 FAX 1 626 965 6998 Model UD42YC5500UA 42 Web site www chang...

Page 2: ...empt to modify this product in any way without written authorization from supplier Unauthorized modification could void the user s authority to operate this product It is not recommended to keep a cer...

Page 3: ...TION connecting the Power Cord Most appliances recommend they be placed on a dedicated circuit that is a single outlet circuit which powers only that appliance and has no additional outlets or branch...

Page 4: ...ferent from that to which the receiver is connected Consult the dealer or an experienced radio TV technician for help ENERGY STAR is a joint program of the U S Environmental Protection Agency and the...

Page 5: ...radiators heat registers stoves or other apparatus including amplifiers that produce heat 6 Clean only with a dry cloth 9 Do not defeat the safety purpose of the polarized or grounding type plug A po...

Page 6: ...maged liquid has been spilled or objects have fallen into the apparatus the apparatus has been exposed to rain or moisture does not operate normally or has been dropped ON DISPOSAL The fluorescent lam...

Page 7: ...atteries may cause chemical leakage and or explosion Please note the following Always ensure that the batteries are inserted with the and terminals in the correct direction as shown in the battery com...

Page 8: ...her end of the VGA cable with the VGA port on the TV and tighten the bolts clockwise on each end of VGA cable NOTE While connecting the 15 pin VGA please do not insert the plug with enormous force oth...

Page 9: ...essing the buttons The default signal source will be displayed when the TV is turned on On Channel Set the default channel by pressing the buttons The default channel will be displayed when the TV is...

Page 10: ...Press again to exit it 11 Choose the aspect ratio 12 Selects the MHL mode directly Moves back to the main screen In MHL mode 13 MENU Press to display exit the on screen menus or to quit some operation...

Page 11: ...Program Selection Using the CH CH on the panel of TV or on the remote control Press CH to increase channel number Press CH to decrease channel number Using 0 9 Digital Buttons You can select the chann...

Page 12: ...ted Some items in the menus may be hidden depending on modes or signal sources used Buttons on the TV have the same function as corresponding buttons on the remote control If your remote control is lo...

Page 13: ...y mode on or off Energy Demo Switch the Energy demo on or off While both Energy Mode and Energy demo are set to On Backlight To control the brightness of the screen adjust the brightness of panel Back...

Page 14: ...can t be adjusted External When you set Speaker to External the TV s speakers are turned off You will hear sound through the external speakers only Adjusts the volume with the knob attached to the ex...

Page 15: ...mpanying parent or adult guardian NC 17 No one 17 and under admitted X Adult audience only N A MPAA rating of N A Canada To select the Canada English Canada French Rating you want to lock or not Canad...

Page 16: ...guage Select your preferred On Screen Display language Audio Language Select your preferred audio language Available for digital channels if multiple audio languages are broadcasted Transparency Menu...

Page 17: ...environments Health Remind Switch the Health Remind on or off While Health Remind is set to On a prompt picture will remind you to have a break at intervals of two hours Configuring the Time Menu Cloc...

Page 18: ...ck may be abnormal when playing files that are too large Main Operating Interface Photo Music Movie Text 1 Press button to select PHOTO MUSIC MOVIE TEXT in the main menu then press ENTER button to ent...

Page 19: ...ve or poorly connected Use known good signal cord Volume is at the minimum value or TV is in mute mode Adjust the value of volume No picture no sound and indicator light is green blue The signal cable...

Page 20: ...binet with a soft dry lint free cloth Please be sure not to use a wet cloth Extended Absence If you expect to leave your TV dormant for a long time such as a vacation it s a good idea to unplug the po...

Page 21: ...rmal FULL ZOOM1 ZOOM2 5 Picture Effect Standard Home Vivid Eco Movie Game User 6 Film Mode 3 2 pull down Yes Picture Enhancement 7 Blue Stretch Yes 8 Black Stretch Yes 9 Motion Compensation Yes 10 DLT...

Page 22: ...health alerts 28 Startup Setting Yes 29 Picture Freeze Yes 30 Movie and Music Show MPEG2 MPEG2_HD 31 Photo Show JPEG 32 USB Multi media File Format Show TXT 33 Hotel Mode Yes SIGNAL FORMAT CAPABILITY...

Page 23: ...Standby Default Color of Front Cabinet Black Keyboard Position Right side Stand Type Unpackaged With Base Stand mm Unpackaged Without Base Stand mm Dimension for Main Body L D H mm Packaged Dimension...

Page 24: ...on a flat surface object with a surface area larger than that of the flat panel Both supporting brackets on either side must rest on the flat surface and the two brackets must be fastened with screws...

Page 25: ...ipement ATTENTION N essayez PAS de modifier ce produit de quelque fa on sans l autorisation crite du fournisseur Toute modification non autoris e peut annuler l autorisation d utiliser ce produit pour...

Page 26: ...cordon d alimentation La plupart des appareils recommandent l utilisation d un circuit d di c est dire un circuit de sortie qui alimente uniquement cet appareil et n ayant aucune autre prise ni circui...

Page 27: ...eur est branch Consulter le revendeur ou un technicien radio TV exp riment pour de l aide ENERGY STAR est un programme conjoint de l Environmental Protection Agency des tats Unis et le minist re am ri...

Page 28: ...s registres de chaleur les fourneaux ou autres appareils y compris les amplificateurs qui produisent de la chaleur 6 Nettoyez uniquement avec un chiffon sec 9 Ne contournez pas la fonction de s curit...

Page 29: ...upport ou table sp cifi s par le fabricant ou vendus avec l appareil Lorsque vous utilisez un chariot soyez prudent lorsque vous d placez l ensemble chariot appareil pour viter les blessures en cas de...

Page 30: ...s sur l utilisation de piles L utilisation d un mauvais type de piles peut entra ner une fuite chimique et ou une explosion Veuillez noter les points suivants Veillez toujours ce que les piles soient...

Page 31: ...ranchez une extr mit du c ble VGA au port VGA de l ordinateur branchez l autre extr mit du c ble VGA au port VGA sur le t l viseur et serrez les boulons dans le sens horaire chaque extr mit du c ble V...

Page 32: ...ntrer dans le mode H tel pour r gler les param tres relatifs uniquement en mode TV Activer h tel R glez Activer h tel On Off en appuyant sur les touches Lorsque le mode H tel est activ la fonction de...

Page 33: ...es cha nes Appuyez nouveau pour quitter 11 Choisir le format d cran 12 S lectionne directement le mode MHL Revient l cran principal en mode MHL 13 MENU Appuyez pour afficher quitter le menu de l cran...

Page 34: ...e la cha ne Appuyez sur CH pour diminuer le num ro de la cha ne Utilisation des touches num riques 0 9 Vous pouvez s lectionner le num ro de cha ne en appuyant sur 0 9 en mode ATV En mode DTV appuyez...

Page 35: ...vent tre masqu es en fonction des modes ou des sources de signaux utilis s Les boutons du t l viseur ont la m me fonction que les boutons correspondants sur la t l commande Si votre t l commande est p...

Page 36: ...d mo nergie sont activ s la ligne Consommation appara t sur l cran du t l viseur Pour contr ler la luminosit de l cran r glez la luminosit du panneau Le r tro clairage peut tre ajust lorsque le mode...

Page 37: ...nceintes du t l viseur et les enceintes connect es votre r cepteur audio Si cela se produit r glez le t l viseur sur haut parleur externe TV Lorsque vous d finissez le haut parleur t l viseur les haut...

Page 38: ...ertissement aux parents Certaines sc nes peuvent tre inappropri es pour les enfants de moins de 13 ans R Pour adultes Les enfants de moins de 17 doivent tre accompagn s par leurs parents ou un tuteur...

Page 39: ...ctions pour d verrouiller temporairement le programme R initialiser RRT Appuyez sur la touche ENTRER pour r initialiser les informations RRT REMARQUE Le R glage RRT et la R initialisation RRT peuvent...

Page 40: ...Restaurer les param tres syst me d usine par d faut Lorsque la restauration est termin e le Guide d installation s affiche l cran Guide installation Il s agit d un guide pour vous aider configurer le...

Page 41: ...lecture de fichiers trop gros Interface d exploitation principale Photo Musique Cin ma Texte 1 Appuyez sur les boutons pour s lectionner Photo Musique Cin ma Texte dans le menu principal puis appuyez...

Page 42: ...as d image pas de lumi re sonore et l indicateur est vert bleu Le volume est la valeur minimale ou la t l vision est en mode sourdine R glez la valeur du volume Le c ble de signal n est pas correcteme...

Page 43: ...essuyez le bo tier avec un chiffon doux sec et non pelucheux Veuillez veiller ne pas utiliser un chiffon humide Absence prolong e Si vous pr voyez de laisser votre t l viseur inutilis pendant une long...

Page 44: ...n principale Jeu multim dia IMAGE 1 Cat gorie T l viseur LED 2 Temp rature de couleur Normal Warm chaud Cool froid User utilisateur 3 R tro clairage intelligent r glable Oui 4 Mode ratio Normal PLEIN...

Page 45: ...loge Minuterie de veille Oui 27 Limite de visionnement Oui Alertes de sant de deux heures 28 R glages du d marrage Oui 29 Arr t sur image Oui 30 USB multim dias Film et musique MPEG2 MPEG2_HD DD MJPEG...

Page 46: ...support Socle incurv Dimension pour du bo tier principal L P H mm Non emball avec support de socle mm Non emball sans support de socle mm Dimension emball L P H Poids net kg 48 Support 2 Vis de socle...

Page 47: ...eau plat ne peut tre plac sur une surface plate de taille sup rieure celle de l cran plat et les supports de fixation des deux c t s doivent tre fix s dans la surface plane et les deux supports doiven...

Reviews: