


3
b
2
3
2
1
3
a
2
4
4
4
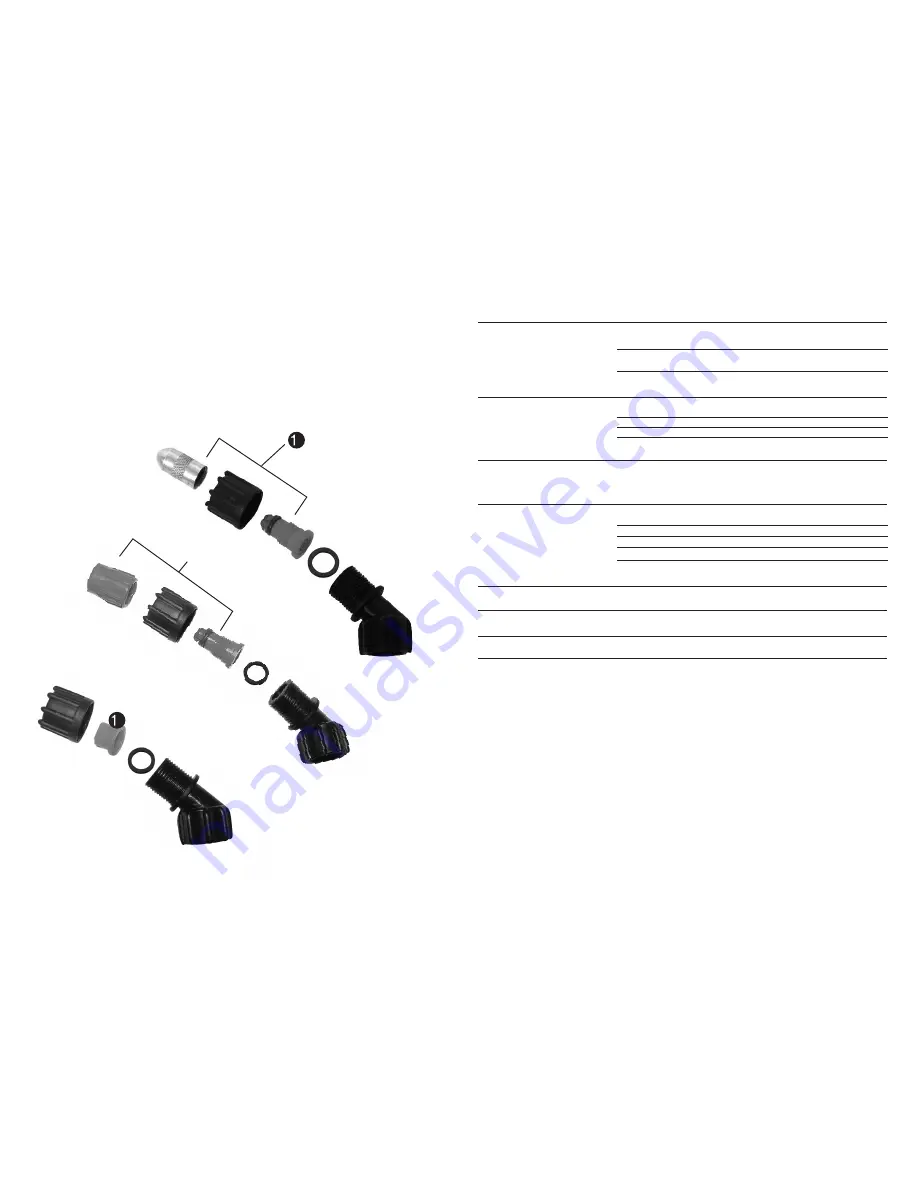
NOZZLE ASSEMBLY
Spray Tip Assembly
Part #
1
. Poly Adjustable Nozzle
6-8093
1a.
Brass adjuatable Nozzle
6-8122
1b.
Flat Fan Nozzle
6-8096
2.
Nozzle Retaining Nut
6-8094
3. Nozzle Gasket
6-8129
4.
Elbow
6-8099
5E
TROUBLE SHOOTING YOUR SPRAYER
Symptom
Difficulty pumping the pump lever
Little or no resistance during
repeated pumping – no pressure
Too much resistance after just a few
pumping strokes but pressure only lasts
briefly
Upward pumping is more difficult and/or
tank wall becomes indented.
When the handle is pulled up it moves
itself back down
Leaks Inside Cylinder
Leaks Outside Cylinder
The end of the spray wand leaks
Possible Reason
Dirty bushing
Dirty cylinder wall
Swollen collar from long term
exposure, needs lubrication
Damaged or dirty valve plate
Damaged O-ring at valve seat
Collar or piston is worn
Leaky seal in pressure
regulator
Not enough air cushion in the pressure
cylinder
Wrong tank cap (no vent hole)
Vent hole is clogged
Lower valve plate sticks
Clogged intake channels
Inlet screen clogged (at base of pressure
cylinder)
Damaged/Dirty Collar or Piston
Damaged O-ring on Cylinder
Worn or damaged shut-off valve
Correction
Remove the pump lever, clean & grease
the bushings with petroleum jelly
Remove the piston, clean & replace the
piston & collar
Lubricate the collar with petroleum jelly
Clean or Replace Valve Plates or Cylinder
Replace O-ring
Replace Collar or Piston
Check Seal and Valve Seat
Remove the PVC hose & drain pressure
cylinder. Reconnect the hose & preventive
measure-release. Pump up after each use
Replace with a properly vented cap
Clear the vent hole
Replace the valve plate
Clean the channels & tank
Clean intake screen with a small brush and
detergent
Clean or Replace Collar and Possibly
Cylinder if Worn, Replace O-ring
Rebuild or replace the shut-off valve
Note: ALWAYS WEAR STURDY RUBBER GLOVES, PROTECTIVE EYE WEAR AND
PROTECTIVE CLOTHING WHEN USING THE SPRAYER and work in a ventilated
area or outdoors. Prior to any repair, clean the sprayer tank with water by
fi
lling it
and spraying the water in an appropriate area outdoors or in a container. Make sure
all of the pressure is released by locking open the shut-off valve. When you complete
the repair
fi
ll the sprayer tank with water and pressurize it to check for leaks. DO
NOT USE THE SPRAYER IF IT LEAKS. Repair the leak and check the sprayer again.
6E


