Page 9
Drop Size Adjustment & Calibration
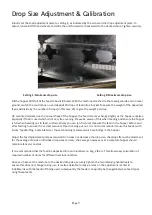
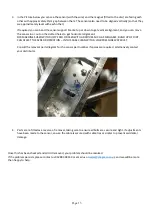
Initially set the Feed adjustment plate to setting 4, as indicated by the arrow on the drop adjustment plate. To
adjust, loosen BOTH hand wheels, and slide the unit forwards or backwards to the desired value. Tighten securely.
Setting 1: Minimum drop size
Setting 8: Maximum drop size
Fill the hopper 50% full of the feed to be distributed. With the machine attached to the towing vehicle and on level
ground, switch the control box on and deposit 20 drops of feed into a bucket. Measure the weight of the deposited
feed and divide by the number of drops (in this case 20) to give the weight per drop.
On mounted models, due to unusual shape of the hopper, the feed rate may change slightly as the hopper empties,
especially if feed is used which is not very free running. Please be aware of this when feeding and ensure the hopper
is full when heading out to feed, or alternatively you can (on first use) measure the feed in the hopper before and
after feeding to ensure the correct amount of feed is being put out. It is not recommended to use this feeder with
‘sticky’ feedstuff eg. home blends or those contain
ing molasses which can bridge in the hopper
Adjust the feed adjustment plate as required to increase or decrease the drop size, checking after each adjustment
for the average drop size. Individual drop sizes can vary, the average however over a complete hopper should
remain relatively constant.
It is recommended that the feed be deposited in round numbers, ie. 1kg, 2lb etc. This allows easy calculation of
required number of drops for different livestock numbers.
Once you have set the machine to the desired drop size, securely tighten the two retaining handwheels to
ensure this does not change during use. It is also advisable to make a mark on the adjustment marker in
indelible ink with the feedstuff being used, subsequently the feeder can quickly be changed between feed types
using these marks.

