
9
10
Page 12
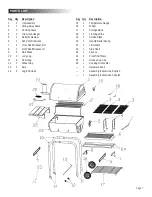
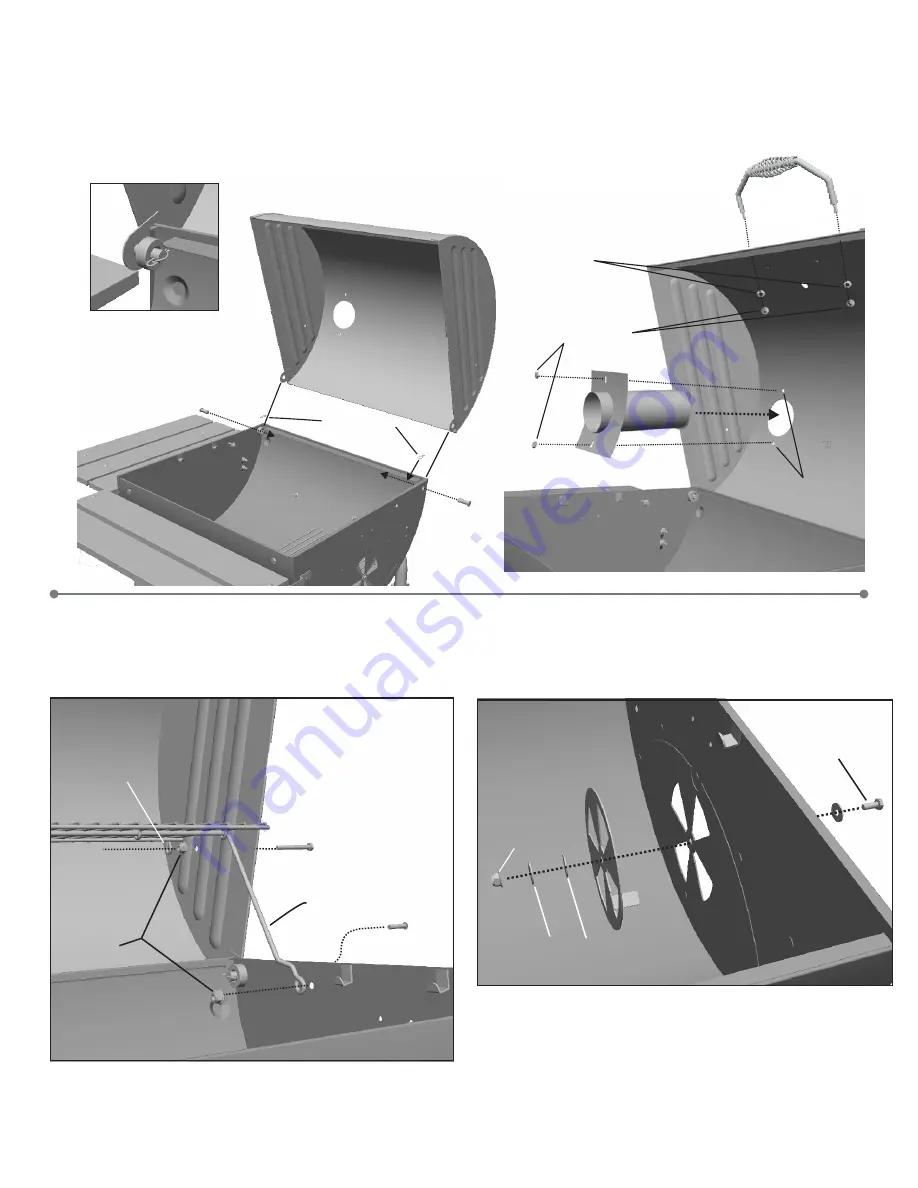
Hinge Pin
Hair Pin Clip
Hinge Pin
Handle with
Barrel Spring
1/4-20x1/2
Screws
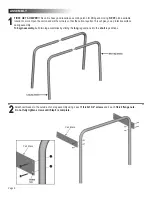
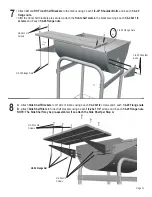
Install the
Swing-Away Grate
by inserting 2 each
1/4-20x2" screws
(one for each side of the lid) into
Grill Lid
and s
Place the wire loop in
Swing-Away
over the shaft of the bolt
,
as shown below.
Similarly secure the
Swing-Away leg
to the firebox using 2 each
1/4-20x3/4" screws
and 2 each
1/4-20 flange nuts.
ecure
with 2 each
1/4-20 flange nuts
.
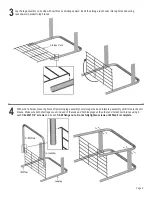
1/4-20
Flange Nut
Damper Wheel
Flat Washer
1/4-20
Flange Nut
1/4-20x 3/4 Screw
Flat
Washer
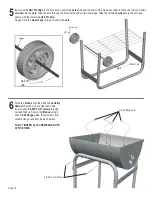
Attach the butterfly damper wheel to the firebox using 1 each
1/4-20x3/4"
screw, 2 each
flat washers
, 1
lock washer
and
one
1/4-20 flange nut
. DO NOT FULLY TIGHTEN THE
FLANGE NUT. This will allow for rotation of the damper wheel.
1/4-20x2"
Screw
1/4-20x3/4"
Screw
1/4-20 Flange Nuts
Hinge Properly Installed
Lock Washer
Swing-
Away Leg
Wire Loop
Lock Washer
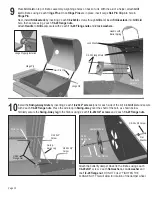
Place
Grill Lid
on top of firebox assembly. Align hinge holes on back of unit. With the aid of a helper, attach
Grill
Lid
to firebox using 2 each H
inge Pins
. Once
Hinge Pins
are in place, insert Large
Hair Pin Clip
into hole in
Hinge Pin
.
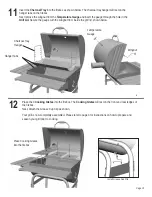
Next, install
Smokestack
by inserting 2 each
1/4-20x3/4
screws though
Grill Lid
, insert
Smokestack
into
Grill Lid
hole, then secure using 2 each
1/4-20 flange nuts.
Attach
Handle
to
Grill Lid,
secure with 2 each
1/4-20 Flange nuts
and
2 lock washers.


