
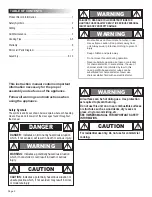
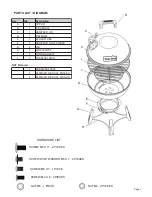


GRILL MAINTENANCE
Frequency of clean up is determined by how often the grill is used. Make sure coals are completely extinguished before
cleaning inside of the unit. Thoroughly rinse with water and allow to air dry before using again. Wipe out the interior of the
unit with a cloth or paper towels.
When finished cooking, and the unit has adequately cooled, clean out all remaining ashes. Ashes collect moisture, which
can lead to premature rusting and decay. Also, occasional touch up of the exterior paint will be required. Black, high-
temperature spray paint is recommended. NEVER PAINT THE INTERIOR OF THE UNIT.
Cooking Surface:
If a bristle brush is used to clean any of the grill cooking surfaces, ensure no loose bristles remain on
cooking surfaces prior to grilling. It is not recommended to clean cooking surfaces while grill is hot.
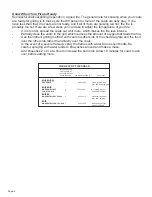
GRILLING
Charcoal is recommended, however, wood or a combination of both may be used as the fuel source for grilling with the fuel
source placed and ignited on the charcoal grate. Do not build too large of a fire. We recommend starting a fire with no more
than
10
briquettes and adding more as needed during cooking. After allowing the fire to burn down, place the cooking grate
on the unit. Failure to read and follow instructions for lighting charcoal may result in serious personal injury and/or property
damage.
Page 3
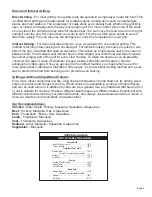
COOKING TIPS
Building Your Fire
1.)
Stack charcoal briquettes or wood into a pyramid-shaped pile on top of the charcoal grate.
We recommend using 10 briquettes to start your fire, adding more as needed.
2.)
If using lighter fluid, saturate the charcoal briquettes with lighter fluid and let it soak in for
approximately 5 minutes. If using a chimney starter, electric starter, or other type of fire
starter, light your fire according to the manufacturer's instructions.
3.)
After allowing the lighter fluid to properly soak in, light the pile of briquettes in several
locations to ensure an even burn.
Always light the fire with the grill lid open.
Leave lid open until briquettes are fully lit. Failure to do this could trap fumes from charcoal
lighter fluid in grill and may result in a flash fire when lid is opened.
4.)
Never add charcoal lighter fluid to hot or warm coals as flashbacks may occur causing
injury.
5.)
You are ready to begin cooking when the pile of briquettes ashes over and produces a red
glow (approximately 12 – 15 minutes).
6.)
Depending on your cooking method, either leave the briquettes in a pile or spread evenly
across the charcoal grate using a long-handled poker.
*Always use caution when handling hot coals to prevent injury.


