background image

HOW TO ORDER REPLACEMENT PARTS

To make sure you obtain the correct replacement 
part(s) for your gas grill, please refer to the parts list 
on page 36-37. The following information is required 
to assure getting the correct part.

•Gas grills model number (see data sticker on grill).

•Part number of replacement part needed.

•Description of replacement part needed.

•Quantity of parts needed.

To obtain replacement parts, contact the dealer from 
which products was purchased. If dealer service is 
not available, contact: Nexgrill Industries, Inc. 
customer service 

Tel:1-800-913-8999

Fax:1-800-598-1545

IMPORTANT

Use only factory authorized parts. The use of any part 
that is not factory authorized can be dangerous. This 
will also void your warranty.

Keep this assembly and operating instruction manual 
for convenient referral, and for replacement parts 
ordering.

CAUTION

Gas valves are present at the factory (valve assembly 
will be marked accordingly). If you wish to convert at 
some later date, be sure to contact your gas supplier or 
grill dealer before making the conversion.

Different orifices must be installed when converting 
from one type of gas to another. You will also need a 
data plate indicating what type of gas is used by the 
grill.

The doneness of meat, whether rare, medium, or well 
done, is affected to a large degree by the thickness of 
the cut. Expert chefs say it is impossible to have a 
rare doneness with a thin cut of meat.

The cooking time is affected by the kind of meat, the 
size and shape of the cut, the temperature of the 
meat when cooking begins, and the degree of 
doneness desired.

When defrosting meats it is recommended that it be 
done overnight in the refrigerator as opposed to a 
microwave. This in general yields a juicier cut of meat.

Use a spatula instead of tongs or a fork to

turn the meat, as a spatula will not puncture the meat 
and let the juices run out.

To get the juiciest meats, add seasoning or salt after the 
cooking is finished on each side and turn the meat only 
once (juices are lost when the meat is turned several 
times). Turn the meat just after the juices begin to 
bubble to the surface.

Trim any excess fat from the meat before cooking. To 
prevent steaks or chops from curling during cooking, slit 
the fat around the edges at 2-inch intervals.

DO NOT LEAVE THE GRILL UNATTENDED WHILE 
COOKING.

Ordering Parts

Grill Hints

37

Figure 83

CSA INTERNATIONAL

Project 2056658

38 of 45

Summary of Contents for 420-0077

Page 1: ...s important information necessary for the proper assembly and safe use of the appliance Read and follow all warnings and instructions before assembling and using the appliance Follow all warnings and instructions when using the appliance Keep this manual for future reference Figure 83 CSA INTERNATIONAL Project 2056658 1 of 45 ...

Page 2: ...h defects or other reproductive harm Your grill will be very hot Never lean over the cooking area while using your grill Do not touch cooking surfaces grill housing lid or any other grill parts while the grill is in operation or until the gas grill has cooled down after use Table of Contents Safety Instruction Safety Instruction Assembly Instruction Gas Hook Up Installer Final Check List Leak Test...

Page 3: ...pproved for outdoor use with a W A marking DANGER 1 Plug into a grounded 3 prong outlet do not remove grounding prong do not use an adapter and do not use an extension cord 2 It is recommended that a separate circuit serving only your refrigerator be provided Use receptacles that cannot be turned off by a switch or pull chain 3 Never clean refrigerator parts with flammable fluids These fumes can c...

Page 4: ... heated surfaces NOTE The normal flow of gas through the regulator and hose assembly can create a humming noise A low volume of noise is perfectly normal and will not interfere with operation of the grill If humming noise is loud and excessive you may need to purge air from the gas line or reset the regulator excess gas flow device This purging procedure should be done every time a new LP gas tank...

Page 5: ...ated area and out of reach of children Disconnected LP gas tanks must not be stored in a building garage or any other enclosed area The cylinder connection device compatible with the connection for outdoor cooking appliances The other cylinders can be acceptable for use with the appliance and they must be compatible with the appliance retention means and accompanied by illustration depicting the c...

Page 6: ...heat that can increase accident potential When using this appliance basic safety practices must be followed including the following Do not repair or replace any part of the grill unless specifically recommended in this manual All other service should be referred to a qualified technician This grill is not intended to be installed in or on recreational vehicles or boats Children should not be left ...

Page 7: ...ll bottom This can severely upset combustion air flow or trap excessive heat in the control area For proper lighting and performance of the burners keep the burner ports clean It is necessary to clean them periodically for optimum performance The burners will only operate in one position and must be mounted correctly for safe operation Clean the grill with caution To avoid steam burns do not use a...

Page 8: ... the packaging before using this unit Step 2 The screws used to attach the gas tank bottom bracket are already screwed into the bottom of back panel see the figure below Remove the screws align with the holes on the gas tank bottom bracket and then re screw into the holes on bottom back panel of the grill As shown below 8 Figure 83 CSA INTERNATIONAL Project 2056658 9 of 45 ...

Page 9: ... bottom bracket anticlockwise to loose Putting out the bracket sidelong make the bracket to support onto floor then tightening the tank bolt clockwise As shown below Step 4 Assemble the NG regulator hose clamp using attached 2 screws As shown below 9 Figure 83 CSA INTERNATIONAL Project 2056658 10 of 45 ...

Page 10: ...l using the 3 screws As shown below Step 5 Use screwdriver to remove attached 3 screws on the back access panel and take out the regulator As shown below Assembly Instruction continued 10 Figure 83 CSA INTERNATIONAL Project 2056658 11 of 45 ...

Page 11: ...or coupling clockwise as shown in figure below LP gas cylinder must be fitted with a listed overfill prevention device OPD Secure liquid propone gas cylinder into the gas tank retention clamp and use attached chain through the handle holes of tank As shown below 11 Figure 83 CSA INTERNATIONAL Project 2056658 12 of 45 ...

Page 12: ...inder must be provided with a shut off valve terminating in an L P gas supply cylinder valve outlet specified as applicable for connection type QCC1 in the standard for compressed gas cylinder valve outlet and inlet connection ANSI CGA V 1 Manifold pressure 11 27 94cm water column W C L P GAS HOOK UP Ensure that the black plastic grommets on the LP cylinder valve are in place and that the hose doe...

Page 13: ...artment for assistance To disconnect L P gas cylinder 1 Turn the burner valves off 2 Turn the tank valve off fully turn clockwise to stop 3 Detach the regulator assembly from the tank valve by turning the quick coupling nut counterclockwise 9 Specified clearance maintained 24 61cm from combustibles 9 All internal packaging removed 9 Knobs turn freely 9 Burners are tight and sitting properly on ori...

Page 14: ...e installation site due to possible mishandling in shipment or excessive pressure unknowingly being applied to the unit Periodically check the whole system for leaks following the procedures listed below If the smell of gas is detected at anytime you should immediately check the entire system for leaks BEFORE TESTING Make sure that all packing material is removed from the grill including tie down ...

Page 15: ...ps or plugs may result in leakage of propane The gas must be turned off at the supply cylinder when the unit is not in use If the appliance is stored indoors the cylinder must be disconnected and removed from the appliance Cylinders must be stored outdoors in a well ventilated area out of the reach of children Leak Testing continued 164 0 453 0 197 0 104 0 316 0 27 0 305 7 15 Figure 83 CSA INTERNA...

Page 16: ...s present Only the pressure regulator and hose assembly supplied with the unit should be used TO LIGHT THE MAIN BURNER Never substitute regulators and hose assembly for those supplied with the grill If a replacement is necessary contact the manufacturer for proper replacement The replacement must be that specified in the manual Screw the regulator type QCC1 onto the tank Leak check the hose and re...

Page 17: ...t the grill if odor of gas is present Call for service 1 800 913 8999 Grill Lighting Instruction continued Each burner is adjusted prior to shipment however variations in the local gas supply may take minor adjustments necessary Visually check the burner flames prior to each use The flames should look like this picture If they do not refer to the burner maintenance part of this manual FLAME CHARAC...

Page 18: ...procedure or light my match 5 Check for proper burner flame characteristics Each burner is adjusted prior to shipment however variations in the local gas supply may make minor adjustments necessary Burner flames should be blue and stable with no yellow tips excessive noise or lifting Yellow flames indicate insufficient air Noisy flames or flames that lift away from the burner indicate too much air...

Page 19: ...ted gas to dissipate 3 Insert a match into the lighting rod Ignite the match and insert through the cooking grid to the burner 4 Press the control knob and rotate it to the Ignite HI setting The burner should light immediately 5 If the burner does not light within seconds turn the knob to the OFF position Wait for 5 minutes and try again As shown below 19 Figure 83 CSA INTERNATIONAL Project 205665...

Page 20: ...duct after it is converted however we will not honor any warranty claims for parts damaged during the conversion of the original LP valves and orifices to NG configuration if the conversion is done improperly WARNING for grill using natural gas NG 1 The outdoor cooking gas appliance and its individual shutoff valve must be disconnected from the gas supply piping system during any pressure testing ...

Page 21: ...r orifice Screwdriver is used for removing the screws Gas Conversion From LP to NG continued NG Conversion Kit NG regulator NG hose w quick connector NG brass connector NG regulator hose NG regulator clamp Not provided NG Conversion Kit sold separately NG Orifices Pack Provided in NG Orifices Pack Main Burner Orifice including in package 21 Figure 83 CSA INTERNATIONAL Project 2056658 22 of 45 ...

Page 22: ...bly b If you are replacing an existing natural gas grill the supply hose that supplied natural gas to the old grill will work with your new grill c Replace the LP gas regulator and hose assembly with a natural gas supply hose and regulator not supplied with the grill Follow installation instructions as supplied by the manufacturer The regulator might not be necessary You should contact the local n...

Page 23: ...n the control knob b Remove all control knobs with 5 32 Allen wrench provided c Adjust gas valve through access hole at knob bezel by inserting a flat head screw driver Turn the screw driver clockwise to tighten until it stops Not it may already be fully turned so it will not turn further Then turn it counterclockwise to loosen for one full revolution 360 deg per revolution d Adjust gas valves on ...

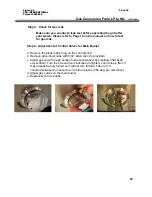
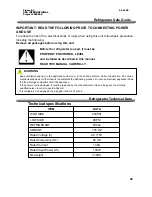
Page 24: ...igerator Safe Guide To reduce the risk of fire electrical shock or injury when using this unit follow basic precaution including the following Remove all packages before using this unit IMPORTANT READ THE FOLLOWING PRIOR TO CONNECTING POWER AND USE WARNING 37LBS Net weight 100W Rated Input Power W 1 38A Rated Current 60 HZ Rated Frequency Hz AC 115V Rated Voltage V 1 76 OZ AMOUNT R134a REFRIGERANT...

Page 25: ...uching with it would deactivate the insulation or cause leakage for electricity Extension cord is not recommended to use WARNING If the power cord is damaged it must be replaced by the manufacturer or its service agent or a similarly qualified person in order to avoid a hazard The appliance must be positioned so that the plug is accessible Protection from Moisture To minimize the possibility of ge...

Page 26: ...its target temperature 3 Cautions Keep opening the door may form layers of frost in the refrigerator It may affect the functions if the frost is getting thick While it is more than 2mm thick the refrigerator need to be defrosted Defrosting is operated manually Before defrosting set the knob of the temperature regulator to position 0 where the compressor will stop working and leave the door open un...

Page 27: ...hould always be cleaned If the plastic parts in refrigerator remain contaminated for a long time by oil animal or vegetable they will be easy aged and possibly cracked The drain pan gets dirty very easily if it is not cleaned regularly To prevent bad odor occur clean the pan regularly 5 Troubleshooting When the refrigerator does not work a Check if there is a power failure b Check if the power plu...

Page 28: ...e the grill MAIN GRILL BURNER CLEANING Ensure the gas supply is off and the knobs are in the OFF position Make sure the grill is cool Clean the exterior of the burner with a wire brush Clear stubborn scale with a metal scraper Clear any clogged ports with a straightened paper clip Never use a wooden toothpick as it may break off and clog the port Please note if insects or other obstructions are bl...

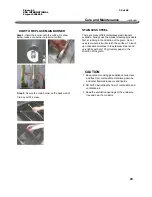
Page 29: ...eep outdoor cooking gas appliance area clear and free from combustible materials gasoline and other flammable vapors and liquids 2 DO NOT obstructing the flow of combustion and ventilation air 3 Keep the ventilation openings of the enclosure free and clear from debris HOW TO REPLACE MAIN BURNER Step 1 Insert the burner onto the orifice As show below make sure burner hole aim at orifice Step 2 Secu...

Page 30: ... 2 tablespoons of baking soda to a quart of water Wash the shelf and tray with a mild detergent solution The outside of the unit should be cleaned with mild detergent and warm water Wring excess water out of the sponge or cloth before cleaning the area of the controls or any electrical parts Wash the outside cabinet with warm water and mild liquid detergent Rinse well and wipe dry with a clean sof...

Page 31: ...bstruction which could result in a fire in and around burner tubes This type of fire is known as FLASH BACK and can cause serious damage to your grill and create an unsafe operating condition for the user Although an obstructed burner tube is not the only cause of FLASH BACK it is the most common cause To reduce the chance of FLASH BACK you must clean the burner tubes before assembling your grill ...

Page 32: ...rill by indirect heat from the burner on the other side Heat from the lighted burner circulates gently throughout the grill cooking the meat or poultry without any direct flame touching it This method greatly reduces flare ups when cooking extra fatty cuts because there is no direct flame to light the fats and juices that drip down during cooking CAUTION If burners go out during operation close ga...

Page 33: ...l valves Wait ten minutes and re start Check your flames for proper performance If the flames are not correct replace regulator Regulator makes noise Make sure you have a spark while you are trying to light the burner Make sure that the wire is connected to the electrode assembly Clean wire s and or electrode with rubbing alcohol and a clean swab Wipe with a clean cloth Check to see if the other b...

Page 34: ...at OFF position Unit does not operate Check to see if the fuel hose is bent or kinked Make sure the grill area is clear of dust Make sure the burner and orifices are clean Check for spiders and insects The regulator has a safety device that restricts the flow of gas in the event of a leak This safety device can be triggered with out a gas leak To reset the safety device turn off all burners and cl...

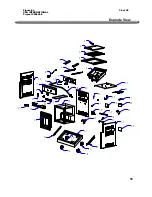
Page 35: ...Explode View 36 43 44 42 40 41 1 2 3 4 8 10 11 12 13 14 15 16 18 19 20 22 9 7 28 35 39 6 23 24 25 26 27 17 38 21 5 37 33 32 34 29 31 30 45 46 39 35 Figure 83 CSA INTERNATIONAL Project 2056658 36 of 45 ...

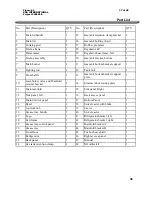
Page 36: ...fold retainer bracket 2 34 Strainer tube securing plate 1 11 Main manifold 1 35 Side panel Right 1 12 Side panel Left 1 36 Back access panel 1 13 Main Control panel 1 37 BottomPanel 1 14 Bezel 2 38 Swivel caster with brake 1 15 control knob 2 39 Caster 2 16 Grease tray handle 1 40 Swivel caster 1 17 Logo 1 41 Refrigerator bracket left 1 18 Cart frame 1 42 Refrigerator bracket right 1 19 Grease tra...

Page 37: ...en converting from one type of gas to another You will also need a data plate indicating what type of gas is used by the grill The doneness of meat whether rare medium or well done is affected to a large degree by the thickness of the cut Expert chefs say it is impossible to have a rare doneness with a thin cut of meat The cooking time is affected by the kind of meat the size and shape of the cut ...

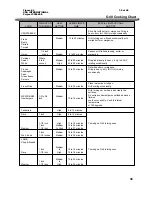
Page 38: ...um 1 2 to 3 4 inch MEATS BEEF Hamburgers Place in aluminum foil pan Grill stirring occasionally 15 to 30 minutes Medium French fries Dot with butter or margarine Wrap in heavy duty foil Grill turning occasionally 15 to 30 minutes Medium Frozen Asparagus Peas Green beans Sprouts Wrap individually in heavy duty foil Grill rotating occasionally 40 to 60 minutes 45 to 60 minutes Medium High Whole 6 to...

Page 39: ... brushing frequently with melted butter margarine oil or marinade Up to 1 hour Low or Medium 2 to 3 pounds POULTRY Slit skin Grill turning once 5 to 10 minutes Low Hot dogs Trim edges Grill turning once 4 to 8 minutes High 1 inch slices Ham steaks precooked Grill turning occasionally During last few minutes brush with barbecue sauce Turn several times 30 to 40 minutes Medium Ribs 30 to 40 minutes ...

Page 40: ...ained half hour before cooking turn the burner to the grill on full Drain seafood reserving marinade On each of twelve 10 skewers thread 2 shrimps and 2 scallops alternating with pineapple chunks Place skewers on grill Cook 7 10 minutes often basting and turning PORK CHOPS 4 Pork chops Marinade 1 large onion 2 tbs lemon juice or vinegar 2 tbs oil tsp powdered mustard 2 tsp Worcestershire sauce tsp...

Page 41: ...l buttered1 1 2 quart rectangular baking dish Cover dish with aluminum foil Bake covered 25 minutes on medium with the lid of your BBQ grill closed Remove foil and continue baking 15 minutes longer or until potatoes are tender Let stand 5 minutes before serving VEGETABLE KABOBS 3 medium sized zucchini 12 cherry tomatoes 12 fresh mushrooms Grated Parmesan cheese FAJITAS 1 1 2 lb flank steak or bone...

Page 42: ...high Use the above basting sauce for rotissing CHICKEN TANDOORI STYLE 8 large chicken thighs or drumsticks 1 c plain nonfat yogurt c lemon juice 2 tsp salt tsp cayenne tsp black pepper tsp crushed garlic tsp grated ginger 1 tbs corn oil Combine all the ingredients in a large mixing bowl and marinate the chicken for 8 hours in the refrigerator Drain the chicken and spread on the spit running the ro...

Page 43: ...g as the purchaser is within the warranty period from the original date of purchase The original consumer purchaser will be responsible for all shipping charges of parts replaced under the terms of this limited warranty This limited warranty is applicable in the United States only is only available to the original owner of the product and is not transferable Manufacturer requires reasonable proof ...

Page 44: ...er acts of nature animal tampering improper installation or installation not in accordance with local codes or printed manufacturer instructions THlS LIMITED WARRANTY IS THE SOLE EXPRESS WARRANTY GIVEN BY THE MANUFACTURER NO PRODUCT PERFORMANCE SPECIFICATION OR DESCRIPTION WHEREVER APPEARING IS WARRANTED BY MANUFACTURER EXCEPT TO THE EXTENT SET FORTH IN THlS LIMITED WARRANTY ANY IMPLIED WARRANTY P...

Reviews: