- 5 -
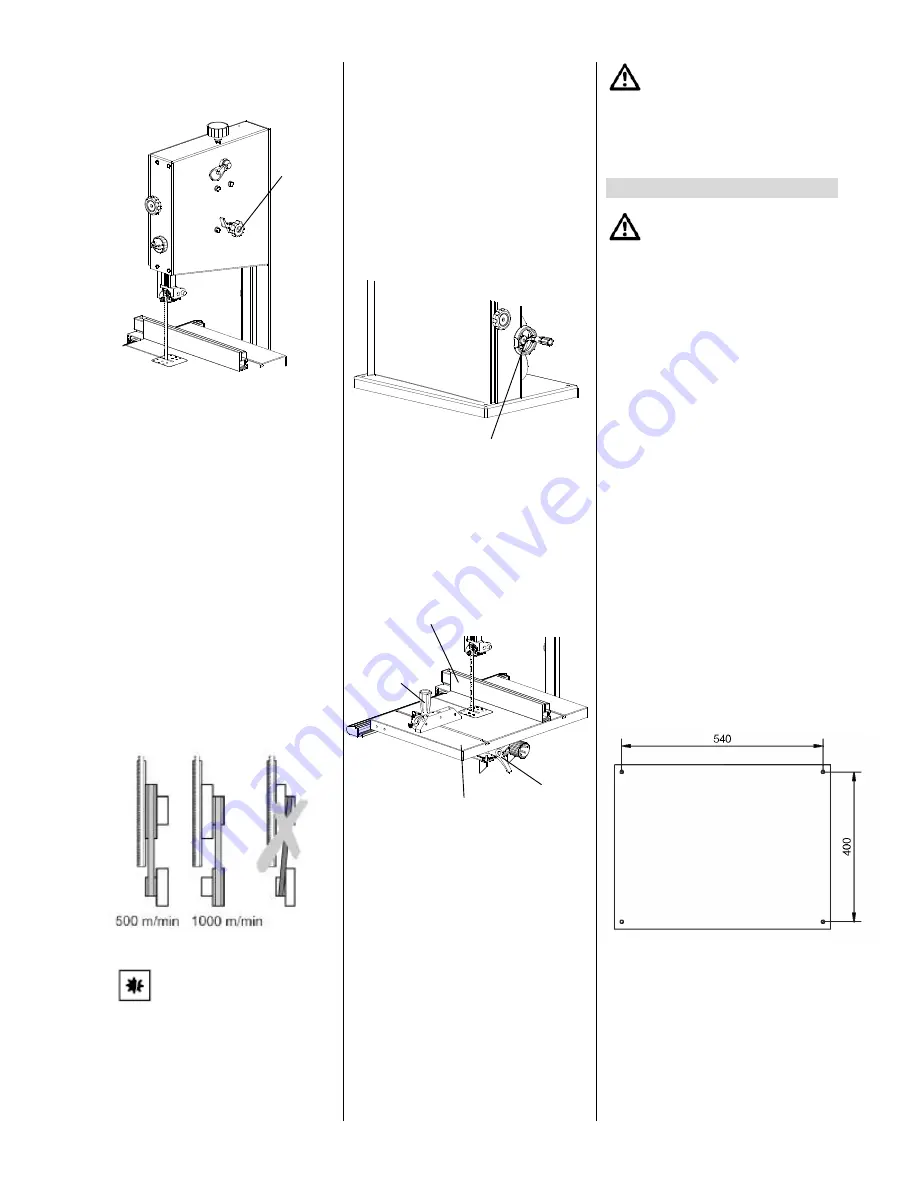
With the setting knob
(33)
the tilt of the
upper band saw wheel can be adjusted, if
necessary. This tracking adjustment is
required to have the blade run dead
center on the rubber tyres of the band
saw wheels:
-
Turning clockwise = blade moves to
the rear.
-
Turning counter-clockwise = blade
moves to the front.
Speed adjustment
By shifting the drive belt the band saw
can be operated at two speeds (see
"Technical Specifications"):
.
500 m/min for hard wood, plastics
.
1000 m/min for all kinds of wood.
Caution!
The drive belt must not run
in a diagonal position; this will damage
the belt
Setting knob for drive belt tension
With the setting knob
(34)
the drive belt
tension is corrected, if necessary
l
turning
the
setting
knob
clockwise reduces the blade
tension
l
turning
the
setting
knob
counterclockwise increases the
blade tension.
Saw table tilt
After loosening the lock screw
(35)
the
saw table
(36)
tilts steplessly through 45
°
against the blade
Rip fence
The rip fence
(37)
clamps to the front of
the bandsaw table; The rip fence can be
used on both sides of the blade.
Mitre fence
The mitre fence
is inserted into the table
slot from the table
’
s front edge. For mitre
cuts the mitre fence turns to60
°
in both
directions For 45
°
and 90
°
miters positive
stops are provided. To set a mitre angle:
loosen lock handle
(38)
by turning it
counter-clockwise.
Risk of injury!
When cutting with the mitre
fence the lock handle must be firmly
tightened.
6. Initial Operation
Danger!
Start the saw only after the
following
preparations
are
completed:
-
the saw is securely mounted ;
-
the saw table is installed and
aligned;
-
the V-belt tension checked;
-
safety devices have been checked.
Connect the saw to the mains supply
only after all of the above preparations
are completed! Otherwise there is a
risk of an unintentional starting of the
saw, which can cause severe personal
injury.
6.1 Mounting
For a firm stand the saw must be
mounted on a stable supporting surface:
1. Drill 4 holes in the supporting
surface.
2. Put fixing bolts through the base
plate and secure with nuts.
Optimal working height and stability is
provided by the steel stand, which is
already prepared for mounting the saw.
Information regarding the assembly of the
stand is given in the addendum to these
operating instructions.
33
34
35
36
37
38


