background image

– 3 –

2.0  KEYPAD, MENU, DISPLAY & CONNECTORS

The Keypad

2.1   ON/OFF/ENTER Key  


The ON/OFF/ENTER key powers the unit ON or OFF. Since the same key is   


also used as an ENTER key, the gauge is powered off by pressing and holding 
down the key until the unit powers off.

Once the gauge is initially powered on, this key will function as the ENTER key, similar 
to a computer keyboard. This key will be used to select or set a menu option.

NOTE: 

Unit will automatically power off when idle for 5 minutes. All current settings 

are automatically saved prior to powering off.

2.2   PRB 0 Key   

The PRB 0 key is used to “zero” the TI-25MX in much the same way that a 
mechanical micrometer is zeroed. If the gauge is not zeroed correctly, all of the 
measurements that the gauge makes may be in error by some fixed value. Refer  


      to section 5.1 for a further explanation of this important feature.

2.3   CAL Key   

The CAL key is used to enter and exit the TI-25MX’s calibration mode. This 
mode is used to adjust the sound velocity value that the TI-25MX will use when 
calculating thickness. The tool will either calculate the sound-velocity from a 

sample of the material being measured, or allow a known velocity value to be entered 
directly. This provides increased linearity between transducers. Refer to section 5.2 for 
an explanation on the various calibration options.

Summary of Contents for TI-25MX

Page 1: ...MODEL TI 25MX ULTRASONIC THICKNESS GAUGE Operating Manual ...

Page 2: ...versus thickness relationship 3 2 Suitability of materials 3 3 Range of measurement and accuracy 3 4 Couplant 3 5 Temperature 3 6 Measurement modes 4 0 Selecting the measurement mode 12 4 1 Which Mode and Transducer do I use for my applications 5 0 Making measurements 14 5 1 Probe Zero 5 2 Material Calibration 6 0 Additional features 20 6 1 GAIN 6 2 Hight speed Scan 6 3 Unit 6 4 Lite 6 5 Zero 6 6 ...

Page 3: ...y one side of the material being measured 1 1 Disclaimer Inherent in ultrasonic thickness measurement is the possibility that the instrument will use the second rather than the first echo from the back surface of the material being measured This may result in a thickness reading that is TWICE what it should be Responsibility for proper use of the instrument and recognition of this phenomenon rest ...

Page 4: ...y The PRB 0 key is used to zero the TI 25MX in much the same way that a mechanical micrometer is zeroed If the gauge is not zeroed correctly all of the measurements that the gauge makes may be in error by some fixed value Refer to section 5 1 for a further explanation of this important feature 2 3 CAL Key The CAL key is used to enter and exit the TI 25MX s calibration mode This mode is used to adj...

Page 5: ...e area scanned Refer tsection 6 2 for an explanation on the scan feature 2 6 Increment Decrement Key s The Keys are used to increment decrement values navigate menus and select menu options 2 7 MATL Key The MATL Key is used to select a common basic material type from a short list of 9 materials and 2 programmable custom materials for calibration Refer to section 4 1 for an explanation on selecting...

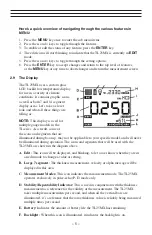
Page 6: ... a result some of the icons and segments that are illuminated during boot up may not be applicable to your specific model and will never be illuminated during operation The icons and segments that will be used with the TI 25MX are shown in the diagram above A Edit This icon will be displayed and blinking to let a user know when they are in an edit mode to change a value or setting B Large 7 segmen...

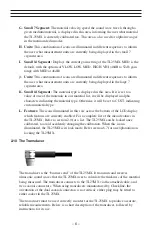
Page 7: ...ters indicating the material type Otherwise it will be set to CUST indicating custom material type L Features The icons illuminated in this row across the bottom of the LCD display which features are currently enabled For a complete list of the menu features in the TI 25MX Refer to section 2 0 for a list The TI 25MX can be locked once calibrated to avoid accidently changing the calibration When th...

Page 8: ...d commonly called couplant This fluid serves to couple or transfer the ultrasonic sound waves from the transducer into the material and back again Before attempting to make a measurement a small amount of couplant should be applied to the surface of the material being measured Typically a single droplet of couplant is sufficient After applying couplant press the transducer wear face down firmly ag...

Page 9: ...nd cap The transducer connectors are of type Lemo 00 NOTE There is no polarity associated with connecting the transducer to the TI 25MX it can be plugged into the gauge in either direction Probe Zero Disk Battery Cover Refer to Diagram The Battery cover is the large round disk shown in the diagram NOTE This same disk is also used as a probe zero reference disk Simply remove the cover when replacin...

Page 10: ...easurement is practical in a wide variety of materials including metals plastics and glass Materials that are difficult include some cast materials concrete wood fiberglass and some rubber 3 3 Range of measurement and accuracy The overall measurement capabilities based on the wide variety of materials is determined by the consistency of the material being measured The range of thickness that can b...

Page 11: ...ese errors 3 6 Measurement Modes This section will cover the different measurements modes of the TI 25MX the transducers required and the reasons for using specific modes Pulse Echo P E Mode Pulse echo mode measures from the initial pulse sometimes referred to as an artificial zero to the first echo reflection In this mode either an automatic or manual zero can be performed depending on the zero p...

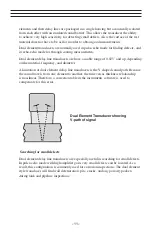
Page 12: ... the material frequency and diameter A limitation of dual element delay line transducers is the V shaped sound path Because the sound travels from one element to another the time versus thickness relationship is non linear Therefore a correction table in the instruments software is used to compensate for this error Searching for small defects Dual element delay line transducers are especially usef...

Page 13: ...for better resolution Measuring Material Coatings The pulse echo coating mode should be used when both material and coating thickness are required while still requiring the ability to detect flaws and pits A special coating style transducer is required for use in this mode There are a variety of coating transducers in various frequencies available from Electromatic Thru Paint Coatings Often times ...

Page 14: ...caused by temperature variations in the transducer Noisy Material Materials such as titanium stainless steel and aluminum may have inherent surface noise issues or mirroring effect Higher frequency transducers 7 10MHz offer improved resolution to avoid erroneous measurements Restricted access Measuring materials with extreme curvatures or restricted access are best suited for higher frequencies an...

Page 15: ...ocity To determine the velocity of a single sample refer to the Material Calibration section in section 5 2 When measuring curved materials it s more accurate to calibrate from two test points one at the minimum limit of the target thickness and one at the maximum limit In this case the reference disk mounted to the TI 25MX is not used This is called two point calibration and is described section ...

Page 16: ... are fully illuminated and stable and last digit of the measurement is toggling only 001 01mm 3 Press the key to perform the manual zero PRB0 will briefly be displayed on the screen indicating the zero calculation is being performed 5 2 Material Calibration In order for the TI 25MX to make accurate measurements it must be set to the correct sound velocity of the material being measured Different t...

Page 17: ...option is most suited for linearity over large ranges When using the one point option the calibration should be perform on the thickest side of the measurement range for the best linearity for that range For example if the measurement range is 100 2 54mm to 1 0 25 4mm the user should calibrate on a known thickness sample close to 1 0 25 4mm Note It s always handy to carry a set of mechanical calip...

Page 18: ...tion calculates both the probe zero and velocity value If the two point option is used a probe zero is not required For example if the measurement range was 080 2 03mm to 250 6 35mm two known samples or locations on the test material would be needed for the minimum and maximum boundaries of the test range Using the range above a one point calibration would be performed at 250 6 35mm and a two poin...

Page 19: ...ernal zero of the TI 25MX is now set The procedure above can be used to set the internal zero of the TI 25MX to use any reference standard as the probe zero standard if desired 6 Repeat steps 2 4 on the second test point location 7 Press the key to display the calculated velocity edit screen NOTE The calculated velocity can be edited if needed by pressing the keys to scroll and edit the velocity v...

Page 20: ...nd return to the measurement screen NOTE Pressing the key prior to pressing the key will abort to the measurement screen without saving any changes 4 If USR1 or USR2 were selected the velocity edit screen will be displayed and edit icon illuminated and flashing 5 Use the and keys to scroll to the desired material velocity NOTE The longer these keys are held the faster the velocity value is increme...

Page 21: ...cast materials How do I know when to lower the gain If the reading becomes sporadic and won t settle down or resolve on a thickness value because the material is either very noisy or granular Setting the gain to a lower less sensitive level would potentially offer improved stability How do I know when to increase the gain When a material is difficult to penetrate or pass sound through This could b...

Page 22: ... procedure to select the units is outlined as below 1 Press the key to access the menu items features 2 Use the and keys to scroll through the items features until the UNIT feature is being displayed 3 Press the key to edit the units setting The edit icon will be illuminated and flashing 4 Use the and keys to toggle English or Metric units NOTE Pressing the key prior to pressing the key will abort...

Page 23: ...Use the and keys to scroll through the BRT LO MED HI options 7 When the desired BRT setting is displayed press the key to set the brightness and return to the measurement screen Note Pressing the key prior to pressing the key will abort to the measurement screen without saving changes 6 5 Zero AutoManual There are two transducer zeroing options available in the TI 25MX auto and manual The AUTO zer...

Page 24: ...nearity when using a specific probe diameter The default standard setting is 250 and works reasonably well using a general correction curve for all of our dual element transducers in our range However selecting the exact diameter of the transducer being used will offer additional linearity accuracy The three options found in our range of transducers are 187 250 500 inches All of our transducer dia...

Page 25: ... these must remain unlocked for measurement functionality The procedure to enable disable the lock feature is outlined below 1 With the TI 25MX powered off press and hold down the key while powering the TI 25MX on The lock icon will be illuminated on the display 2 To unlock the TI 25MX repeat step one but hold down the key while powering the TI 25MX on 6 8 Factory Defaults The TI 25MX can be reset...

Page 26: ...0 0850 2159 Magnesium 0 2300 5842 Mercury 0 0570 1448 Molybdenum 0 2460 6248 Monel 0 2110 5359 Nickel 0 2220 5639 Nylon 0 1060 approx 2692 Platinum 0 1560 3962 Plexiglas 0 1060 2692 Polystyrene 0 0920 2337 PVC 0 0940 2388 Quartz glass 0 2260 5740 Rubber vulcanized 0 0910 2311 Silver 0 1420 3607 Steel 1020 0 2320 5893 Steel 4340 0 2330 5918 Teflon 0 0540 1372 Tim 0 1310 3327 Titanium 0 2400 6096 Tu...

Page 27: ...ound velocity of the material being measured starts to have a noticeable effect upon ultrasonic measurement At such elevated temperatures it is recommended that the user perform calibration on a sample piece of known thickness which is at or near the temperature of the material to be measured This will allow the TI 25MX to correctly calculate the velocity of sound through the hot material Expansio...

Page 28: ...easuring laminates is that many included air gaps or pockets which will cause an early reflection of the ultrasound beam This effect will be noticed as a sudden decrease in thickness in an otherwise regular surface While this may impede accurate measurement of total material thickness it does provide the user with positive indication of air gaps in the laminate Measuring through paint coatings Mea...

Page 29: ...E RESULTING FROM THE USE OF SUPPLIED EQUIPMENT WHETHER SUCH DAMAGE OCCURS OR IS DISCOVERED BEFORE UPON OR AFTER REPLACEMENT OR REPAIR AND WHETHER OR NOT SUCH DAMAGE IS CAUSED BY MANUFACTURER S OR SUPPLIER S NEGLIGENCE WITHIN ONE YEAR FROM INVOICE DATE Some State jurisdictions or States do not allow the exclusion or limitation of incidental or consequential damages so the above limitation may not a...

Page 30: ......

Reviews: