- 3 -
2.
安裝與調整
2. Installation and Adjustment
2
.
1
. M121
安裝
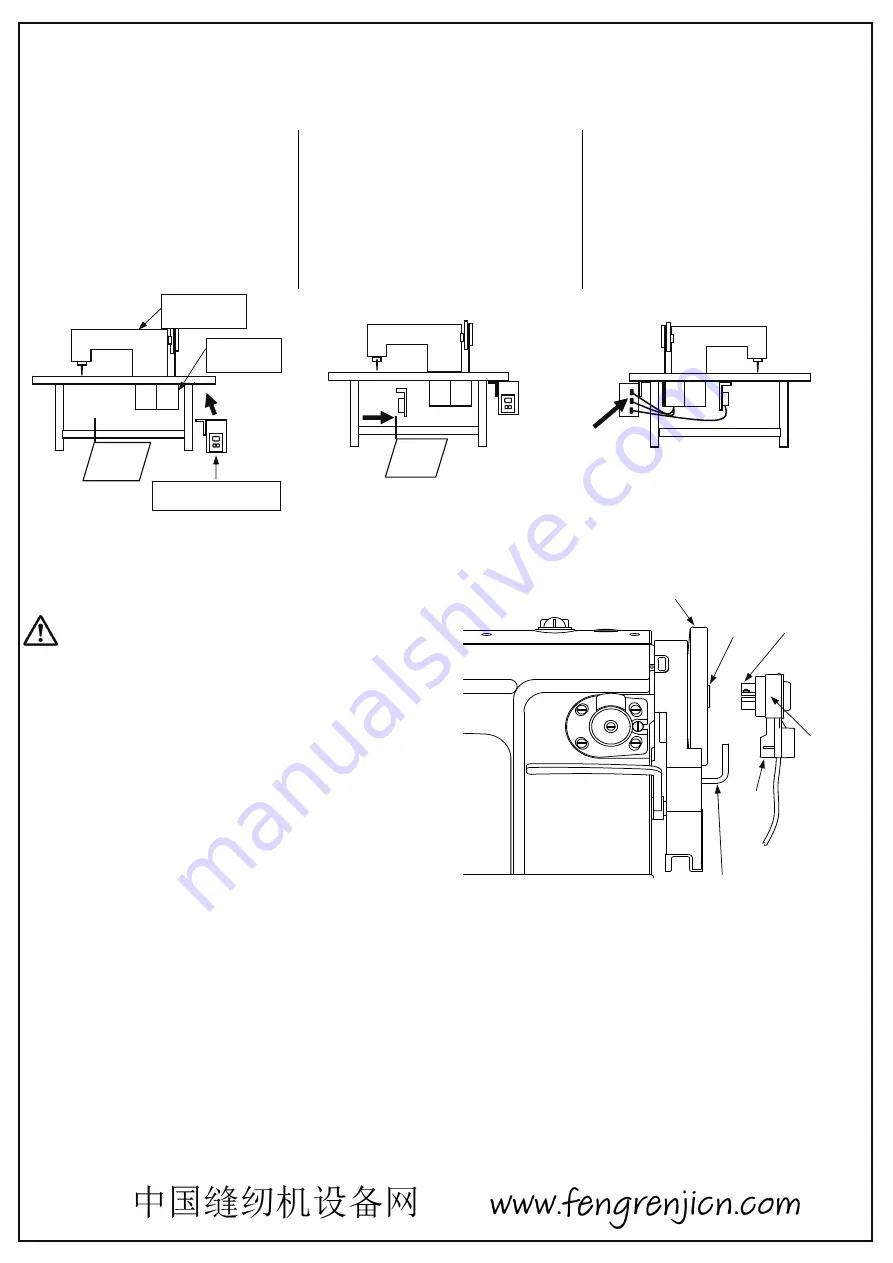
2.1. M121 Installation
a)
.
M121
控制箱請安裝於機桌下。
a). Install the M121 controller under
the table.
b)
.踏板開關請安裝於台板下的踏板上方位置。
b) Install the pedal to the speed
controlunit of M121 controller.
c)
.踏板開關、馬達出力、馬達編碼器的電線請確實
連接至
M121
控制箱背面。
※詳細資料請參考
3
.插頭配置。
c). The cable of a pedal unit, a motor output,
and a motor encoder is surely
connected to
M121controller.
※
For details, refer to "3. Connector Diagram".
2
.
2
.
檢出器安裝與調整(外接位置檢出器)
2.2. Install and Adjust The Synchronizer(sensor)
注意:
栓固定螺絲時,腳要離開踏板,才可以進行作業。
Attention:
When tightening the fixing screws,
release the foot from the pedal.
a)位置檢出器的安裝方法:
檢出器的定位槽插入定位棒,在縫糿機皮帶輪的凸緣上安
裝檢出器。
然後,栓緊固定檢出器接頭上的
2
根螺絲。
a) Synchronizer Installation
:
Mounting the Synchronizer onto the flange of machine
pulley,and match the stopper with a stop groove of the
synchronizer.
With then tighten and secure 2 screws of the synchronizer.
b)調整檢出器:
在實際安裝縫糿機時一邊進行上位置停止一邊調整。
調整『針上』上位置
鬆開位置檢出器接頭的
2
個螺絲,
將接頭旋轉到適當的停止位置。
調整後再栓緊螺絲予以固定。
b) Synchronizer Adjustment
:
Adjust this position with the synchronizer installed onto
the sewing machine and while stopping at the UP
position.
Adjustment of UP Position
Loosen the two screws on the synchronizer joint, and set
thestop position by turning the synchronizer joint.
After adjustment, please fix it by tightening the screws.
縫糿機
sewing machine
馬達
motor
踏板
pedal
M121
控制箱
M121 controller
踏板
pedal
縫糿機皮帶輪
Sewing machine pulley
凸緣
Flange
接頭
Synchronizer
joint
位置檢出器
Synchronizer
定位槽
Stop
groove
定位棒
Stopper
(縫糿機反面圖)
(Backside of the sewing machine)
GOLDEN WHEEL


