4.0 CONFIGURATION MENU
Cheetah Xi Programming Manual
4-47
P/N: 06-651
Rev 1, 09/2013
4.6.4.1 HOW TO SET PANEL’S NETWORK ID AND SUPERVISION
The Network Panel ID (
Network Address
) screen allows you to set a unique panel ID that identifies the
respective Cheetah Xi panel on the network. A Cheetah Xi network can contain up to 128 panels. Each
panel connected to the same network must have a unique Panel ID.
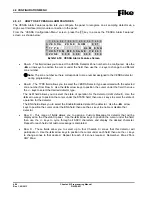
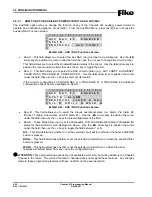
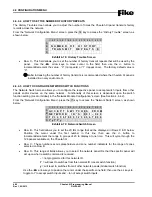
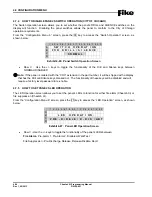
From the “Network Configuration Menu” screen, press the F1 key to access the “Network Panel ID” screen,
as shown below:
1 2 3 4 5 6 7 8 9 0 1 2 3 4 5 6 7 8 9 0
A
N E T W O R K
P A N E L
I D : 0 0 1
B
A L L N E T
I D’ S : 0 0 1 - 0 2 0
C
1 2 3 4 5 6 7 8 9 0 1 2 3 4 5 6 7 8 9 0
D
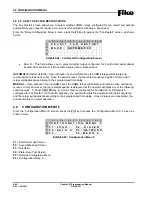
Exhibit 4-74: Network Panel ID Screen
•
Row A - This field allows you to set a unique network ID (Address) for the respective panel. Use the
◄►
arrow keys to move cursor to the field; then use the +/- keys to change network ID.
•
Row B - This field allows you to select the 20 IDs range displayed in Rows C & D. To change the ID
range, use the
◄►
arrow keys to position the cursor under the range field; then use the +/- button
to increment/decrement the range in groups of 20 forward or backwards (ID’s 001 – 128)
•
Row C - These numbers act as placeholders and zone number indicators for the range of zones
selected on Row B.
•
Row D - These fields allow you to select the Network panel ID’s to be supervised by this panel. The
fields show the panel IDs on the network in groups of 20. Move the cursor with the
◄►
arrow keys
to position under desired ID number shown on Row C; then use the +/- keys to toggle a
Y
under
each network panel ID that you want this panel to supervise.
Y
= Supervise this panel ID
Blank
= No supervision of that network ID
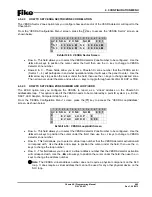
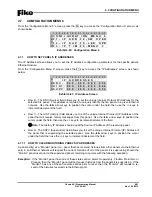
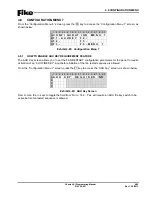
To set the custom message for network panels, press the F1 key:
1 2 3 4 5 6 7 8 9 0 1 2 3 4 5 6 7 8 9 0
A
C U S T O M
M E S S A G E
B
F O R
P A N E L :
0 0 1
C
D
C U S T O M
M S G
P A N E L
0 0 1
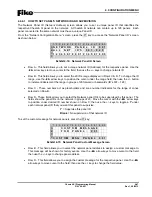
Exhibit 4-75: Network Panel Custom Message Screen
•
Row B - This field allows you to select the network panel address to assign a custom message to.
This message will be shown for history events. Use the
◄►
arrow keys to move cursor to the field;
then use the +/- keys to change panel address.
•
Row D - This field allows you to assign the custom message for the respective panel. Use the
◄►
arrow keys to move cursor to the field; then use the +/- keys to change the field value.
Summary of Contents for 10-068
Page 111: ......


