5
6
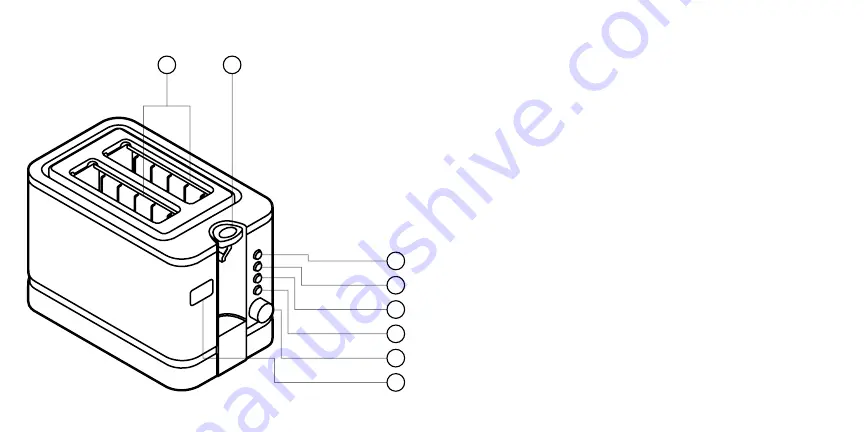
FEATURES
1.
Toasting Slots
2.
Lever
3.
Cancel Button
4.
Reheat Button
5.
Defrost Button
6.
Bagel Button
7.
Shade-Setting
Knob (7 settings)
8.
LED Display
9.
Crumb Tray
(not shown)
10.
Power Cord
(not shown)
1
2
3
4
5
6
7
BEFORE FIRST USE
1.
Remove all packing materials and stickers from inside and outside
of the toaster.
2.
Gently wipe down the exterior with a damp cloth or paper towel.
WARNING:
Never immerse the toaster or its plug in water or any
other liquid. It is NOT dishwasher-safe.
3.
Read all instructions and follow them carefully.
HOW TO USE
With your Digital Toaster, you can select the toasting mode and shade
setting just the way you like it, then watch as the timer counts down to
your perfect piece of toast.
1.
Ensure the crumb tray is pushed all the way in (see Cleaning and
Maintenance, p. 11). Plug in the Digital Toaster to put it in standby
mode.
2. Turn the shade-setting knob to the desired setting (see chart,
p. 8). The selected setting will appear on the LED display. The
higher the number, the darker and crisper the results.
3. Put your desired food into the toasting slots.
NOTE:
Use only
bread products and products designed for toasters, such as
toaster pastries.
4. For simple toasting, press the lever all the way down to start. The
timer will appear on the display and begin counting down.
OPERATING INSTRUCTIONS
8
Summary of Contents for RJ31-SS-V2-D
Page 9: ...13 14 NOTES NOTES...


