5.1 Preparation and Start-up
Before starting up the appliance, remove the protective wrapping.
Then carefully clean the working surface and the external parts with
lukewarm water and detergent, using a damp rag to remove all traces
of anti-rust material applied in the factory, then dry with a clean cloth.
5.1.1 Start-up
Before using the appliance for the first time, thoroughly clean out
the tank (see the chapter 6.3 “Cleaning and taking care of the
machine”).
Before starting up the appliance, check that its specifications (cate-
gory and type of gas used) match those of the family and group of
the gas available locally.
If not, it is necessary to adapt the appliance to the gas family or
group required (see paragraph 5.1.10 “Conversion and adaptation”).
To start up the appliance, see the instructions for regular use.
5.1.2 Check of power
The appliances must be used with the specific injectors for the nomi-
nal power.
The power may be:
• the nominal power indicated on the data plate of the appliance;
• the reduced capacity power.
These injectors are shown in table 1.
Nominal power is also obtained in respect of the supply pressure:
• from 15 to 22.5 mbar for gases of the second family (G20/methane)
• from 25 to 45 mbar for gases of the 3rd family
(G30/butane, G31/propane)
The appliance shall not be operated outside the above-mentioned
pressure ranges.
To adjust power with reduced capacity, use the data in table 1.
If you wish to further check the nominal power, you may do so by
using a gas meter according to the so-called "volumetric method".
A simple inspection is usually enough to check if injectors are func-
tioning correctly.
5.1.3 Checking the input pressure
Input pressure should be measured using a fluid measuring gauge
(e.g. a gooseneck pipe, min. resolution 0.1 mbar).
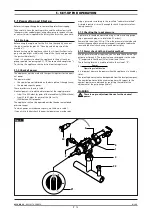
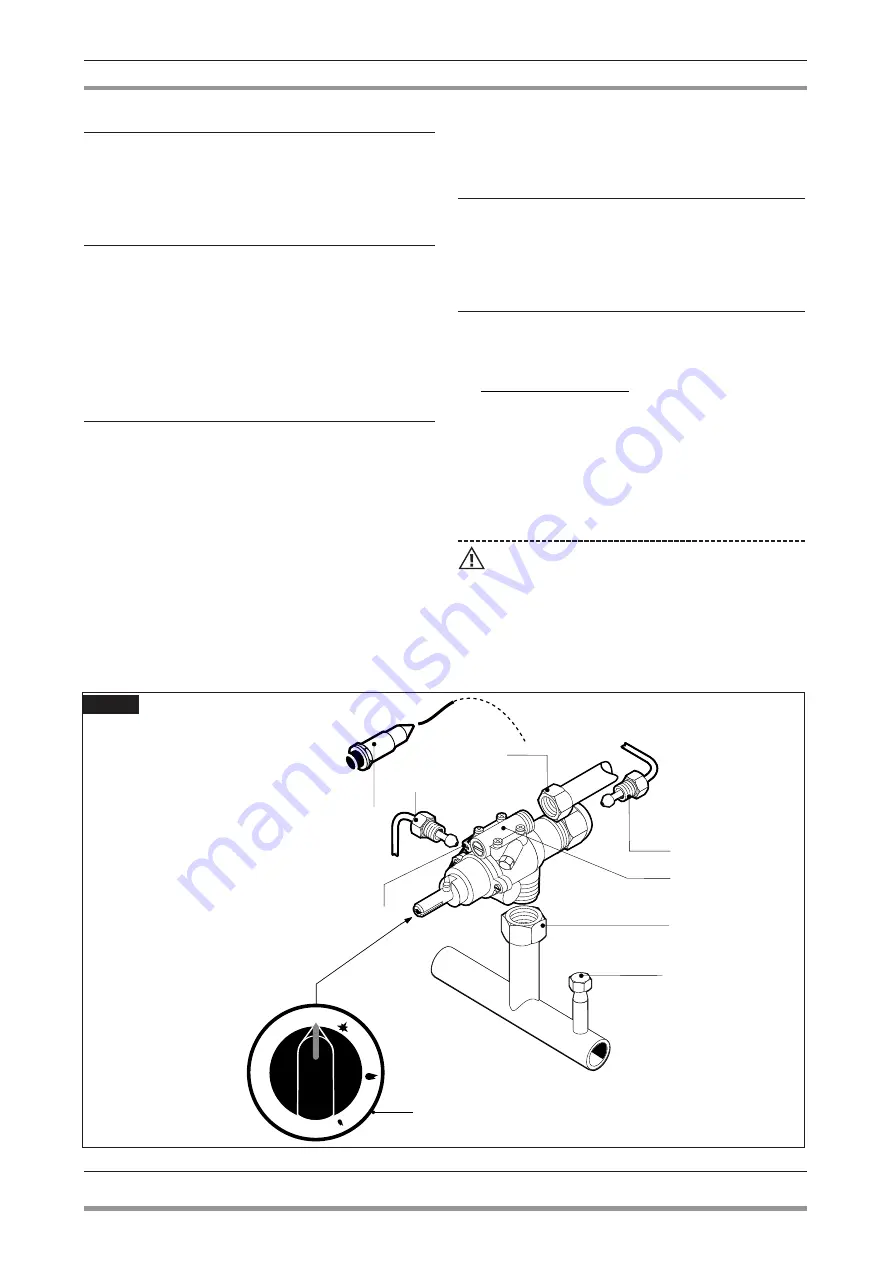
Remove lock screw (pos. 22 fig. 1) from the pressure intake tube and
connect the gauge hose: once measurement is complete, replace the
screw and do a seal check using a leak detector spray.
5.1.4 Power check with volumetric method
Using a gas meter and a stopwatch, you can read the volume of gas
output per time unit. The correct volume corresponds to the value
"E" expressed in litres/hour (l/h) or litre/minute (l/min).
The following formula is used to calculate the value of “E”:
It is important measure the power when the appliance is in standby
status.
The calorific power value can be requested from the local gas company.
The nominal power and the minimum power with respect to the
nominal pressure are obtained by consulting the table for the
adjustment of the gas passage (table 1).
WARNING
There is no pre-adjustment device for the nominal
power.
E
=
Power
Operating
calorific value
5 - SET-UP FOR OPERATION
0820_GB_99
- GAS PASTA COOKER
7
· 12
01/2016
4
22
6
1
5
3
2
21
24
0
Fig. 1


