5 Operation of the NucleoCounter
25
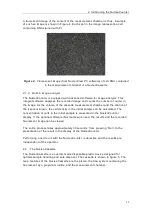
instrument and with the lid closed. The check determines the number of CCD -pixels
that show elevated signal levels. If the number of pixels is above a predefined limit
then the cassette insertion slit can be contaminated with an interfering particle, like
a dust particle. An error message is shown in the display and a cleaning of the
insertion slit is recommended (refer to chapter 7 Maintenance of NucleoCounter).
If a PC with NucleoView is connected to the instrument a contaminant is usually
observed as an object, which is stationary in all images.
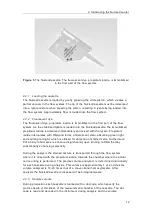
To initiate a Zero Count Check
type in “F50 +
”. Then the following text will appear
in the display:
0 count check
Continue
Esc Abort
Figure 20 Zero Count Check, step 1
Press “
” to continue. Now the instrument prompts you to remove any cassette from
the insertion slit:
Remove any
cassette
Continue
Esc Abort
Figure 21 Zero Count Check, step 2
Press “
” to continue. Now the instrument prompts you to close the lid in order to
avoid false light from entering the insertion slit during the Zero Count Check:
Close lid
Continue
Esc Abort
Figure 22 Zero Count Check, step 3
Press “
” to continue. Then a “Wait” message appears in the display:
wait...
Figure 23 Zero Count Check, step 3A
Summary of Contents for 900-0300
Page 1: ...NucleoCounter YC 100 User s Guide Revision 1 3 Technology that counts...
Page 2: ...i This page was intentionally left blank...
Page 4: ...iii This page was intentionally left blank...
Page 6: ...v This page was intentionally left blank...
Page 8: ...vii This page was intentionally left blank...
Page 10: ...ix This page was intentionally left blank...
Page 12: ...Introduction and intended use xi This page was intentionally left blank...
Page 20: ...1 Inspection and Unpacking of Equipment 8 This page was intentionally left blank...
Page 26: ...Fejl Henvisningskilde ikke fundet 14 This page was intentionally left blank...
Page 44: ...7 Maintenance of NucleoCounter 32 This page was intentionally left blank...
Page 48: ...8 Troubleshooting Error messages 36 This page was intentionally left blank...
Page 55: ...43 2 1 3 Metal E nclosure Figure 36 Printer Output connector seen from the cable entry side...

