RM133 Series
System Components Removal and Installation
│
23
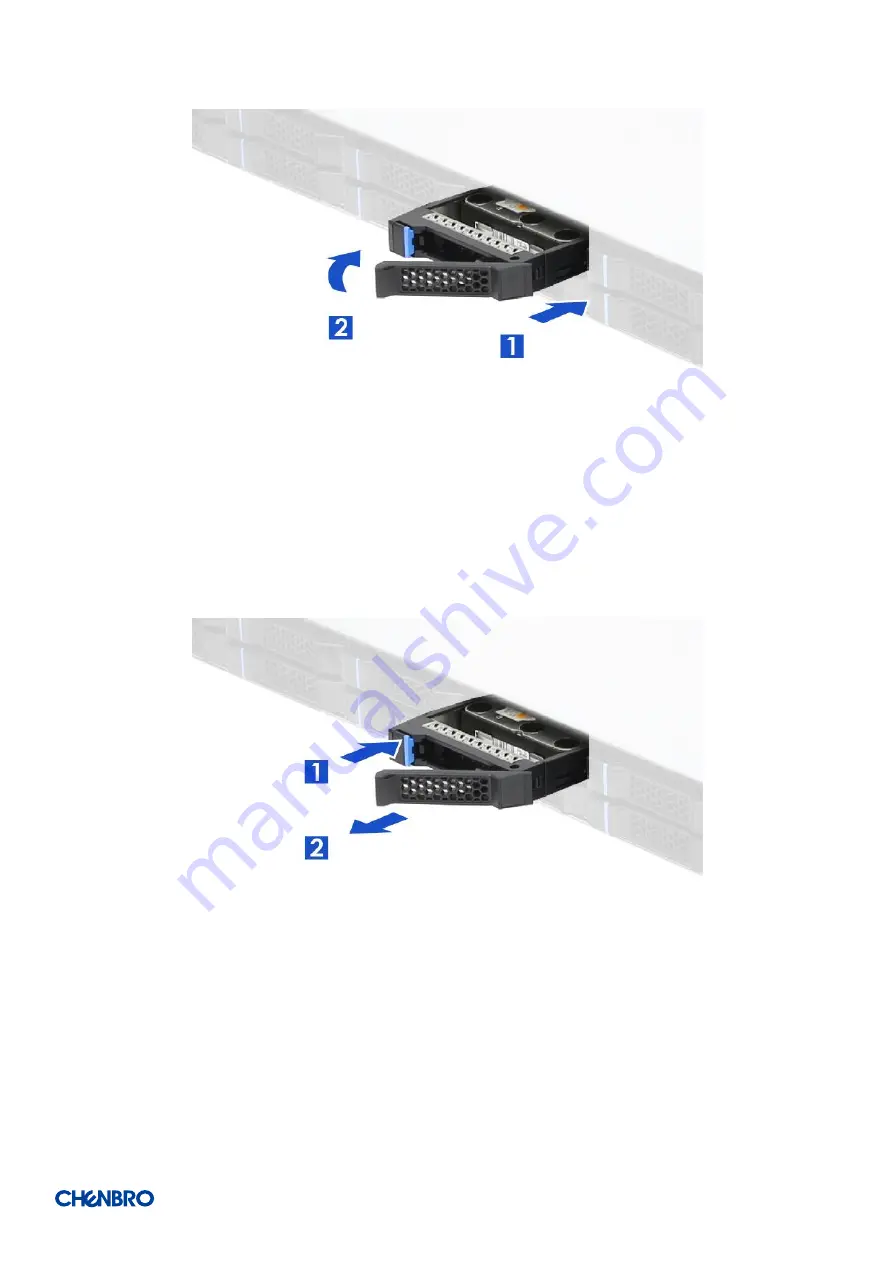
Figure 22 2.5’’ hot-swap HDD/SSD assembly installation
1. With the lever open, insert the HDD/SSD assembly into the drive bay until the end of the HDD/SSD cage.
2. Push in the lever to lock it into place.
Figure 23 2.5’’ hot-swap HDD/SSD assembly removal
1.
Press the tray button t
o
release the lever.
2. Pull the HDD/SSD assembly out of the drive bay.


