DETERMINING TOTAL SHIM PACK SIZE
1. Assemble the case (22) to the axle housing. The
pinion must not be installed.
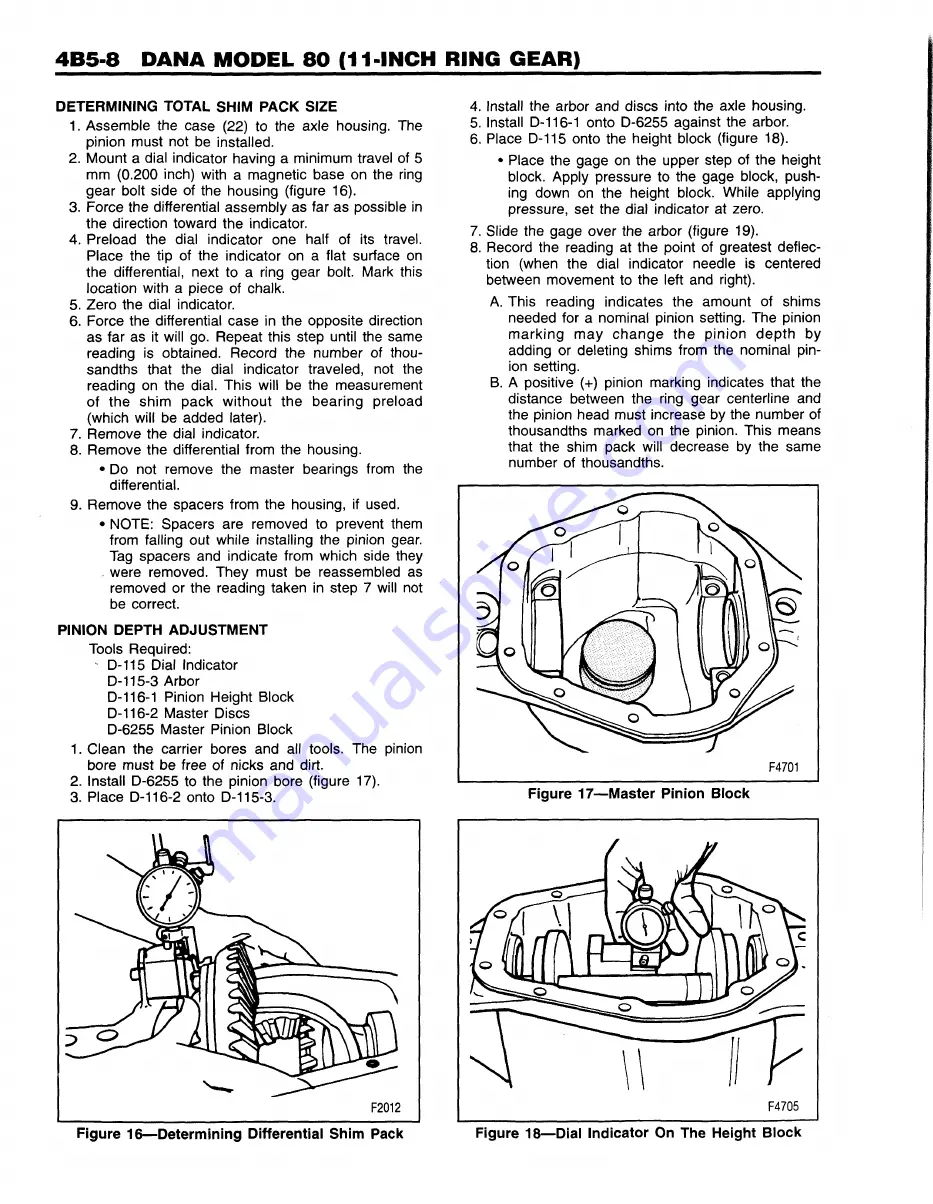
2. Mount a dial indicator having a minimum travel of 5
mm (0.200 inch) with a magnetic base on the ring
gear bolt side of the housing (figure 16).
3. Force the differential assembly as far as possible in
the direction toward the indicator.
4. Preload the dial indicator one half of its travel.
Place the tip of the indicator on a flat surface on
the differential, next to a ring gear bolt. Mark this
location with a piece of chalk.
5. Zero the dial indicator.
6. Force the differential case in the opposite direction
as far as it will go. Repeat this step until the same
reading is obtained. Record the number of thou
sandths that the dial indicator traveled, not the
reading on the dial. This will be the measurement
of the shim pack w ithout the bearing preload
(which will be added later).
7. Remove the dial indicator.
8. Remove the differential from the housing.
• Do not remove the master bearings from the
differential.
9. Remove the spacers from the housing, if used.
• NOTE: Spacers are removed to prevent them
from falling out while installing the pinion gear.
Tag spacers and indicate from which side they
were removed. They must be reassembled as
removed or the reading taken in step 7 will not
be correct.
PINION DEPTH ADJUSTMENT
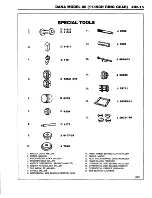
Tools Required:
D-115 Dial Indicator
D-115-3 Arbor
D-116-1 Pinion Height Block
D-116-2 Master Discs
D-6255 Master Pinion Block
1. Clean the carrier bores and all tools. The pinion
bore must be free of nicks and dirt.
2. Install D-6255 to the pinion bore (figure 17).
3. Place D-116-2 onto D-115-3.
F2012
4. Install the arbor and discs into the axle housing.
5. Install D-116-1 onto D-6255 against the arbor.
6. Place D-115 onto the height block (figure 18).
• Place the gage on the upper step of the height
block. Apply pressure to the gage block, push
ing down on the height block. While applying
pressure, set the dial indicator at zero.
7. Slide the gage over the arbor (figure 19).
8. Record the reading at the point of greatest deflec
tion (when the dial indicator needle is centered
between movement to the left and right).
A. This reading indicates the amount of shims
needed for a nominal pinion setting. The pinion
m arking m ay change the pinion depth by
adding or deleting shims from the nominal pin
ion setting.
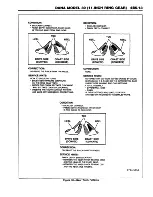
B. A positive (+) pinion marking indicates that the
distance between the ring gear centerline and
the pinion head must increase by the number of
thousandths marked on the pinion. This means
that the shim pack will decrease by the same
number of thousandths.
F4705
Summary of Contents for Light Duty Truck 1994 Series
Page 1: ......
Page 11: ...VIEW A p n n n j VIEW C F7554 Figure 10 Hydra Matic 4L60 E Transmission I D Location ...
Page 24: ...NOTES ...
Page 26: ... ...
Page 69: ...NOTES ...
Page 71: ...3 2 STEERING ...
Page 73: ......
Page 84: ......
Page 102: ...40 ...
Page 130: ...NOTES ...
Page 146: ...NOTES ...
Page 162: ...NOTES ...
Page 166: ...Figure 5 Removing the Pinion Flange Figure 6 Pressing the Drive Pinion from the Cage ...
Page 178: ...Figure 3 Spreading the Differential Case Figure 4 Removing the Differential ...
Page 190: ...NOTES ...
Page 202: ...NOTES ...
Page 206: ...F5785 ...
Page 212: ...B Button Moved Out of Bearing Bore F5791 ...
Page 228: ...NOTES ...
Page 232: ......
Page 234: ......
Page 236: ...Adjuster 63 Bolt 64 Lock Figure 10 Turning the Adjuster Plug K3 Models ...
Page 237: ...Figure 13 Removing the Pinion Seal 39 Bearing Cup Figure 16 Removing the Inner Bearing Cap ...
Page 261: ...F7475 ...
Page 267: ...B Button Moved Out of Bearing Bore F5791 ...
Page 294: ...NOTES ...
Page 300: ...NOTES ...
Page 318: ...NOTES ...
Page 322: ...SR207LN2 EDS ...
Page 324: ......
Page 326: ...OVERHEAD OILING AND RETURN MAIN OIL GALLERY N30005 6A2 J EDS ...
Page 368: ...103 153 127 V1200 ...
Page 370: ......
Page 372: ......
Page 374: ...F9375 Figure 7 Engine Lubrication Diagram Engines Without Balance Shaft ...
Page 376: ...Figure 9 Engine Lubrication Diagram Engines With Balance Shaft ...
Page 399: ...V2974 ...
Page 410: ......
Page 412: ...195 196 201 174 252 163 165 164 244 3706r3924 ...
Page 452: ......
Page 454: ...163 164 V1202 ...
Page 456: ...20 21x 302 210 4 0 41 2 5 2 5 1 2 51 4 2 e3 54 3 9 252 252 S 255 255 25 6 256 209 V1196 ...
Page 458: ...100 1 8 4 185 183 177 v 75 201 3706r1204 ...
Page 460: ......
Page 510: ......
Page 512: ...V2131 ...
Page 514: ...110 106 106 103 90 93 89 88 87 86 v 7 7 7 7 j A _ 111 f t 2 a a s 53 49 L 47 46 3706r4751 ...
Page 566: ...NOTES ...
Page 574: ...NOTES ...
Page 618: ...SPECIAL TOOLS ...
Page 620: ...NOTES ...
Page 672: ......
Page 682: ......
Page 686: ......
Page 694: ...RH0213 4L60 E ...
Page 695: ...657 659 m i J 8092 H J 34196 4 3 34196 5 657 658 665 J 23907 J 7004 1 J 8092 RH0214 4L60 E ...
Page 696: ...J 8092 J 34196 4 33 31 J 8092 RH0215 4L60 E ...
Page 697: ...SPECIAL TOOLS ...
Page 698: ...SPECIAL TOOLS ...
Page 758: ...RH0194 4L80 E ...
Page 764: ......
Page 770: ...SPECIAL TOOLS ...
Page 771: ...SPECIAL TOOLS CONT ...
Page 772: ......
Page 775: ......
Page 776: ......
Page 785: ......
Page 804: ...NOTES ...
Page 806: ......
Page 808: ......
Page 822: ...3707r5079 ...
Page 840: ......
Page 848: ...NOTES ...
Page 852: ......
Page 860: ...F5435 ...
Page 866: ......
Page 878: ...F9167 ...
Page 882: ...16 FrontOutputShaft 18 DrivtQNr 19 DrivenGm t 20 DriveChain 22 FrontOutputBearing V2836 ...
Page 890: ...F9168 ...
Page 908: ......
Page 919: ......


