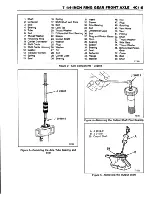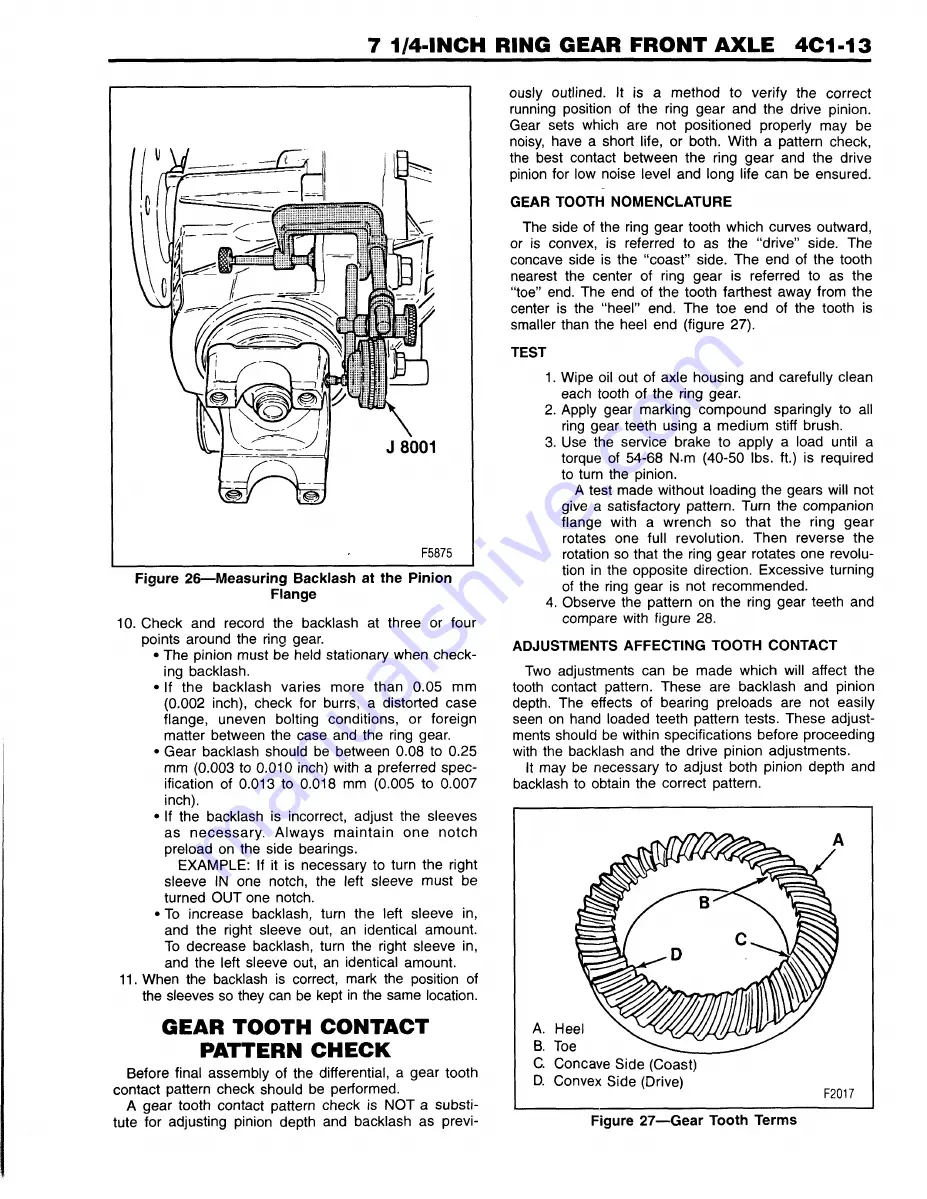
Figure 26— Measuring Backlash at the Pinion
Flange
10. Check and record the backlash at three or four
points around the ring gear.
• The pinion must be held stationary when check
ing backlash.
• If the backlash varies more than 0.05 mm
(0.002 inch), check for burrs, a distorted case
flange, uneven bolting conditions, or foreign
matter between the case and the ring gear.
• Gear backlash should be between 0.08 to 0.25
mm (0.003 to 0.010 inch) with a preferred spec
ification of 0.013 to 0.018 mm (0.005 to 0.007
inch).
• If the backlash is incorrect, adjust the sleeves
as necessary. A lw ays m aintain one notch
preload on the side bearings.
EXAMPLE: If it is necessary to turn the right
sleeve IN one notch, the left sleeve must be
turned OUT one notch.
• To increase backlash, turn the left sleeve in,
and the right sleeve out, an identical amount.
To decrease backlash, turn the right sleeve in,
and the left sleeve out, an identical amount.
11. When the backlash is correct, mark the position of
the sleeves so they can be kept in the same location.
GEAR TOOTH CONTACT
PATTERN CHECK
Before final assembly of the differential, a gear tooth
contact pattern check should be performed.
A gear tooth contact pattern check is NOT a substi
tute for adjusting pinion depth and backlash as previ
ously outlined. It is a method to verify the correct
running position of the ring gear and the drive pinion.
Gear sets which are not positioned properly may be
noisy, have a short life, or both. With a pattern check,
the best contact between the ring gear and the drive
pinion for low noise level and long life can be ensured.
GEAR TOOTH NOMENCLATURE
The side of the ring gear tooth which curves outward,
or is convex, is referred to as the “drive” side. The
concave side is the “coast” side. The end of the tooth
nearest the center of ring gear is referred to as the
“toe” end. The end of the tooth farthest away from the
center is the “ heel” end. The toe end of the tooth is
smaller than the heel end (figure 27).
TEST
1. Wipe oil out of axle housing and carefully clean
each tooth of the ring gear.
2. Apply gear marking compound sparingly to all
ring gear teeth using a medium stiff brush.
3. Use the service brake to apply a load until a
torque of 54-68 N-m (40-50 lbs. ft.) is required
to turn the pinion.
A test made without loading the gears will not
give a satisfactory pattern. Turn the companion
flange with a wrench so that the ring gear
rotates one full revolution. Then reverse the
rotation so that the ring gear rotates one revolu
tion in the opposite direction. Excessive turning
of the ring gear is not recommended.
4. Observe the pattern on the ring gear teeth and
compare with figure 28.
ADJUSTMENTS AFFECTING TOOTH CONTACT
Two adjustments can be made which will affect the
tooth contact pattern. These are backlash and pinion
depth. The effects of bearing preloads are not easily
seen on hand loaded teeth pattern tests. These adjust
ments should be within specifications before proceeding
with the backlash and the drive pinion adjustments.
It may be necessary to adjust both pinion depth and
backlash to obtain the correct pattern.
Summary of Contents for Light Duty Truck 1994 Series
Page 1: ......
Page 11: ...VIEW A p n n n j VIEW C F7554 Figure 10 Hydra Matic 4L60 E Transmission I D Location ...
Page 24: ...NOTES ...
Page 26: ... ...
Page 69: ...NOTES ...
Page 71: ...3 2 STEERING ...
Page 73: ......
Page 84: ......
Page 102: ...40 ...
Page 130: ...NOTES ...
Page 146: ...NOTES ...
Page 162: ...NOTES ...
Page 166: ...Figure 5 Removing the Pinion Flange Figure 6 Pressing the Drive Pinion from the Cage ...
Page 178: ...Figure 3 Spreading the Differential Case Figure 4 Removing the Differential ...
Page 190: ...NOTES ...
Page 202: ...NOTES ...
Page 206: ...F5785 ...
Page 212: ...B Button Moved Out of Bearing Bore F5791 ...
Page 228: ...NOTES ...
Page 232: ......
Page 234: ......
Page 236: ...Adjuster 63 Bolt 64 Lock Figure 10 Turning the Adjuster Plug K3 Models ...
Page 237: ...Figure 13 Removing the Pinion Seal 39 Bearing Cup Figure 16 Removing the Inner Bearing Cap ...
Page 261: ...F7475 ...
Page 267: ...B Button Moved Out of Bearing Bore F5791 ...
Page 294: ...NOTES ...
Page 300: ...NOTES ...
Page 318: ...NOTES ...
Page 322: ...SR207LN2 EDS ...
Page 324: ......
Page 326: ...OVERHEAD OILING AND RETURN MAIN OIL GALLERY N30005 6A2 J EDS ...
Page 368: ...103 153 127 V1200 ...
Page 370: ......
Page 372: ......
Page 374: ...F9375 Figure 7 Engine Lubrication Diagram Engines Without Balance Shaft ...
Page 376: ...Figure 9 Engine Lubrication Diagram Engines With Balance Shaft ...
Page 399: ...V2974 ...
Page 410: ......
Page 412: ...195 196 201 174 252 163 165 164 244 3706r3924 ...
Page 452: ......
Page 454: ...163 164 V1202 ...
Page 456: ...20 21x 302 210 4 0 41 2 5 2 5 1 2 51 4 2 e3 54 3 9 252 252 S 255 255 25 6 256 209 V1196 ...
Page 458: ...100 1 8 4 185 183 177 v 75 201 3706r1204 ...
Page 460: ......
Page 510: ......
Page 512: ...V2131 ...
Page 514: ...110 106 106 103 90 93 89 88 87 86 v 7 7 7 7 j A _ 111 f t 2 a a s 53 49 L 47 46 3706r4751 ...
Page 566: ...NOTES ...
Page 574: ...NOTES ...
Page 618: ...SPECIAL TOOLS ...
Page 620: ...NOTES ...
Page 672: ......
Page 682: ......
Page 686: ......
Page 694: ...RH0213 4L60 E ...
Page 695: ...657 659 m i J 8092 H J 34196 4 3 34196 5 657 658 665 J 23907 J 7004 1 J 8092 RH0214 4L60 E ...
Page 696: ...J 8092 J 34196 4 33 31 J 8092 RH0215 4L60 E ...
Page 697: ...SPECIAL TOOLS ...
Page 698: ...SPECIAL TOOLS ...
Page 758: ...RH0194 4L80 E ...
Page 764: ......
Page 770: ...SPECIAL TOOLS ...
Page 771: ...SPECIAL TOOLS CONT ...
Page 772: ......
Page 775: ......
Page 776: ......
Page 785: ......
Page 804: ...NOTES ...
Page 806: ......
Page 808: ......
Page 822: ...3707r5079 ...
Page 840: ......
Page 848: ...NOTES ...
Page 852: ......
Page 860: ...F5435 ...
Page 866: ......
Page 878: ...F9167 ...
Page 882: ...16 FrontOutputShaft 18 DrivtQNr 19 DrivenGm t 20 DriveChain 22 FrontOutputBearing V2836 ...
Page 890: ...F9168 ...
Page 908: ......
Page 919: ......

