FUEL TANK AN D EXHAUST SYSTEMS 8-10
4. Connect hoses to top of canister in same position as
in Step 3 above.
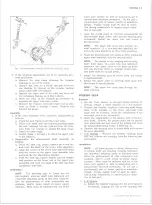
CANISTER PURGE VALVE (Fig. 10)
Disassembly
1. Disconnect lines at valve.
2. Snap off valve cap (slowly remove cap as diaphragm
is under spring tension). Remove diaphragm, spring
retainer and spring.
3. Replace parts as necessary. Check orifice open
ings.
Assembly
1. Install spring, spring retainer, diaphragm and cap.
2. Reinstall canister as previously outlined, connect
lines to valve.
SEPARATOR
Removal
1. Raise vehicle on hoist.
2. Disconnect lines from separator.
3. Remove retaining screw and remove separator.
Installation
1. Install separator and its retaining screw.
2. Connect lines to separator.
3. Lower vehicle and remove from hoist.
FUEL TANK
Removal and installation procedures are the same as
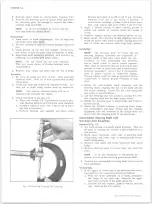
Fig.
14—
Fuel Vapor Sticker and Rear Vent Pipe P
10
Series
outlined for other models with exception of disconnecting
and connecting fuel tank-to-separator vent lines. Refer
to Fuel Tank Section.
10-30 CHEVROLET TRUCK SERVICE MANUAL
Summary of Contents for 10 1971 Series
Page 1: ......
Page 96: ......
Page 100: ...10 30 CHEVROLET TRUCK SERVICE MANUAL Fig 4 10 30 Series Truck Frame FRAME 2 4 ...
Page 120: ......
Page 203: ...ENGINE 6 25 Fig 22L Engine Mounts 10 30 CHEVROLET TRUCK SERVICE MANUAL ...
Page 215: ...ENGINE 6 37 REAR M O U NT Fig 21V Engine Mounts 10 30 CHEVROLET TRUCK SERVICE MANUAL ...
Page 218: ......
Page 249: ......
Page 324: ......
Page 340: ......
Page 365: ...10 30 CHEVROLET TRUCK SERVICE MANUAL Fig 43 Power Steering Pump M ounting STEERING 9 25 ...
Page 368: ......
Page 386: ......
Page 390: ...ELECTRICAL BODY AND CHASSIS 12 4 10 30 CHEVROLET TRUCK SERVICE MANUAL ...
Page 391: ......
Page 428: ......
Page 432: ......
Page 449: ...SPECIFICATIONS 9 10 30 CHEVROLET TRUCK SERVICE MANUAL ...
Page 463: ......
Page 464: ......
Page 465: ......
Page 466: ......


