STEERING 9-4
2. Rotate adjusting ring to give .005" end play between
adjusting ring and first and reverse shifter lever
(fig. 6).
3. Tighten attaching screws and clamp bolt.
Automatic Transmission
1. Place the shift tube lever in "Neutral" or "Drive".
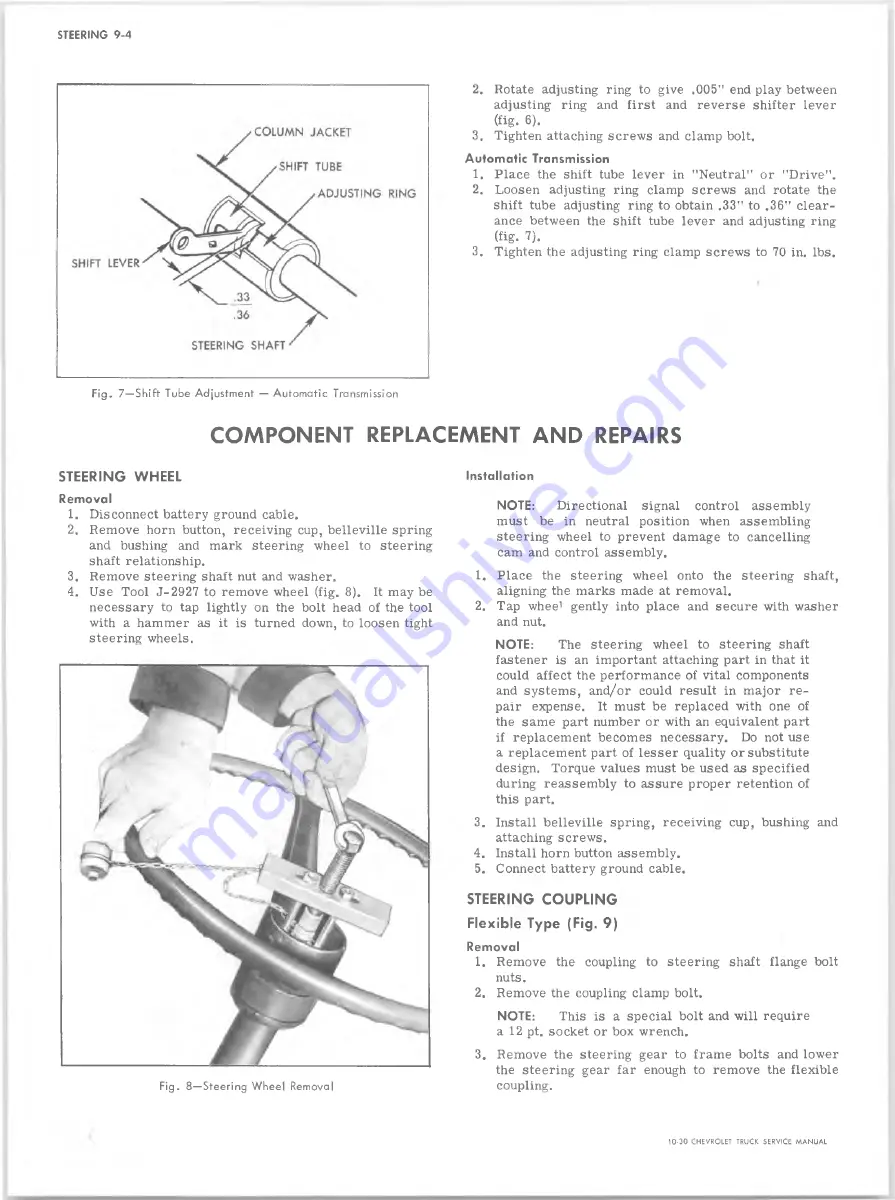
2. Loosen adjusting ring clamp screws and rotate the
shift tube adjusting ring to obtain .33" to .36" clear
ance between the shift tube lever and adjusting ring
(fig. 7).
3. Tighten the adjusting ring clamp screws to 70 in. lbs.
Fig. 7— Shift Tube Adjustment — Automatic Transmission
CO MPONENT REPLACEMENT A N D REPAIRS
STEERING WHEEL
Removal
1. Disconnect battery ground cable.
2. Remove horn button, receiving cup, belleville spring
and bushing and mark steering wheel to steering
shaft relationship.
3. Remove steering shaft nut and washer.
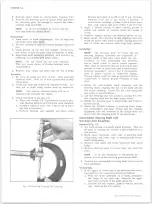
4. Use Tool J-2927 to remove wheel (fig. 8). It may be
necessary to tap lightly on the bolt head of the tool
with a hammer as it is turned down, to loosen tight
steering wheels.
Fig. 8 — Steering Wheel Removal
Installation
NOTE:
Directional signal control assembly
must be in neutral position when assembling
steering wheel to prevent damage to cancelling
cam and control assembly.
1. Place the steering wheel onto the steering shaft,
aligning the marks made at removal.
2. Tap whee1 gently into place and secure with washer
and nut.
NOTE:
The steering wheel to steering shaft
fastener is an important attaching part in that it
could affect the performance of vital components
and systems, and/or could result in major re
pair expense. It must be replaced with one of
the same part number or with an equivalent part
if replacement becomes necessary. Do not use
a replacement part of lesser quality or substitute
design. Torque values must be used as specified
during reassembly to assure proper retention of
this part.
3. Install belleville spring, receiving cup, bushing and
attaching screws.
4. Install horn button assembly.
5. Connect battery ground cable.
STEERING COUPLING
Flexible Type (Fig. 9)
Removal
1. Remove the coupling to steering shaft flange bolt
nuts.
2. Remove the coupling clamp bolt.
NOTE:
This is a special bolt and will require
a 12 pt. socket or box wrench.
3. Remove the steering gear to frame bolts and lower
the steering gear far enough to remove the flexible
coupling.
10-30 CHEVROLET TRUCK SERVICE MANUAL
Summary of Contents for 10 1971 Series
Page 1: ......
Page 96: ......
Page 100: ...10 30 CHEVROLET TRUCK SERVICE MANUAL Fig 4 10 30 Series Truck Frame FRAME 2 4 ...
Page 120: ......
Page 203: ...ENGINE 6 25 Fig 22L Engine Mounts 10 30 CHEVROLET TRUCK SERVICE MANUAL ...
Page 215: ...ENGINE 6 37 REAR M O U NT Fig 21V Engine Mounts 10 30 CHEVROLET TRUCK SERVICE MANUAL ...
Page 218: ......
Page 249: ......
Page 324: ......
Page 340: ......
Page 365: ...10 30 CHEVROLET TRUCK SERVICE MANUAL Fig 43 Power Steering Pump M ounting STEERING 9 25 ...
Page 368: ......
Page 386: ......
Page 390: ...ELECTRICAL BODY AND CHASSIS 12 4 10 30 CHEVROLET TRUCK SERVICE MANUAL ...
Page 391: ......
Page 428: ......
Page 432: ......
Page 449: ...SPECIFICATIONS 9 10 30 CHEVROLET TRUCK SERVICE MANUAL ...
Page 463: ......
Page 464: ......
Page 465: ......
Page 466: ......


