CLUTCHES AND TRANSMISSIONS 7-6
12. Assemble transmission as outlined in Transmission
14. Adjust clutch linkage (See adjustments in this
Section, and install flywheel underpan.
section).
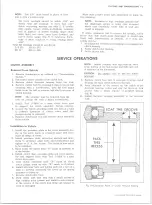
13. Align push rod to clutch fork and attach return spring
to clutch fork.
COIL SPRING CLUTCH
INDEX
General Description................................................................................
Removal from V e h ic le .......................................................................
Installation to Vehicle .......................................................................
GENERAL DESCRIPTION
The coil spring single plate clutch is a dry disc type
and no adjustment for wear is provided in the clutch
itself. An individual adjustment is provided for locating
each lever in manufacturing but the adjusting nut is
locked in place and should never be disturbed, unless the
clutch is dismantled for replacement of parts.
When the clutch pedal is depressed the release bearing
is removed toward the flywheel and contacts the inner
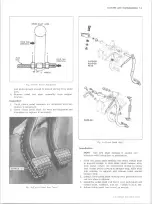
ends of the release levers, (1) (fig. 9). Each release
lever is pivoted on a floating pin which remains station
ary in the lever and rolls across a short flat portion of
the enlarged hole in the eyebolt (2). The outer end of each
release lever engages the pressure plate lug by means of
a strut (3), which provides knife-edge contact between the
outer end of the lever and the lug. The outer ends of the
eyebolts extend through holes in the stamped cover (4),
and are fitted with adjusting nuts (5) to correctly position
the levers.
2. Eyebolt
4. Cover
5. Adjusting Nut
Fig. 9— Release Lever
SERVICE OPERATIONS
CLUTCH ASSEMBLY
Removal From Vehicle
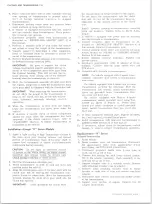
Before removing clutch from flywheel, mark with a
punch the flywheel, clutch cover and one pressure plate
lug, so that these parts may be assembled in their same
relative positions, as they were balanced as an assembly.
Loosen the holding screws a turn or two at a time to
avoid bending rim of cover. When removing driven plate
be sure to mark flywheel side.
NOTE:
It is advantageous to place wood or
metal spacers (approximately 3/8 thick) between
the clutch levers and the cover to hold the levers
down as the holding screws are removed or when
clutch is removed from engine.
Installation To Vehicle
1. Assemble driven plate and clutch cover assembly to
flywheel in accordance with marking on driven plate
for flywheel side.
2. Line up the driven plate assembly and pilot bear
ing with a dummy shaft (used clutch drive gear)
before tightening cover holding screws. Tighten
holding screws before removing dummy shaft.
3. After transmission has been assembled, adjust pedal
as described under “ Clutch Pedal Adjustments” .
10-30 CHEVROLET TRUCK SERVICE MANUAL
Summary of Contents for 10 1971 Series
Page 1: ......
Page 96: ......
Page 100: ...10 30 CHEVROLET TRUCK SERVICE MANUAL Fig 4 10 30 Series Truck Frame FRAME 2 4 ...
Page 120: ......
Page 203: ...ENGINE 6 25 Fig 22L Engine Mounts 10 30 CHEVROLET TRUCK SERVICE MANUAL ...
Page 215: ...ENGINE 6 37 REAR M O U NT Fig 21V Engine Mounts 10 30 CHEVROLET TRUCK SERVICE MANUAL ...
Page 218: ......
Page 249: ......
Page 324: ......
Page 340: ......
Page 365: ...10 30 CHEVROLET TRUCK SERVICE MANUAL Fig 43 Power Steering Pump M ounting STEERING 9 25 ...
Page 368: ......
Page 386: ......
Page 390: ...ELECTRICAL BODY AND CHASSIS 12 4 10 30 CHEVROLET TRUCK SERVICE MANUAL ...
Page 391: ......
Page 428: ......
Page 432: ......
Page 449: ...SPECIFICATIONS 9 10 30 CHEVROLET TRUCK SERVICE MANUAL ...
Page 463: ......
Page 464: ......
Page 465: ......
Page 466: ......


