7-86 A U TO M A TIC T R A N SM ISSIO N
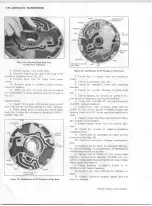
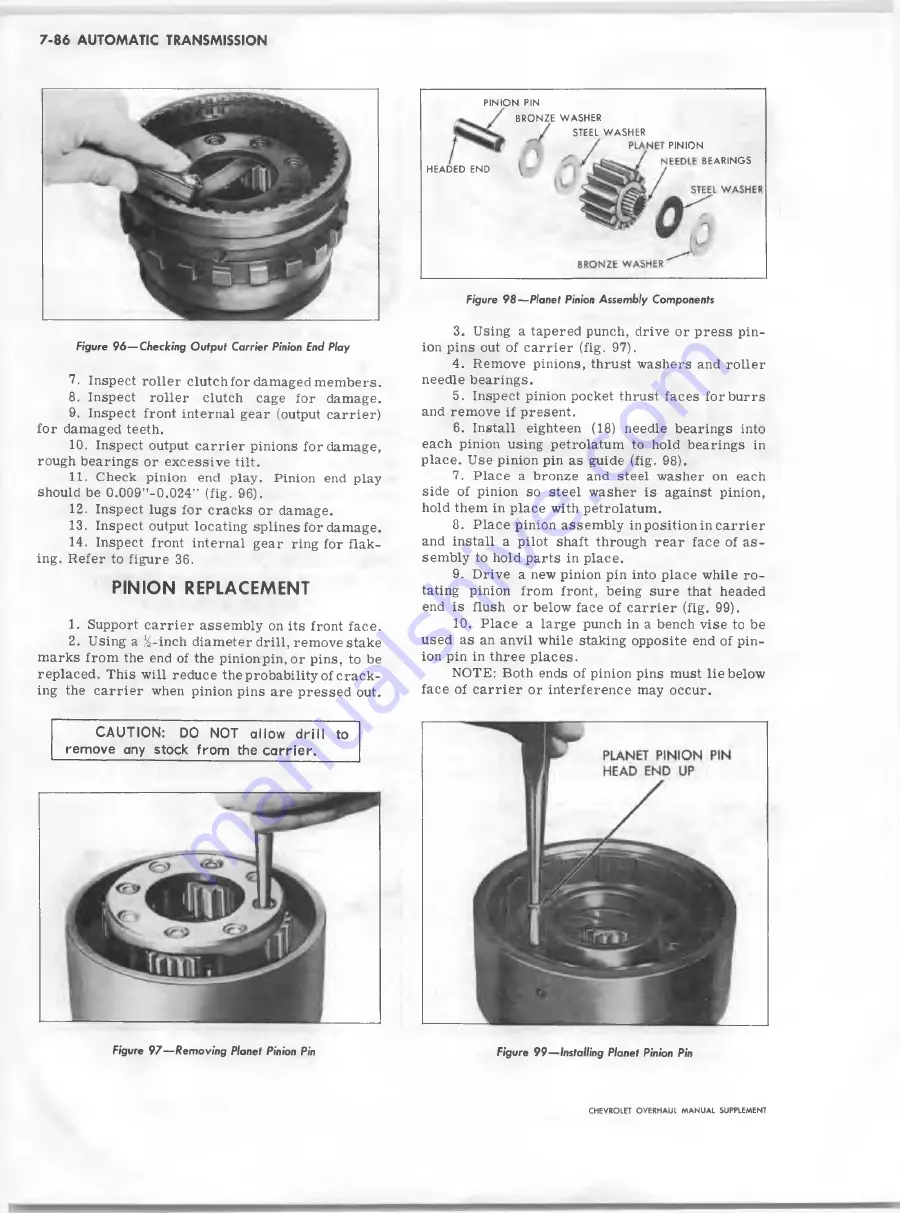
Figure 9 8 — Planet Pinion A sse m b ly Com ponents
PINIC
PINION PIN
BRONZE WASHER
STEEL WASHER
HEADED END
PINION
BEARINGS
Figure 9 6 — C h e ckin g O u tput Carrier Pinion End Play
7. Inspect roller clutchfor damaged m em bers.
8
. Inspect roller clutch cage for damage.
9. Inspect front internal gear (output carrier)
for damaged teeth.
10. Inspect output carrier pinions for damage,
rough bearings or excessiv e tilt.
11. Check pinion end play. Pinion end play
should be 0.009''-0.024" (fig. 96).
12. Inspect lugs for cracks or damage.
13. Inspect output locating splines for damage.
14. Inspect front internal gear ring for flak
ing. Refer to figure 36.
PIN IO N REPLACEMENT
1. Support carrier assem bly on its front face.
2. Using a ^-inch diameter drill, remove stake
marks from the end of the pinionpin, or pins, to be
replaced. This will reduce the probability of crack
ing the carrier when pinion pins are p ressed out.
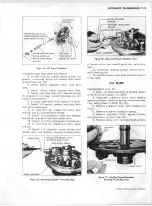
3. Using a tapered punch, drive or p ress pin
ion pins out of carrier (fig. 97).
4. Remove pinions, thrust washers and roller
needle bearings.
5. Inspect pinion pocket thrust faces for burrs
and remove if present.
6
. Install eighteen (18) needle bearings into
each pinion using petrolatum to hold bearings in
place. Use pinion pin as guide (fig. 98).
7. Place a bronze and steel washer on each
side of pinion so ste el washer is against pinion,
hold them in place with petrolatum.
8
. P lace pinion assem bly in position in carrier
and install a pilot shaft through rear face of a s
sem bly to hold parts in place.
9. Drive a new pinion pin into place while ro
tating pinion from front, being sure that headed
end is flush or below face of carrier (fig. 99).
10. Place a large punch in a bench v ise to be
used as an anvil while staking opposite end of pin
ion pin in three places.
NOTE: Both ends of pinion pins must lie below
face of carrier or interference may occur.
CAU TIO N :
DO NOT a llo w d r i l l to
rem ove any stock fro m the c a r r ie r .
Figure 9 7 — R em o vin g Planet Pinion Pin
Figure 9 9 — Installing Planet Pinion Pin
CHEVROLET O VERHAUL M A N U A L SUPPLEMENT
Summary of Contents for 40 60 Series
Page 1: ...40 60 SERIES TRUCK SUPPLEMENT ST 334 72...
Page 86: ......
Page 96: ...n 47 k u m i i i iin I ll II I...
Page 222: ......

