background image

Page 7

SKU 42864

For technical questions, please call 1-800-444-3353.

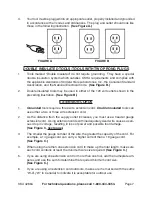
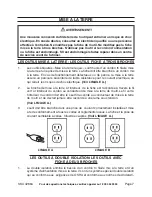
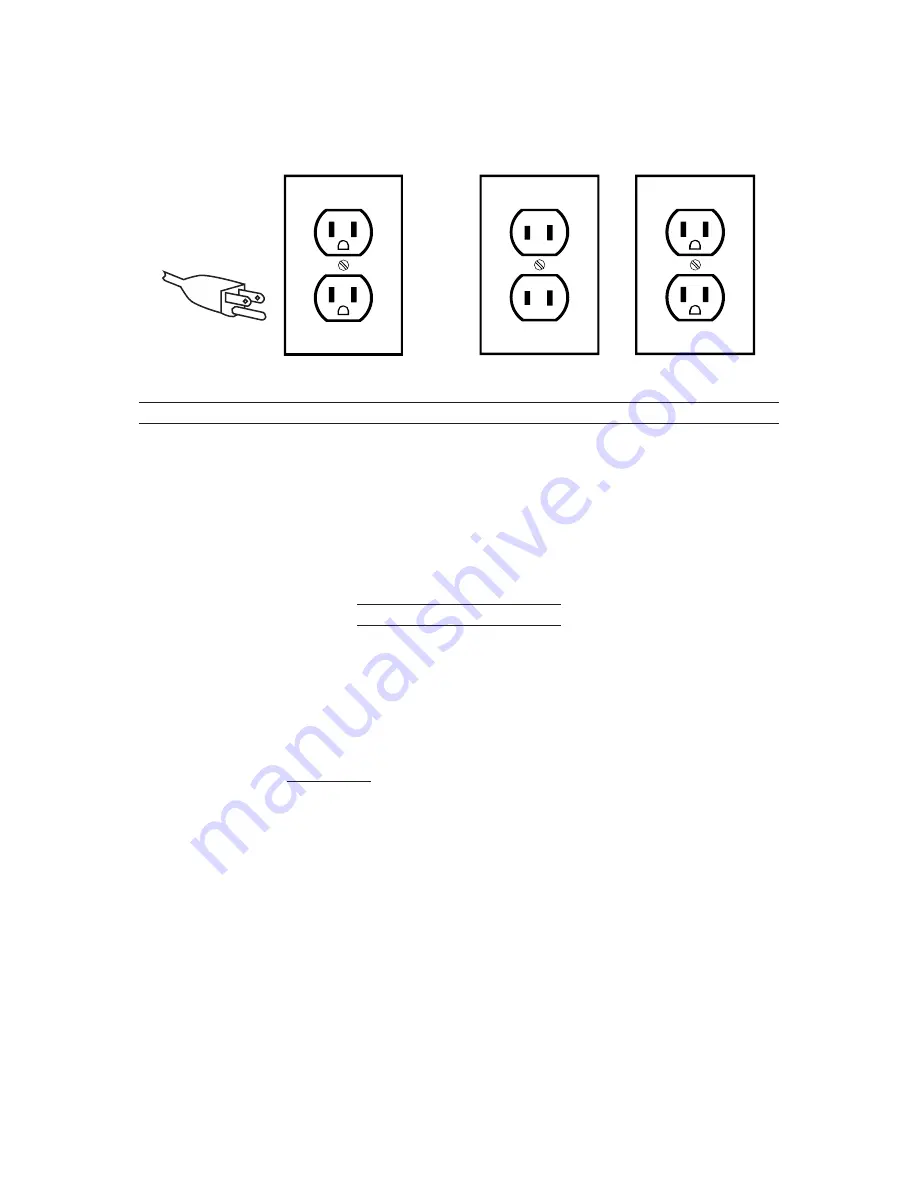
Your tool must be plugged into an appropriate outlet, properly installed and grounded 
in accordance with all codes and ordinances.  The plug and outlet should look like 
those in the following illustration.  

(See Figure A.)

FIGuRE A


FIGuRE b

DOublE INSulAtED tOOlS: tOOlS wItH twO pRONG pluGS

Tools marked “Double Insulated” do not require grounding.  They have a special 
double insulation system which satisfies OSHA requirements and complies with 
the applicable standards of Underwriters Laboratories, Inc., the Canadian Standard 
Association, and the National Electrical Code.  

(See Figure b.)

Double insulated tools may be used in either of the 120 volt outlets shown in the 
preceding illustration.  

(See Figure b.)

ExtENSION cORDS

Grounded tools require a three wire extension cord.  Double Insulated tools can 
use either a two or three wire extension cord.

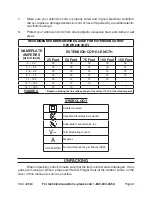
As the distance from the supply outlet increases, you must use a heavier gauge 
extension cord.  Using extension cords with inadequately sized wire causes a seri-
ous drop in voltage, resulting in loss of power and possible tool damage. 

(See Figure c, next page.)

The smaller the gauge number of the wire, the greater the capacity of the cord.  For 
example, a 14 gauge cord can carry a higher current than a 16 gauge cord. 

(See Figure c.)

When using more than one extension cord to make up the total length, make sure 
each cord contains at least the minimum wire size required. 

(See Figure c.)

If you are using one extension cord for more than one tool, add the nameplate


am-

peres and use the sum to determine the required minimum cord size. 

(See Figure c.)

If you are using an extension cord outdoors, make sure it is marked with the suffix 
“W-A” (“W” in Canada) to indicate it is acceptable for outdoor use.

3.

1.

2.

1.

2.

3.

4.

5.

6.

Summary of Contents for 42864

Page 1: ...ebsite at http www harborfreight com To prevent serious injury read and understand all warnings and instructions before use Copyright 2006 by Harbor Freight Tools All rights reserved No portion of thi...

Page 2: ...D ALL INSTRUCTIONS Failure to follow all instructions listed below may result in electric shock fire and or serious injury SAVE THESE INSTRUCTIONS WORK AREA Keep your work area clean and well lit Clut...

Page 3: ...away from heat oil sharp edges or moving parts Replace damaged Power Cords immediately Dam aged Power Cords increase the risk of electric shock When operating a power tool outside use an outdoor exten...

Page 4: ...tool accidentally Always unplug the tool from its electrical outlet before performing any inspection maintenance or cleaning procedures Store idle tools out of reach of children and other untrained pe...

Page 5: ...tory irritation Always use a NIOSH National Institute for Occupational Safety and Health approved respirator and ANSI approved safety goggles Avoid skin exposure Proper ventilation in the work area is...

Page 6: ...lt in the risk of electric shock Check with a qualified electrician if you are in doubt as to whether the outlet is properly grounded Do not modify the power cord plug provided with the tool Never rem...

Page 7: ...e a three wire extension cord Double Insulated tools can use either a two or three wire extension cord As the distance from the supply outlet increases you must use a heavier gauge extension cord Usin...

Page 8: ...0 Feet 75 Feet 100 Feet 150 Feet 0 2 0 18 18 18 18 16 2 1 3 4 18 18 18 16 14 3 5 5 0 18 18 16 14 12 5 1 7 0 18 16 14 12 12 7 1 12 0 18 14 12 10 12 1 16 0 14 12 10 16 1 20 0 12 10 FIGURE C Based on lim...

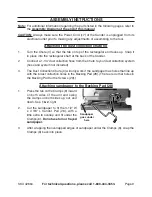
Page 9: ...collection hose from the Chute to your dust collection system hose and system not included The Dust Collection Chute 0 will only work if the sandpaper has holes that line up with the 6 dust collectio...

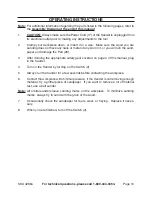
Page 10: ...ruin the sand paper and damage the Pad 28 After donning the appropriate safety gear covered on page 2 of this manual plug in the Sander Turn on the Sander by turning on the Switch 2 Always run the Sa...

Page 11: ...OWING CAREFULLY THE MANUFACTURER AND OR DISTRIBUTOR HAS PROVIDED THE PARTS DIAGRAM IN THIS MANUAL AS A REFERENCETOOL ONLY NEITHERTHE MANUFACTURER NOR DISTRIBUTOR MAKES ANY REPRESENTATION OR WARRANTY O...

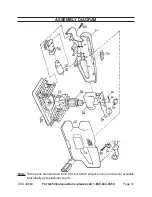
Page 12: ...12 SKU 42864 For technical questions please call 1 800 444 3353 ASSEMBLY DIAGRAM Note Some parts are listed and shown for illustration purposes only and are not available individually as replacement p...

Page 13: ...product Some states do not allow the exclusion or limitation of incidental or consequential damages so the above limitation of exclusion may not apply to you THiS WarranTy iS expreSSly in lieu oF all...

Page 14: ...Copyright 2006 par le Harbor Freight Tools Tous droits r serv s Aucune portion de ce manuel ou de n importe quel travail d art contenu ici ne peut tre reproduite dans aucune forme ou forme sans le co...

Page 15: ...Les banquettes charg es et les endroits sombres invitent les accidents Assurez vous d avoir un espace de travail environnant ad quat Ne pas faire fonctionner des outils lectriques dans une atmosph re...

Page 16: ...fiche d une prise loigner le cordon d alimentation des sources de chaleur de l huile des bords coupants ou des pi ces en mouvement Remplacer les cordons d alimentation endommag s imm diatement Les co...

Page 17: ...plus s curitaire la vitesse pour laquelle il a t con u Ne forcez pas l outil et ne vous servez pas de l outil dans un but autre que celui pour lequel il a t con u N utilisez pas l outil lectrique si l...

Page 18: ...mains afin de pouvoir bien r sister au d marrage du torque vitez les d marrages accidentels Assurez vous d tre pr t commencer le travail avant de brancher la ponceuse Ne jamais d poser l outil avant q...

Page 19: ...magn tiques dans un espace restreint peuvent causer de l interf rence ou un bris du stimulateur cardiaque De plus les personnes qui ont un stimulateur cardiaque devraient respecter ce qui suit viter d...

Page 20: ...terre assure un parcours s curitaire de faible r sistance pour le courant lectrique ce qui r duit les risques de choc lectrique Voir L IMAGE A La broche de mise la terre l int rieur de la fiche est r...

Page 21: ...ir L IMAGE C Lorsque vous utilisez plus d un cordon de rallonge pour longueur assurez vous que le calibre des fils des cordons convient l intensit du courant consomm par l outil Voir L IMAGE C Si vous...

Page 22: ...7 1 12 0 18 14 12 10 12 1 16 0 14 12 10 16 1 20 0 12 10 L IMAGE C Bas sur limitant le volt du cordon baissez cinq volts 150 de l intensit nominale SYMBOLES Construction de Classe 2 Association Canadie...

Page 23: ...syst me de collection de poussi re boyau et syst me non inclus Le conduit de poussi re 0 fonctionnera seulement si le papier sabl a des trous qui s alignent avec les 6 trous de collection de poussi r...

Page 24: ...tions d crites la page 2 de ce manuel brancher la ponceuse Mettre la ponceuse en marche en actionnant l interrupteur 2 Toujours faire fonctionner la ponceuse pour quelques secondes avant de la mettre...

Page 25: ...u Bo tier 2 Interrupteur 3 Ressort brosse carbone 4 Brosse carbone 5 Coussinet de socle 6 Carte de circuit 7 Cordon lectrique 8 Protecteur de cordon 9 Support de cordon lectrique 10 Vis 11 Collerette...

Page 26: ...estions techniques veuillez appeler au 1 800 444 3353 SCH MA D ASSEMBLAGE NOTEZ Quelques pi ces sont num r es et montr es pour les buts d illustration seule ment et ne sont pas en vente individuelleme...

Page 27: ...e 14 SKU 42864 Pour des questions techniques veuillez appeler au 1 800 444 3353 3491 Mission Oaks Blvd PO Box 6009 Camarillo CA 93011 800 444 3353 D f rez au texte anglais pour l explication de garant...

Reviews: