SKU 66745
For technical questions, please call 1-800-444-3353.
Page 13
Operating instructiOns
read the entire impOrtant
saFety inFOrmatiOn
section at the beginning of this
manual including all text under
subheadings therein before set
up or use of this product.
tool set up
Prior to using the Sprayer the first
1.
time:
It is necessary to thoroughly flush
•
the unit’s system with warm, soapy
water prior to its first use.
Hydraulic oil is used by the factory
for testing and protection during
shipment.
Remove the Spray Tip from the
•
Spray Gun by turning the Nut be-
hind the Spray Tip assembly coun-
terclockwise.
Place the Return Tube (43A) and
•
Siphon Hose (50A) in a container of
warm, soapy water.
Turn on the Sprayer and turn the
•
Pressure Adjust Knob (69A) to its
vertical position. In a few seconds,
water will begin to flow up through
the Siphon Hose and flow out from
the Return Tube.
Turn the Pressure Adjust Knob and
•
Prime/Spray Knob (39A) clockwise.
When pressure reaches about
•
2,800 PSI (207 Bar), check to make
sure there are no loose connections
or leaks in the system. If so, shut
down the unit and tighten all con-
nections. Then restart.
Warning!
•
Never attempt to stop
or deflect leaks in the system with
your hands, body, gloves, rags, etc.
If there are no leaks in the system,
•
squeeze the Trigger and continue
spraying until no water comes out of
the Spray Gun.
Turn off the power, and continue
•
spraying to remove any remaining
water from the system.
Engage the Trigger Safety Lock
•
(18B). Then turn the Pressure
Adjust Knob to its “OFF” position.
Dump soapy water from the contain-
•
er. Fill it with fresh water and repeat
above mentioned steps until clean
water comes out of the siphon hose.
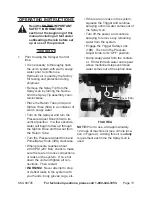
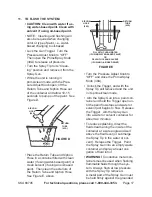
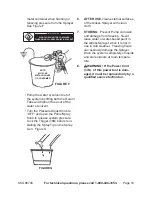
Oiling hole
nOte:
Prior to use, add approximately
12 drops of machine oil (see oil hole loca-
tion in Figure A). Adding this oil is a
daily
requirement each time the Spray Gun is
used.
Figure a
Cover (58A)


