

SKU 66745
For technical questions, please call 1-800-444-3353.
Page 16
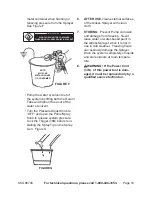
tO clean the spray tip:
2.
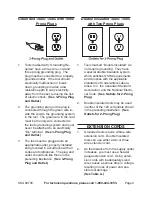
When Spray Tip clogs, rotate the
Spray Gun 180° to the “Clean” posi-
tion. Pull the Trigger (16B) and spray
to clear any blockage. Rotate the
Tip back to the “Spray” position and
continue spraying. If the clogging
continues, clean or replace the Spray
Gun Filter (10B).
impOrtant:
Do
not use a needle or sharp object to
clean the Tip, as damage to the Tip
may result.
tO clean spray gun Filter:
3.
Unscrew the Spray Gun Handle (14B)
from the Gun Body to access the Fil-
ter (10B). Remove the Filter and use
brush (not included) to clean with wa-
ter (if used with water-based paint) or
solvent (if used with oil-based paint).
Inspect Filter for pinholes, clogging,
or other damage. Replace if neces-
sary. Reinstall the Filter. Then screw
the Spray Gun Handle back into the
Gun Body.
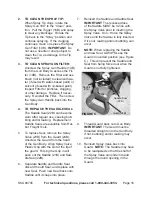
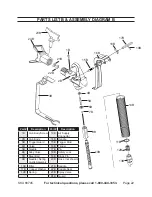
tO replace the saddle seal:
4.
The Saddle Seal (22B) can become
worn after regular use, causing bub-
bling and/or leaking. Replacement
Saddle Seals are available from Har-
bor Freight Tools.
To replace Seal, remove the Spray
5.
Valve (23B) from the Guard (24B).
Unscrew the Guard from the head
of the Gun Body. Align Spray Valve
Plastic Grip with the slot at the tip of
the guard. Forcing the Grip in will
push out the Saddle (21B) and Sad-
dle Seal (22B).
Separate Saddle and Saddle Seal,
6.
discard the old Seal, and replace with
new Seal. Push new Seal back onto
Saddle until it snaps into place.
Reinsert the Saddle and Saddle Seal.
7.
impOrtant:
The recessed face
of the Saddle MUST be in-line with
the Spray Valve prior to inserting the
Spray Valve. Do not force the Spray
Valve until the Saddle is fully inserted.
If it’s not, leaking and/or bubbling can
occur
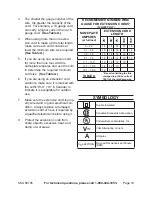
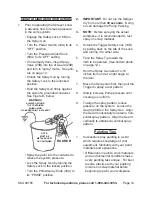
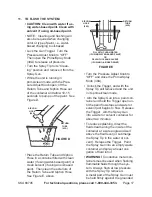
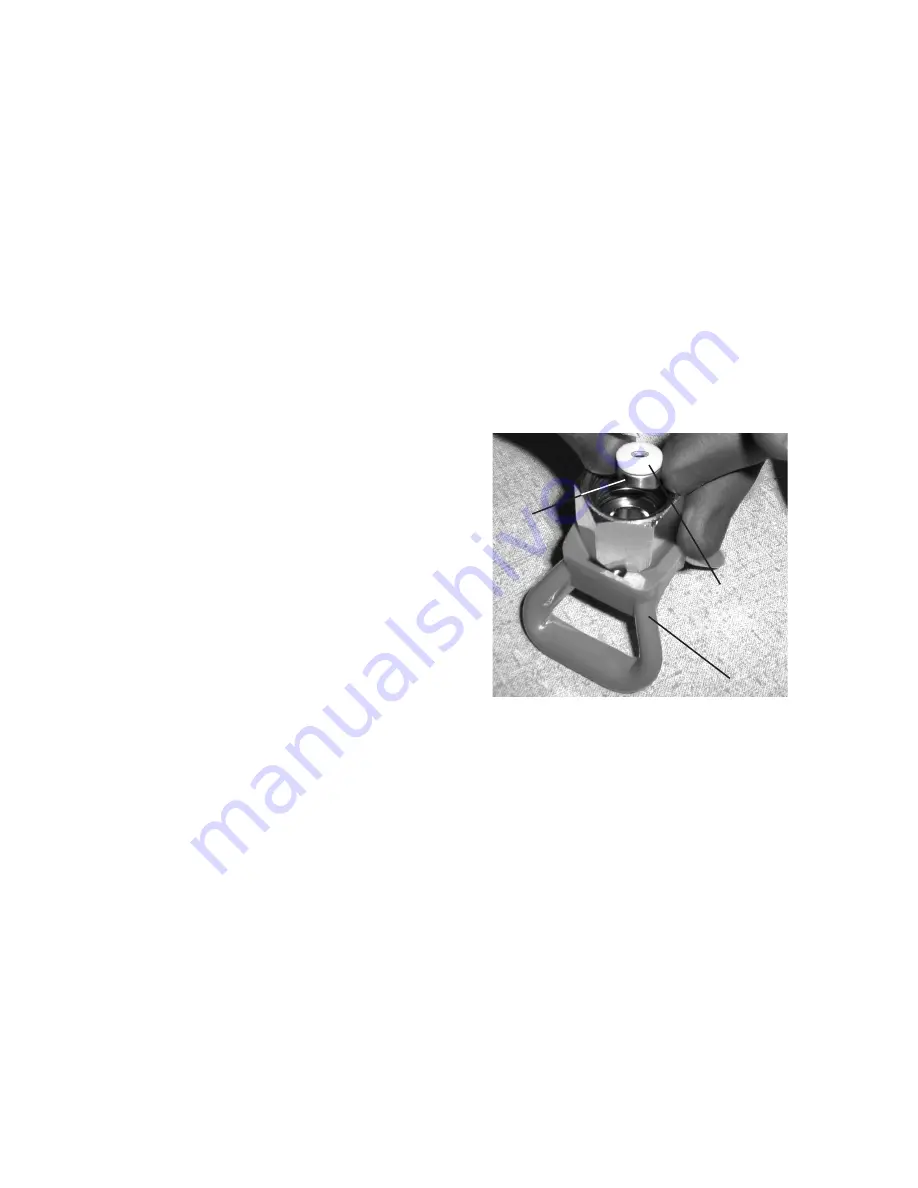
nOte:
8.
When replacing the Saddle
and new Seal, ALWAYS keep the
Guard in inverted position (see Figure
C.) This will prevent the Saddle and
Seal from being forced out when the
Guard is not fully tightened.
Thread Guard back onto Gun Body.
9.
impOrtant:
The Guard must be
threaded straight onto the Gun Body.
If not, bubbling and/or leaking may
occur.
Reinsert Spray Valve back into
10.
Guard.
nOte:
The Saddle may have
to be readjusted so that the shaft of
the Spray Valve can slide into and
through the round opening in the
Guard.
Figure c
Guard (24B)
Saddle Seal
(22B)
Saddle
(21B)


