Page 11
For technical questions, please call 1-888-866-5797.
Item 69343
Sa
Fety
Opera
ti
O
n
Maintenance
Setup
General Operating instructions
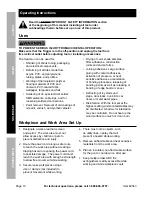
1� Plug the Power Cord of the tool into a 120
volt, grounded, electrical outlet�
2� Allow the Heat Gun one minute to
build up to the desired heat level�
WarninG! to prevent serious injury
do not leave the Heat Gun unattended
while pointed at surfaces or objects.
WarninG! Do not touch work area with
the Heat Gun; it could scorch or ignite.
3� The Power Button has three stages� Push
once for the low setting, push again for
the high setting, and push a third time to
turn OFF with the Automatic Cool Down
Stage� In the OFF setting the Heat
Gun will run for 80 seconds in the cool
down stage and then automatically turn
off� The green LED light is illuminated
when the gun is in the cooling function�
Green LeD
Lit during
cool Down
Stage
red LeD
Lit during
Low temp.
Settings
red LeD
Lit during
High temp.
Settings
Heat Level
indicator LeDs
Low
temps
High
temps
Buttons to adjust Heat
Settings up or Down
power
Button
Figure B
4� Choose the appropriate heat level for the
job and push the “
+
” or “
–
” to adjust the heat
settings� The LEDs will light up to indicate
the heat level�
# LEDs
1
2
3
4
5
6
Low Temp� 430° F 550° F 650° F 700° F 730° F 800° F
High Temp� 570° F 660° F 730° F 790° F 970° F 1160° F
5� Allow the Heat Gun one minute to build up to
the desired heat level�
WarninG!
To prevent personal injury or
property damage; do not leave the Heat
Gun unattended while pointed at surfaces or
objects�
cautiOn! Do not touch work area with the
Heat Gun; it could scorch or ignite.
6� To prevent accidents, turn off the
tool and unplug it after use� Allow
the Heat Gun to cool down on an
insulated, non‑flammable surface�
WarninG! Do not leave work area
until workpiece has cooled. Be alert
for indications of concealed fire.
7� Disconnect the power supply after
use� Clean, then store the tool
indoors out of children’s reach�


