SKU 98912
For technical questions, please call 1-800-444-3353.
Page 9
To Operate The Shear:
aLWaYS
wear
ANSI-approved
safety goggles and heavy duty work
gloves when operating the Shear.
IMPORTANT: Before first use, it is
1.
recommended to test the Shear on
scrap material to determine the cut-
ting capacity of the Blades
(up to
18 gauge steel or 20 gauge stain-
less steel)
. If the tool requires more
force to accomplish the task, a larger
Shear should be used.
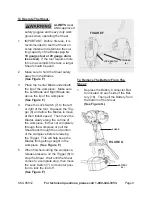
Make sure to hold the Shear safely
2.
away from the Blades.
(See Figure F.)
Place the Center Blade underneath
3.
the lip of the workpiece. Make sure
the Left Blade and Right Blade are
above the lip of the workpiece.
(See Figure F.)
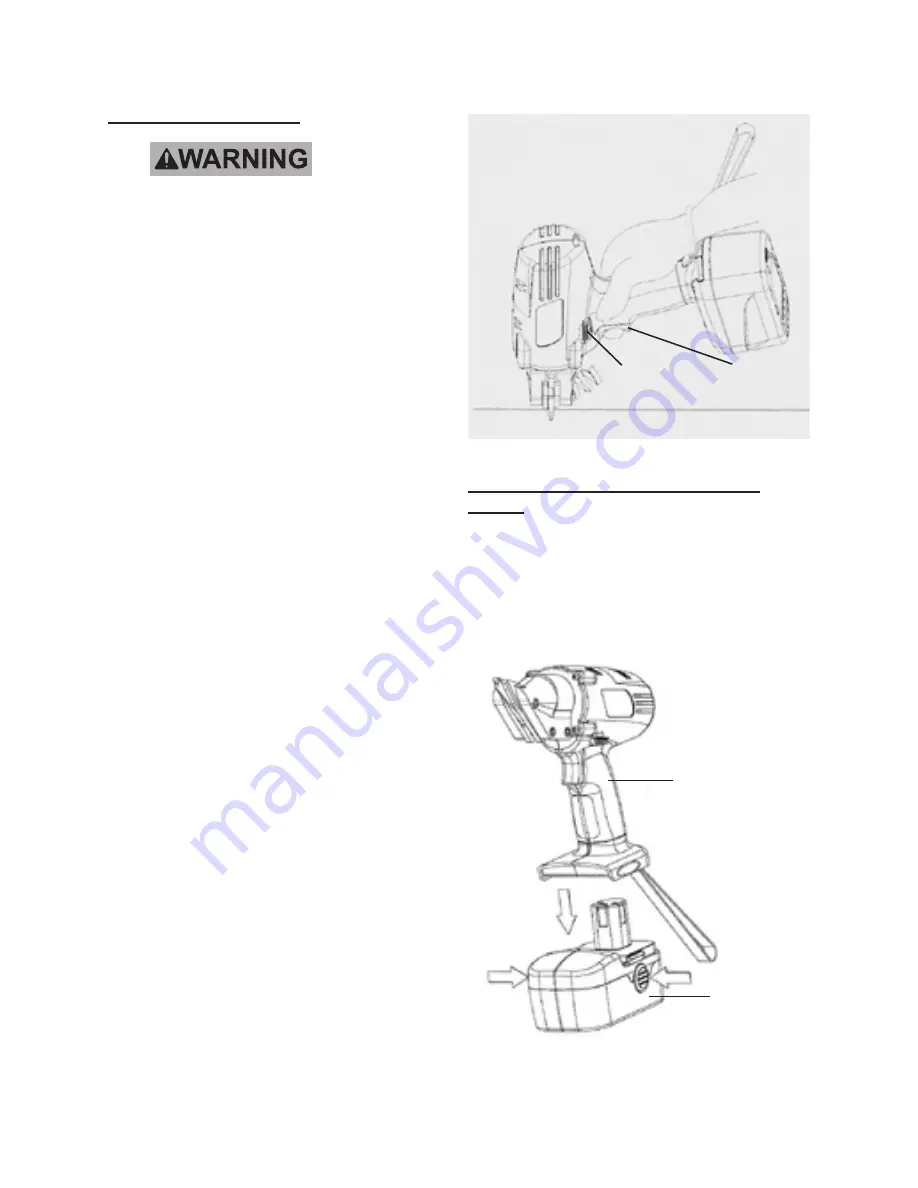
Press the Lock Switch (7) to the
4.
left
or
right
of the tool. Squeeze the Trig-
ger (8) and allow the Blades to move
at their fullest speed. Then move the
Blades slowly along the cut line of
the workpiece. Either cut completely
through the workpiece or pull the
Shear back through the cut portion
of the workpiece before releasing
the Trigger. This will help keep the
Blades from getting caught in the
workpiece.
(See Figure F.)
When finished cutting the workpiece,
5.
release pressure on the Trigger (8) to
stop the Shear. Wait until the Shear
comes to a complete stop, then move
the Lock Switch (7) to its
center
posi-
tion to lock the tool off.
(See Figure F.)
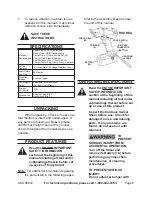
FiguRE F
TRiggER
(8)
LOCk SWiTCH
(7)
To Remove The Battery From The
Shear:
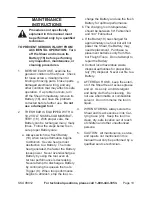
Depress the Battery Connector But-
1.
ton located on each side of the Bat-
tery (18). Then pull the Battery from
the bottom of the Shear.
(See Figure g.)
FiguRE g
SHEaR
BaTTERY
(18)


