background image

10

11

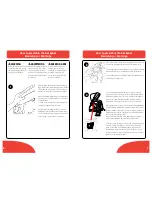
How to assemble the backpack

Ensamblaje • Montage

How to assemble the backpack

Ensamblaje • Montage

7. Fix the backrest to the joints of the 
backpack, inserting the support tubes, as 
shown in the diagram.

7. Fijar el respaldo en las articulaciones de 
la mochila colocando los tubos de soporte 
como indica la figura.

7. Fixer le dossier aux articulations du 
porte-bébé en enfilant les tubes de 
soutien comme indiqué dans la figure

7

8

8. Ensure the tubes are fitted correctly, 
checking that the locking springs are visible 
in the external holes, and pulling the back-
rest in an upward direction.

8. Asegurarse que los tubos queden per-
fectamente colocados, controlar que los 
resortes de bloqueo resulten visibles en los 
orificios externos y empujar hacia arriba el 
respaldo.

8. S’assurer que les tubes sont correctement 
fixes en contrôlant si les ressorts de blocage 
sont visibles dans les trous externes et en 
tirant le dossier vers le haut.


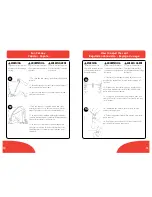
WARNING

The sun canopy cannot be 
removed, but it can be turned 
backwards completely. Before 
turning the sun canopy back-
wards, remove the supports 
of the second arch to free the 
canopy.


ADVERTENCIA

La capota no se puede 
quitar pero se puede recoger 
completamente hacia atrás. 
Quitar primero los soportes 
del segundo tensor dejando la 
capota libre.


MISE EN GARDE

La capote n’est pas détachable 
mais on peut la tirer complète-
ment vers l’arrière. Avant de la 
turer, détacher les soutiens du 
deuxième arceau pour libérer 
la capote.

9. Fix the supports of the sun canopy’s second small 
arch, as shown in the diagram.

9. Fijar los soportes del segundo tensor de la capota 
como indica la figura.

9. Fixer les soutiens du deuxième arceau de la capote 
comme indiqué dans la figure.

9

10

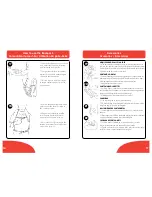
10. Hook the bag/belt bag included at the rear of the 
backpack, with the specific spring catches.

10. Colocar el bolso/riñonera (incluido) en la parte tra 
sera de la mochila con los enganches especiales.

10. Accrocher le sac/banane compris sur l’arrière du 
porte-bébé à l’aide des mousquetons prévus à cet effet

Summary of Contents for 04069503590070 - Smart Support Backpack Child Carrier

Page 1: ......

Page 2: ...oidinjurytoyourchild sfeet Donotusethebackpackifanycomponentsaremissing ordamaged Donotfitanyaccessories sparepartsorcomponentsnot suppliedorapprovedbythemanufacturertothebackpack Ifthebackpackisleftexposedtodirectsunlightforalong time allowittocoolbeforeplacingyourchildinit Prolonged exposuretodirectsunlightmaycausethefabrictofade Preventthebackpackfromcomingintocontactwithsalt water Itmaycauseth...

Page 3: ...sérieuses blessures ou même la mort Pour la sécurité de votre enfant lisez les étiquettes et le manuel d utilisation avant l utilisation du produit Si vous n avez pas le manuel d utilisation composez le 1 877 424 4226 États Unis pour en recevoir un Nodejenuncaalbebésinvigilanciaenelinteriorde estamochila Asegúresedequelamochilaestéabiertaycorrectamente bloqueadaantesdeacomodaralniñoensuinterior ut...

Page 4: ...orizontal position until a click is heard indicating that the frame is locked into position 2 Levantar el protector delantero en posición horizontal hasta escuchar el clic de bloqueo con la estructura 2 Lever l arceau en position horizontale jusqu au déclic de blocage à la structure 1 3 To ensure that the bumper bar is locked correctly into position check on both sides that the black part of the b...

Page 5: ... el montaje de la mochila 6 Nous conseillons de fermer la jambe quand on utilise le porte bébé en le portant sur les épaules Pousser la jambe jusqu à ce qu elle soit complètement fermée La jambe se bloque automatiquement en fin de course On peut maintenant achever le montage du portebébé 4 5 6 5 To open rear leg of the backpack pull the leg toward the rear of the backpack The leg will lock automat...

Page 6: ...dans les trous externes et en tirant le dossier vers le haut WARNING Thesuncanopycannotbe removed butitcanbeturned backwardscompletely Before turningthesuncanopyback wards removethesupports ofthesecondarchtofreethe canopy ADVERTENCIA Lacapotanosepuede quitarperosepuederecoger completamentehaciaatrás Quitarprimerolossoportes delsegundotensordejandola capotalibre MISE EN GARDE Lacapoten estpasdétach...

Page 7: ... The sun canopy is supplied with a rain cover Attach the rain cover to the sun canopy with the zipper The rain cover has side ventilation holes 12 La capota tiene también un impermeable que se aplica mediante una cremallera El impermeabile tiene orificios laterales de aireación 12 La capote est fournie avec un habillage pluie à fixer sur la capote à l aide de la fermeture éclair L habillage pluie ...

Page 8: ...del bebé 15 Le porte bébé est muni d un mini réducteur interne qui permet le plus grand confort au bébé The backpack has a 5 point safety harness which should be adjusted to fit the child securely shoulder straps lap belt and crotch strap 16 Place the child into the backpack and secure child with the safety harness The height of the safety harness can be adjusted to two positions La mochila tiene ...

Page 9: ...19 Leporte bébéestminid unporte mobile lunettesàaccrocher auxépaulières ouvrirlabandesurlesépaulières droiteougauche au choix puisl enfilersurl arrièreduporte téléphone 20 Fixerlabandeàl aideduvelcroprévuàceteffet CARRYBAG 21 Thecarrybagcanbeusedasawaistbeltbag 22 Tohookthebagtothebackpack foldandfastenthestrapsatthe rearofthebag asshowninthediagram BOLSO RIÑONERAPORTAOBJETOS 21 Lamochilatieneunbo...

Page 10: ...sition sur le produit Nettoyer périodiquement les parties en plastique avec un chiffon hu mide Sécher les parties en métal pour éviter la formation de rouille Contrôler périodiquement l état des coutures des épaulières et du siège Cleaning Consejos para el mantenimiento Conseils pour l entretien Ifyouhaveanyquestionsorcommentsaboutthisproduct oraremissinganyof theparts pleasecontactusinoneofthefol...

Page 11: ...www chiccousa com COMO ITALY 6 36 ...

Reviews: