Installation Instructions
Model: K-Series
11
8.
Using 5/32" hex key, install screw (110) and nut (120)
on each end of the array (10) to prevent displays from
accidently sliding off (See Figure 17).
Figure 17: Install End Locks
9.
Proceed to "CABLE MANAGEMENT."
MULTI-DUAL ARM ASSEMBLY
(KCY-210/-220 and FGL-220 ONLY)
BASIC ASSEMBLY
1.
Verify that you have the following parts:
2.
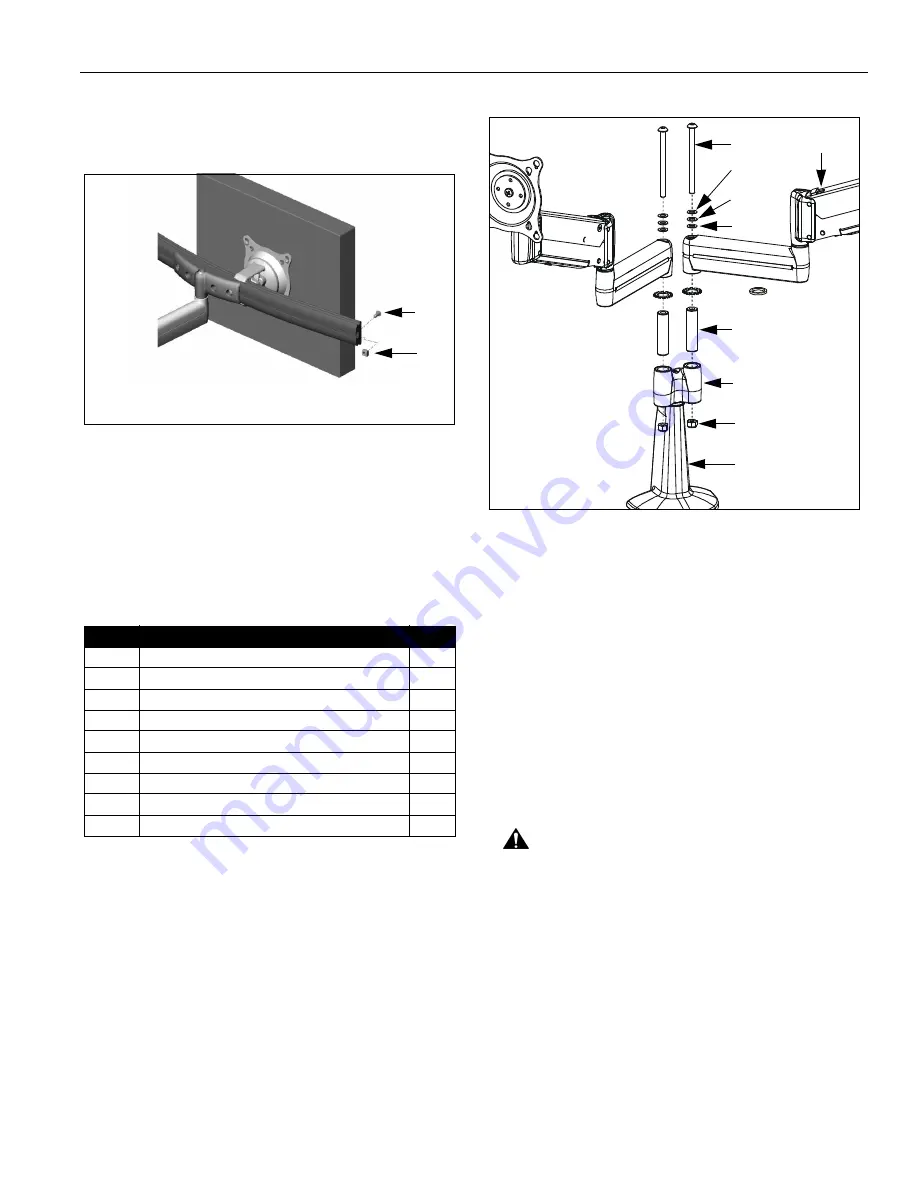
Insert pin (60) into Y-connector upper bore in mount
(20) (See Figure 18).
Figure 18: Multi-Dual Arm Assembly
3.
Install spacer (70) or washer (80), as desired, on pin
(60) (See Figure 18).
NOTE:
Spacer (70) will allow limited movement of arm
assembly (10) relative to Y-connector, dependent
upon tension of screw (30). Washer (80) will lock
arm assembly (10) to Y-connector. See
"ADJUSTMENT" for detail.
4.
Insert arm assembly (10) on pin (60) (See Figure 18).
5.
While holding nut (90) in lower bore of Y-connector,
insert screw (30) through washer (50), washer (40),
washer (50), arm assembly (10), and Y-connector,
into nut (90) (See Figure 18). Loosely install screw
(30) using 3/16" hex key.
CAUTION:
Improper positioning of arm assembly (10)
may result in failure of mount and subsequent damage
to displays. Do NOT position either arm assembly (10)
in gray shaded area.
6.
Position arm assembly (10) within UNSHADED area
as shown (See Figure 19). Using 3/16" hex key,
tighten screw (30) as required to maintain position.
Item
Description
Qty
10
ARM ASSEMBLY, K-Series
2
20
MOUNT, Desk, K-Series
1
30
SCREW, Button Head Cap, 5/16"-18 x 4"
2
40
WASHER, 5/16", UHMW (plastic)
2
50
WASHER, 5/16", Stainless Steel
4
60
PIN
2
70
SPACER, UHMW (plastic)
2
80
WASHER, Lock, External Tooth, 5/8"
4
90
NUT, Nylock, 5/16"-18
2
110
120
NOTE: Left side shown; right side similar
10
30
50
40
50
80 or
70
60
Y-connector
20
NOTE: KCY-220
shown; KCY-210
similar.
NOTE: All parts
same for both sides.
90


