PAC-252
Installation Instructions
6
3.
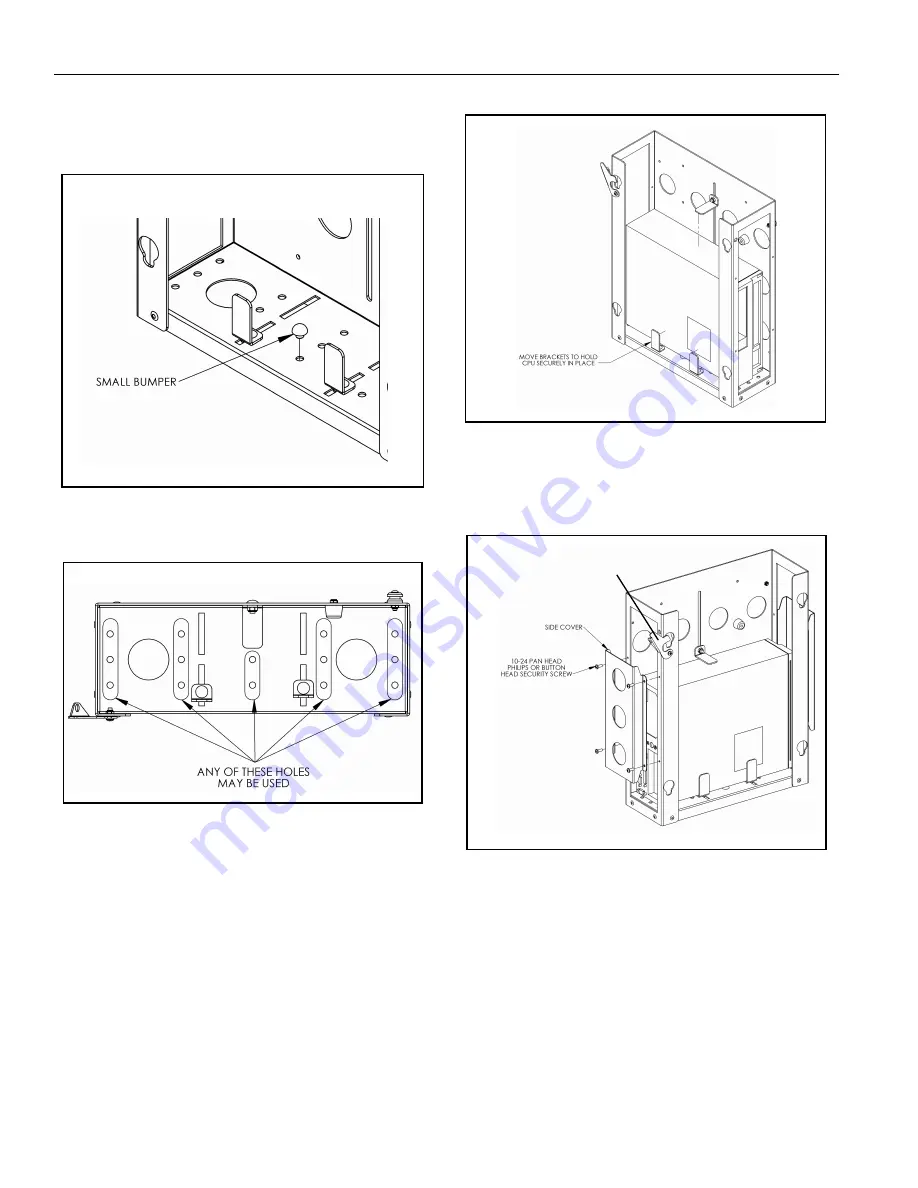
Attach small bumpers (C), making sure the CPU will rest
against the bumpers when installed. (See Figures 5 & 6)
Figure 5
Figure 6
4.
Turn adapter on its end. (See Figure 7)
5.
If necessary, slide brackets out of the way before installing
the CPU inside adapter.
6.
Install the CPU Inside adapter.
7.
Adjust side brackets until they firmly press against sides
and top of CPU.
8.
while pressing brackets against CPU, tighten all Nylock
nuts. The CPU should now be completely rigid inside of
adapter.
Figure 7
9.
Using 10-24 pan head Phillips or button head security
screws (I or H), secure side covers. (See Figure 8)
Figure 8
10. Lift Interface Adapter (A) up to Chief Mount, aligning buttons
(E) of adapter with slots in the Chief Mount. Make sure the
tear drop slots of Interface Adapter (A) face down
replicating those of the Chief Mount.
11. Raise safety latch on Chief Mount to secure Display, making
sure latch is completely engaged.
12. With the aid of another person, lift Large Flat Panel Display
up to the PAC-252 CPU Interface Adapter (A), aligning
buttons of mounting brackets with slots in adapter.
13. Raise safety latch on PAC-252 to secure Display, making
sure latch is completely engaged.
Safety latch


