PACLR2
Installation Instructions
6
Adjust Speaker Rails for Display Width
1.
Turn display over and place on a clean dry surface.
2.
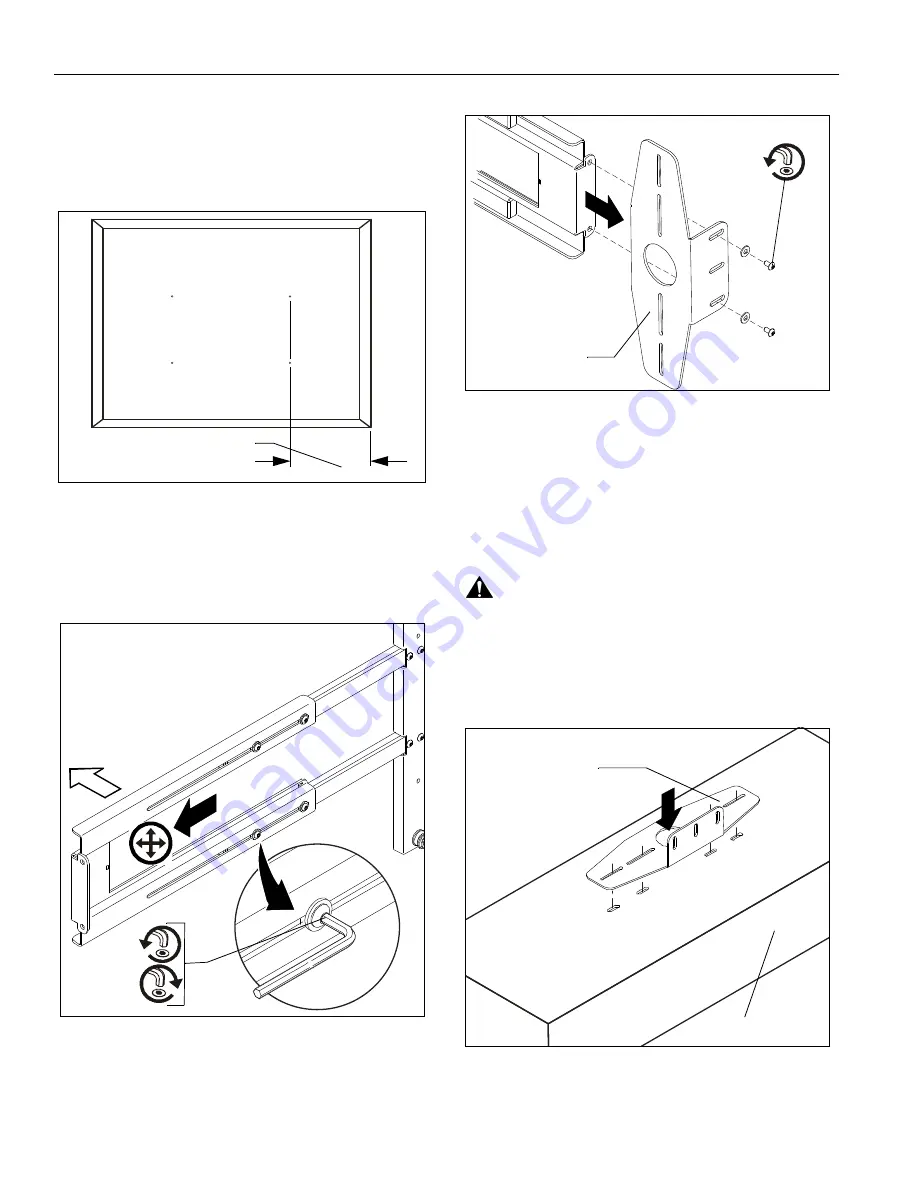
Measure the distance from the vertical center line of
mounting holes in display to the outermost edge of the
display.
Figure 4
3.
Loosen eight button head cap screws and slide speaker
rails outward until required distance between speakers is
obtained. (See Figure 5)
4.
Tighten eight button head cap screws.
Figure 5
1.
Remove speaker mounting brackets from speaker
mounting rails by removing four button head cap screws
and four washers. (See Figure 6)
2.
Set hardware aside for reuse.
Figure 6
IMPORTANT ! :
If orientation of speaker mounting bracket
has changed as a result of speaker rail adjustment verify proper
orientation of bracket with speaker before continuing.
3.
Install left and right speaker mounting brackets to speakers
using the installation instructions provided with the
speakers and the dimensional drawing below. (See Figure
7 and Figure 8)
WARNING:
IMPROPER INSTALLATION CAN LEAD TO
SPEAKERS FALLING RESULTING IN SEVERE PERSONAL
INJURY OR DAMAGE TO EQUIPMENT. Always consult with
the speaker manufacturer before drilling into speakers or
installing in a manner inconsistent with the instructions
provided with the speakers.
Figure 7
Dimension from
Step 2
Front
X8
X4
Speaker Mounting
Bracket
(1each end)
Speaker Mounting
Bracket
(1 each end)
Speaker


