Installation Instructions
PLP Series
5
PLP INSTALLATION (Cont’d)
Mount the PLP
To mount the PLP, do the following:
1.
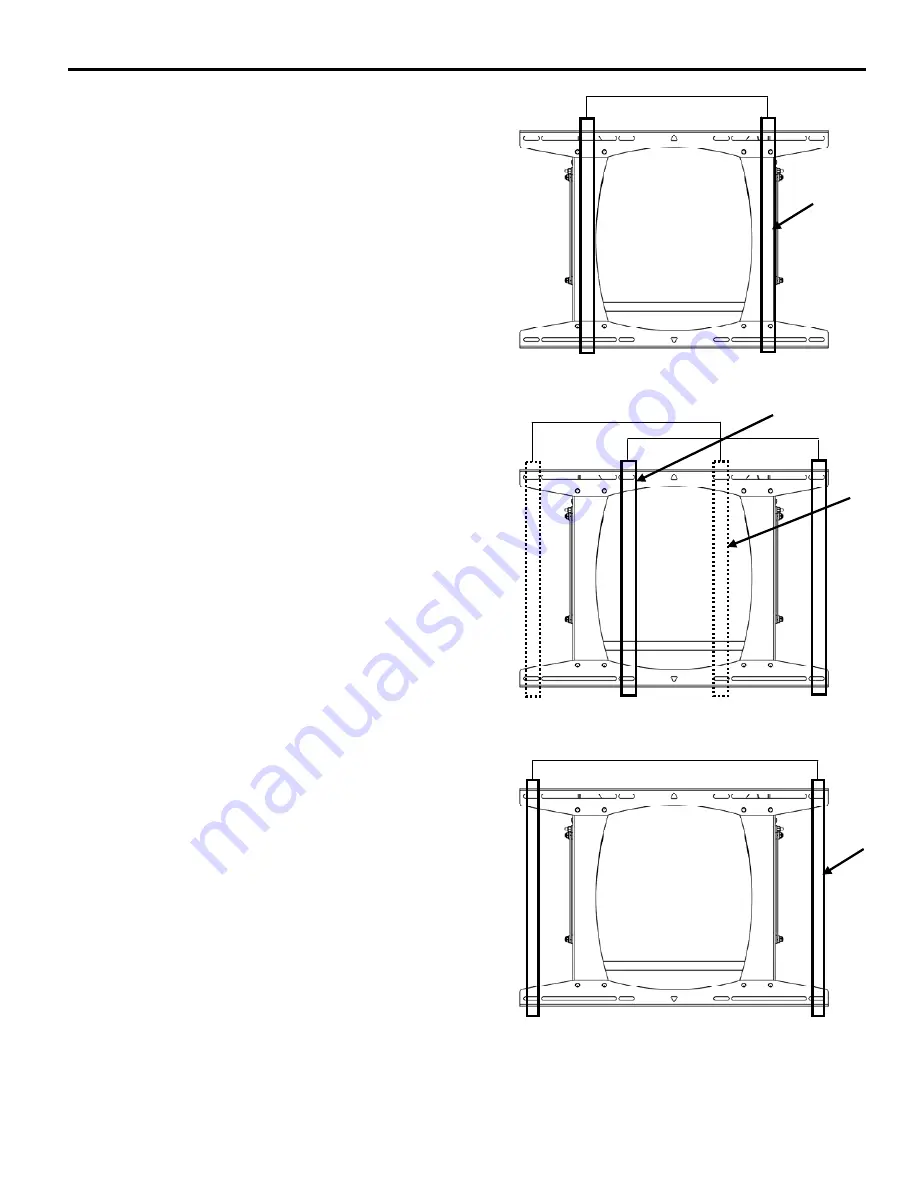
Holding the PLP against the wall, select the pair of
mounting holes that best suits your situation (see
Figures 5, 6, and 7).
NOTE:
The mounting holes are slotted to allow for a
small degree of lateral movement. The mount can
be centered, or shifted to the left of center, or
right of center depending on stud location.
NOTE: Lag bolts and washers are not supplied.
2.
Depending on your situation, install the lag bolts and
washers into the pilot holes previously drilled, as
described below.
•
Option A.
Install four 5/16” x 2 ½”
lag bolts and
four 5/16” washers (two top and two bottom) into
the mounting holes, centering the PLP on dual
wood studs 16” apart on center as shown in
Figure 5.
OR
•
Option B.
Install four 5/16” x 2 ½”
lag bolts and
four 5/16” washers (two top and two bottom) into
the mounting holes that are
right of center
on
dual wood studs 16” apart as shown in Figure 6.
OR
•
Option C.
Install four 5/16” x 2 ½” lag bolts and
four 5/16” washers (two top and two bottom) into
the mounting holes that are
left of center
on dual
wood studs 16” apart dual wood studs 16” apart
on center as shown in Figure 6.
OR
•
Option D.
Install four 5/16” x 2 ½” lag bolts and
four 5/16” washers (two top and two bottom) into
the mounting holes, centering the PLP on dual
wood studs 24” apart on center as shown in
Figure 7.
3.
Tighten all lag bolts.
Figure 5. Mounting Holes – 16” Apart on Center
(Option A)
Figure 6. Mounting Holes – 16" Apart on Center
(Options B and C)
Figure 7. Mounting Holes – 24" Apart On Center
(Option D)
Option B
Option C
Option A
Option D


