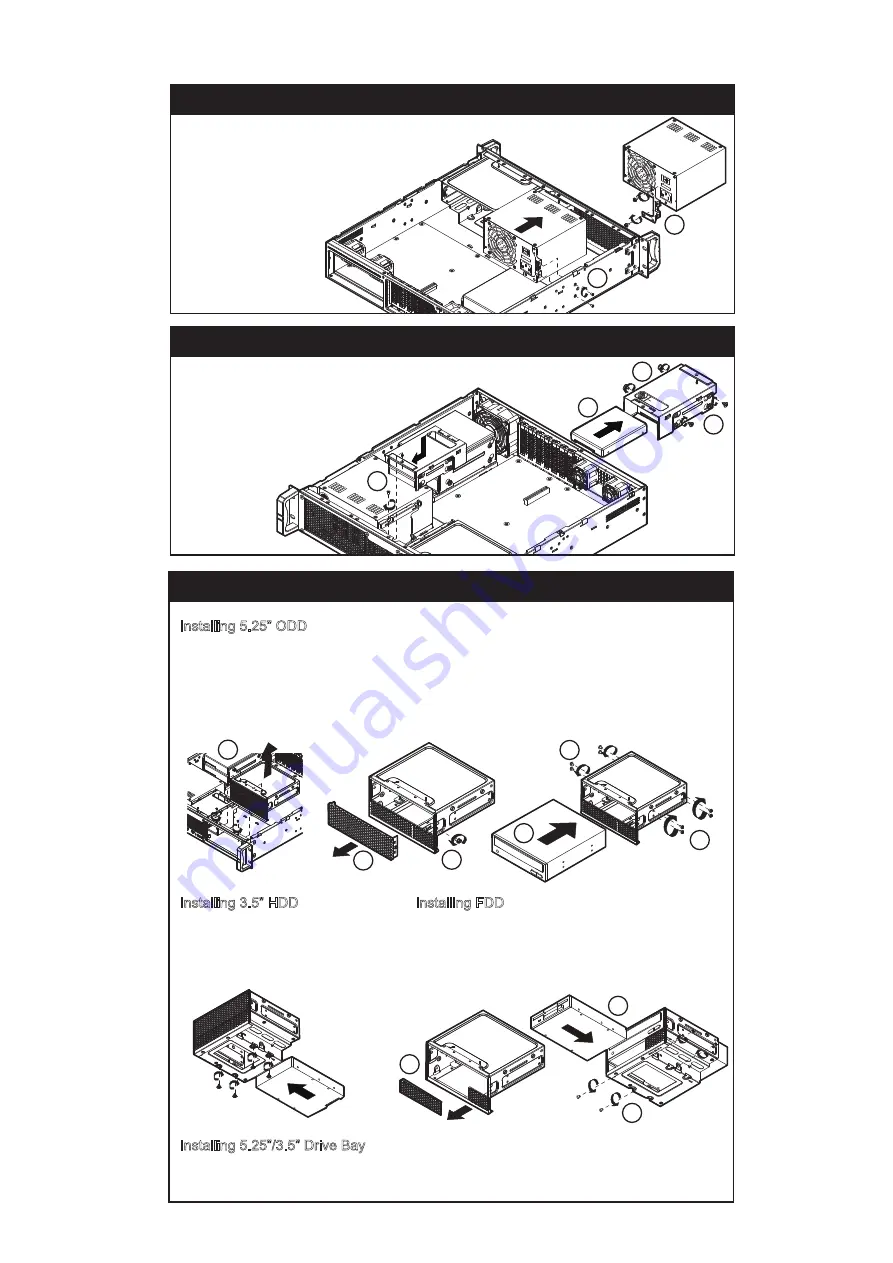
Installing Internal 2.5” SSD
Installing 5.25”/3.5” Drive Bay(with 3.5” HDD or FDD)
Installing PS/2 power supply
1
1
2
2
3
3
4
5
5
Installing 5.25” ODD
Installing 3.5” HDD
Installing 5.25”/3.5” Drive Bay
Installing FDD
1. Release two screws on top of the drive bay to take it out from the chassis
2. Release one screw at the right side of the drive bay
3. Take out the upper front cover
4. Slide the 5.25” ODD into the drive bay assembly
5. Use eight screws to fix on both left and right sides of the drive bay
Slide 3.5” HDD into drive bay ,
and use four quakeproof
screws to fix it at the
bottom of the drive bay
1. Remove the lower front cover of the drive bay
2. Slide FDD into drive bay
3. Use four screws to fix it on both left and
right sides of the drive bay
1. Slide the 5.25”/3.5” drive bay into the chassis
2. Use two screws to fix it on the chassis
- 03 -
1
1
2
2
2
3
1. Use two screws to fix bracket on the PSU
2. Slide the PSU assembly into the chassis,
and use two screws to fix it on the
left side of the chassis
1. Slide two internal 2.5” SSD into the bay
2. Use eight quakeproof screws to fix two
SSD on both left and right sides of
the bay
3. Slide the internal 2.5” SSD
assembly into the
chassis and use
one screw to
fix it on the
chassis


