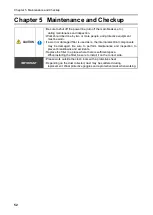
Chapter 5
Maintenance and Checkup
CMN209-004
53
E
ng
lis
h
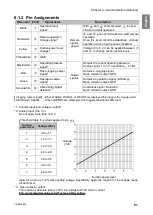
5.1
Replacing Filters
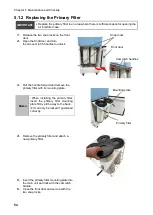
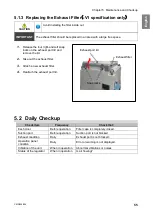
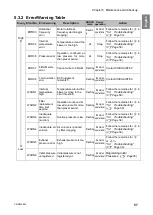
If clogging occurs, a “WARN2” warning appears. Replace the primary filter.
5.1.1
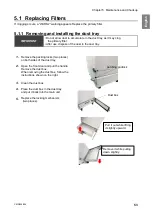
Removing and installing the dust tray
IMPORTANT
・
Do not allow dust to accumulate in the dust tray, as it may clog
the primary filter.
・
After use, dispose of the dust in the dust tray.
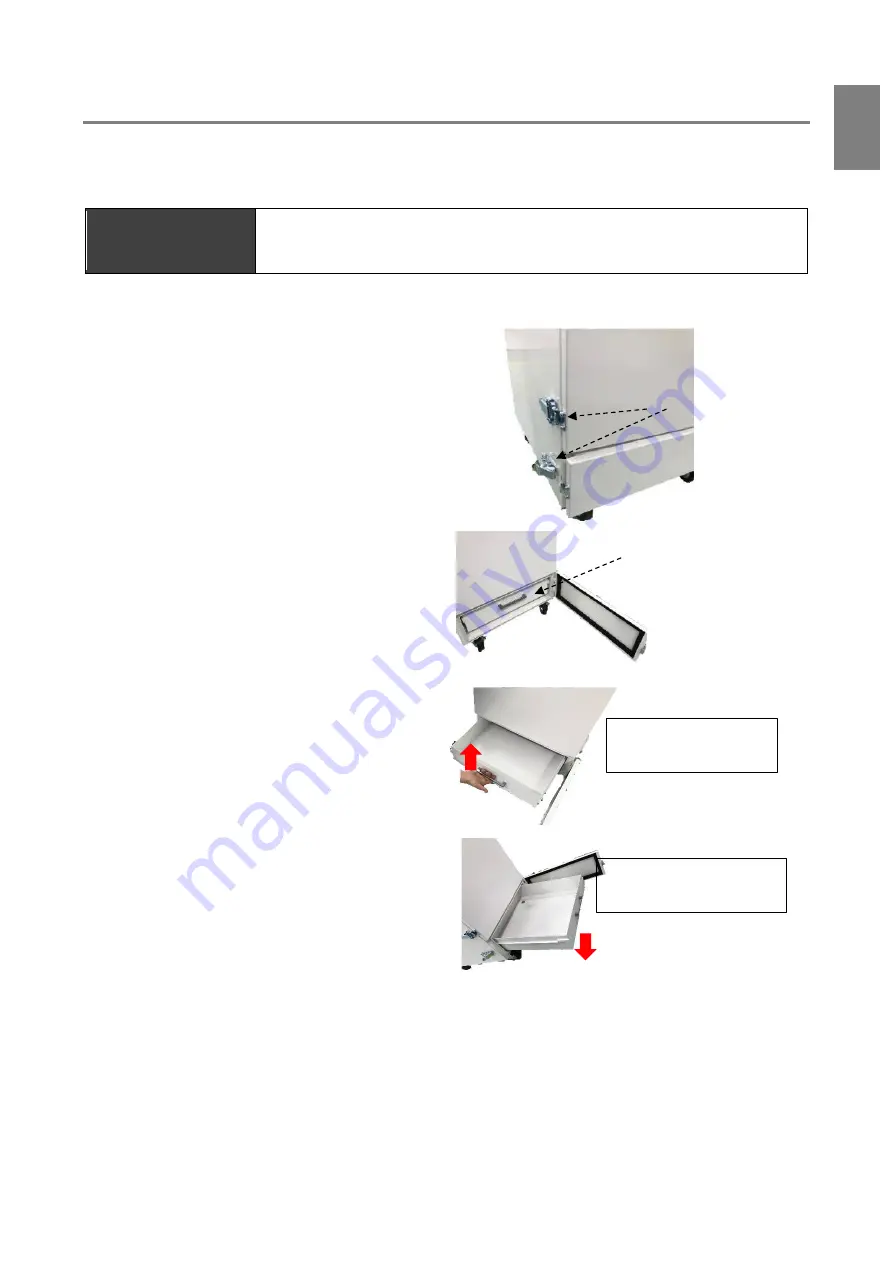
1.
Remove the packing locks (two places)
on both sides of the dust tray.
2.
Open the front door and pull the handle.
Remove the dust box.
When removing the dust box, follow the
instructions shown on the right.
3.
Clean the dust box.
4.
Place the dust box in the dust tray
and put it back into the main unit.
5.
Replace the locking mechanism
(two places).
patching padlock
Dust box
Pull it out while lifting
it slightly upward.
Remove it while pulling
down slightly.
Summary of Contents for CMP-2500AT3-A
Page 3: ......
Page 7: ...1 CMN209 006 3 1 1 1 1 2 10 60 80 1 3 0 40 80 100 1 000...
Page 8: ...1 4 1 4 2 OFF NV63 SVF 3P 30A 1 5...
Page 10: ...2 6 2 2 1 4 HEPA V1 1 1 1 1 AWG14 2 08...
Page 11: ...2 CMN209 006 7 2 2 2 2 1 CMP 2500 AT3 A V1 AT3 BOX HEPA V1...
Page 14: ...2 10 2 4 3 OP kPa SP kPa DP kPa EP kPa Blower Motor rpm Runtime h 17 Total h...
Page 15: ...3 CMN209 006 11 3 3 1 3 1 1 0 40 80 RH...
Page 16: ...3 12 3 1 2 200 230V 1 BOX 2 3...
Page 17: ...3 CMN209 006 13 1 2 8 3 2 1 RS485 ID 2 AT3 ON 3 4 1 7 3 ON OFF 3 30 ON OFF Ver ID...
Page 23: ...5 CMN209 006 19 5 OFF 2...
Page 24: ...5 20 5 1 WARN2 1 5 1 1 1 1 2 2 3 4 5 2...
Page 25: ...5 CMN209 006 21 5 1 2 1 1 1 2 2 2 3 4 1 5 6 2...
Page 26: ...5 22 5 1 3 V1 1 4 2 3 4 5 2 1 1 1 1...
Page 29: ...5 CMN209 006 25 5 4 EL 1 2 3 4 1 4 30 1 1 5 1 20 5 1 20 5 1 20 5 1 20...
Page 31: ...6 CMN209 006 27 1 5V 0 2V B C ON HIGH LOW OFF LOW HI Z LOW DC 1 2...
Page 35: ...7 CMN209 006 31 7 3 7 3 1 CMP 2500AT3 A...
Page 36: ...32 12 7 2 7 2 30...
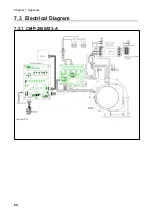
Page 68: ...Chapter 7 Appendix 64 7 3 Electrical Diagram 7 3 1 CMP 2500AT3 A Internal terminal...


