background image


ASSEMBLY / OPERATING INSTRUCTIONS

To operate Cradle Swing...

To operate Mobile Toy Arm...

To Fold...

1

2

1

1

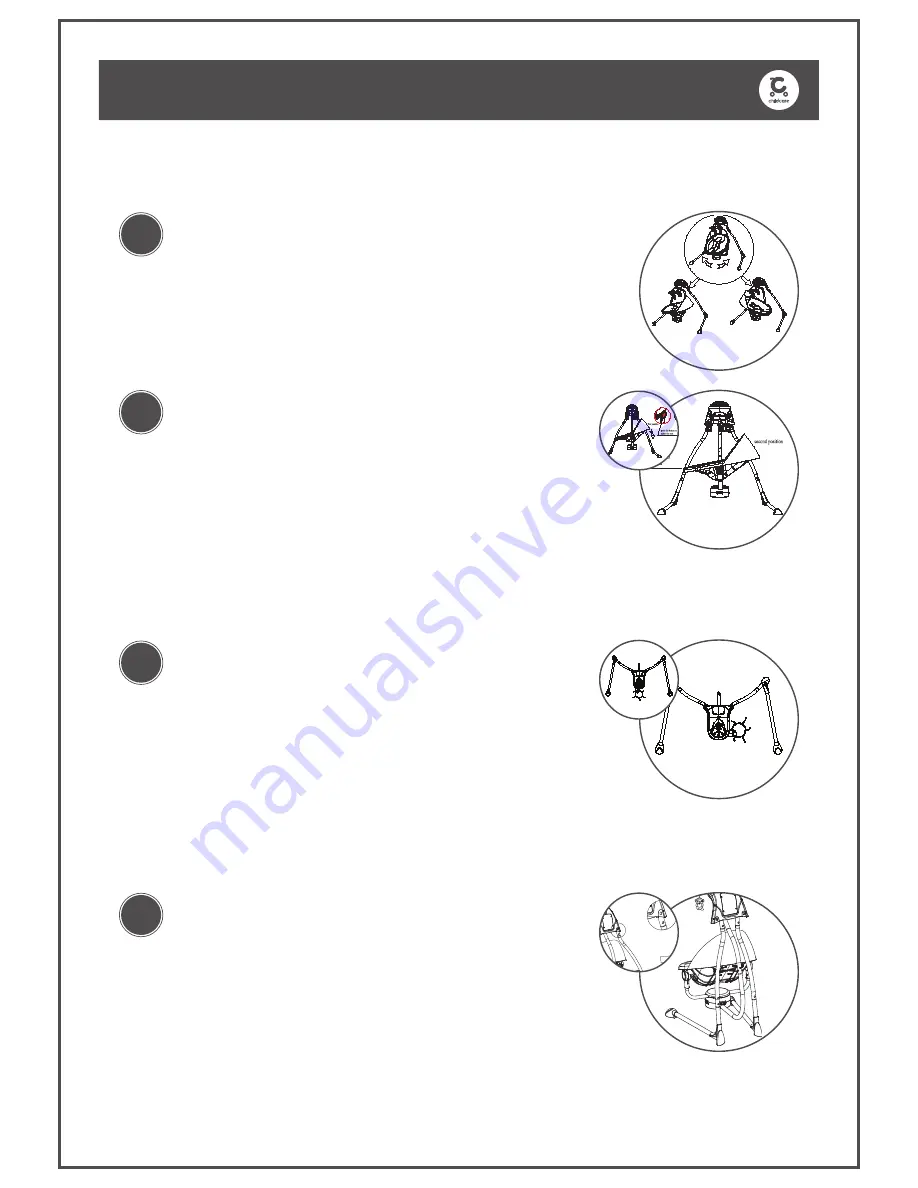
The seat direction can be adjusted in three angles: 

please revolve the seat to the left or right totally three 

angles according to the arrowheads marked in the 

diagram.

The seat backrest can be adjusted into two 

positions by pushing on both buttons located on 

the sides of the seat simultaneously
Release button at the desired location.

The toy mobile arm can be revolved to it’s side as 

shown in the diagram. 

Press the spring pin to fold the two supporting legs. 

1a.

2a.

2b.

1a.

1a.

Summary of Contents for 037696-333

Page 1: ...IMPORTANT RETAIN FOR FUTURE REFERENCE READ CAREFULLY My Little Cloud CradleSwing Model 037696 333...

Page 2: ...ssembly and use of the cradle swing Keep instructions for future use BEFOREASSEMBLINGTHIS CRADLE SWING READAND UNDERSTANDTHE INSTRUCTIONS Never leave the child unattended Never use this product on an...

Page 3: ...otice as a result of our ongoing policy of product improvement Contents Assembly contents list Assembly Operating instructions How to care for your My Little Cloud Cradle Swing Congratulations on your...

Page 4: ...is missing please contact Customer Service InAustralia contactCNPBrandson1300667137 inNewZealand contact Wainhouse Distribution on 0800 567 5000 Supplied loose in box Main module withToy arm Right leg...

Page 5: ...plied loose in box continued There are no accessories recommended for use with this Childcare Cradle Swing Lower boom tube x 1 x 2 x 1 x 4 x 1 Screw 1 lower boom tube Screw 3 upper tube Screw 2 lower...

Page 6: ...support frame as shown in image Ensure the corresponding letters that are displayed on the sides of the frame match up and ensure the pop pins click allowing the pop ins to engage securely Insert left...

Page 7: ...that you hear a click allowing the pop pins to engage securely Then use 1x screw 3 to lock the tubes together as a secondary locking device Place the infant in the seat as show in the diagram Insert...

Page 8: ...echargeable nickle cadmium batteries Adult supervision is required when charging rechargeable batteries Always remove flat or exhausted batteries from the toy Do not short circuit the supply terminals...

Page 9: ...Function There are three time settings available Press the button once and the eight minute light indicator will illuminate Press the button for the second time and two lamps will illuminate for fifte...

Page 10: ...e The adapter and the batteries cannot be used at the same time WARNING 6 7 Water sound button The water sound will start once you press the button press again to stop Toy mobile control button The to...

Page 11: ...r right totally three angles according to the arrowheads marked in the diagram The seat backrest can be adjusted into two positions by pushing on both buttons located on the sides of the seat simultan...

Page 12: ...sure power is in the on position at power point No response when starting up Check on battery polarity ensure that the battery is inserted correctly to avoid damage to the battery and motor head Power...

Page 13: ...ack tray Wipe clean with a damp cloth and mild soap Air dry Do not immerse in water Storage Always store product in a clean and dry place Remove batteries prior to placing unit in storage to prevent b...

Page 14: ...ce 1300 667 137 W www cnpbrands com au E info cnpbrands com au F www facebook com CNPBrands I cnp_baby Distributed in New Zealand by Wainhouse Distribution 2 6 Argyle St Morningside PO Box 41 014 St L...

Reviews: