background image

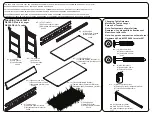
The following tools and parts are required:

Outils et pièces nécessaires:

Se necesitan las siguientes herramientas y piezas:

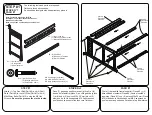
STEP #4

ÉTAPE N°4

PASO #4

Note: Fasteners are shown full size

Remarque: Les dispositifs de fixation sont

Montrés en taille réelle

Nota: Los pernos se muestran en tamaño real

STEP #4

ÉTAPE No4

PASO #4

From Step 3

Après l’Etape 3

Del Paso 3

M4 Hex Wrench (Provided)

M4 Clé À Six Pans (Fournie)

M4 Llave Hexagonal (se Incluye)

Part #3

Pièce No3

Pieza #3

Part #11

Pièce No11

Pieza #11

Part #11

Pièce No11

Pieza #11

#11 - (4) M6 x 55mm Bolt

(4) Boulons M6 x 55mm
(4) Pernos M6 x 55mm

#12 - (4) M6 x 13mm Barrel Nut

(4) Écrous à Portée Cylindrique M6x13mm

(4) Tuerca Cilíndrica M6x13mm

Part #12

Pièce No12

Pieza #12

Part #12

Pièce No12

Pieza #12

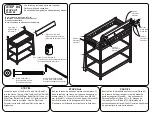
Insert the tenon of the Back Curved Rail (Part #3) 

into the slot on the top of the Top Back Rail (Part #4).  

Attach using (4) M6x55mm Bolts (Part #11) and (4) 

M6x17mm Barrel Nuts (Part #12). Tighten with the 

M4 Allen Wrench provided. Use the Flat Head 

Screwdriver to hold the Barrel Nut in the proper 

alignment. 

Insérez le tenon du panneau arrière courbé (pièce 3) 

dans la fente qui se trouve sur le panneau supérieur 

arrière (pièce 4).  Fixer à l'aide (4) boulons M6 x 55 

mm (pièce #11) et deux (4) écrous de baril (pièce #12). 

Serrer à l'aide de la clé hexagonale M4 fournie. 

S'assurer que l'étiquette est orientée vers l'intérieur. 

Inserte el de la barandilla posterior curva (Pieza #3) 

en la ranura de la parte superior de la barandilla 

posterior superior (Pieza #4).  Una utilizando (4) 

Pernos M6x55mm (Pieza #11) y (4) Mangos de 

Tuerca M6x17mm (Pieza #12)..Aprietetodos los 

pernosutilizando la Llave Allen M4 incluida.Asegúrese 

de que la etiqueta mire haciaadentro.

#3 -  (1) Back Curved Rail 

(1) Panneau arrière courbé 

(1) Barandilla posterior curva

Summary of Contents for Simmons Kids SlumberTime Little Folks 080213030124

Page 1: ...rved Trademark is a registered trademark of Children s Products LLC New York NY Lisez toutes les instructions avant l assemblage et l utilisation CONSERVEZ LES INSTRUCTIONS POUR R F RENCE ULT RIEURE L...

Page 2: ...d utiliser la table langer Conserver ces instructions dans un endroit s r pour r f rence ult rieure Inspecter r guli rement la table langer Ne pas l utiliser si elle est endommag e ou bris e Serrer t...

Page 3: ...rasive pour eviter d endommager les finitions REMARQUES SUR LE SOIN ET L ENTRETIEN Ne pas rayer ou ebrecher la finition Examinez de pres le produit regulierement contactez Simmons Kids Furniture pour...

Page 4: ...1 Tablette paisse Sup rieure 1 Estante Grueso Parte Superior 23954 8 2 Thin Shelf Middle Bottom 2 Tablette Mince Centrale et Inf rieure 2 Estante Delgado Parte Media y Inferior 23955 9 1 Changing Pad...

Page 5: ...Pans Fournie M4 Llave Hexagonal se Incluye Part 6 Pi ce No6 Pieza 6 Part 6 Pi ce No6 Pieza 6 Part 1 Pi ce No1 Pieza 1 Part 10 Pi ce No10 Pieza 10 1 1 Left Side 1 C t gauche 1 Lado izquierdo 6 4 Shelf...

Page 6: ...l and Top Back Rail into the groove on the Left Side Slide 2 Thin Shelves Part 8 in the grooves on the Shelf Rails into the grooves on the Left Side as shown Placez le c t gauche au sol en orientant l...

Page 7: ...ng the M4 Hex Wrench as shown From Step 2 Apr s l Etape 2 Del Paso 2 Part 2 Pi ce No2 Pieza 2 10 5 M6 x 35mm Bolt 5 Boulons M6 x 35mm 5 Pernos M6 x 35mm M4 Hex Wrench Provided M4 Cl Six Pans Fournie M...

Page 8: ...ved Rail Part 3 into the slot on the top of the Top Back Rail Part 4 Attach using 4 M6x55mm Bolts Part 11 and 4 M6x17mm Barrel Nuts Part 12 Tighten with the M4 Allen Wrench provided Use the Flat Head...

Page 9: ...de fixation sont Montr s en taille r elle Nota Los pernos se muestran en tama o real STEP 5 TAPE No5 PASO 5 Place the Changing Pad Part 9 onto the upper shelf From Step 4 Apr s l Etape 4 Del Paso 4 Pa...

Reviews: