Status: 12/2021 - Version 1.00
Page 3
Teach-in of the transmitters, thermal switches, magnetic switches, motion detectors, FB etc.
Item No. 23214
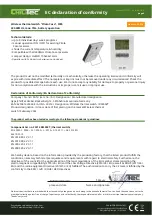
• First insert the battery into the respective transmitter with the correct polarity.
(See, for example, images) The battery compartments are located under the rocker switches (simply pull them off towards the
front) or, in the case of remote control / magnet and thermal switch, on the back under a flap.
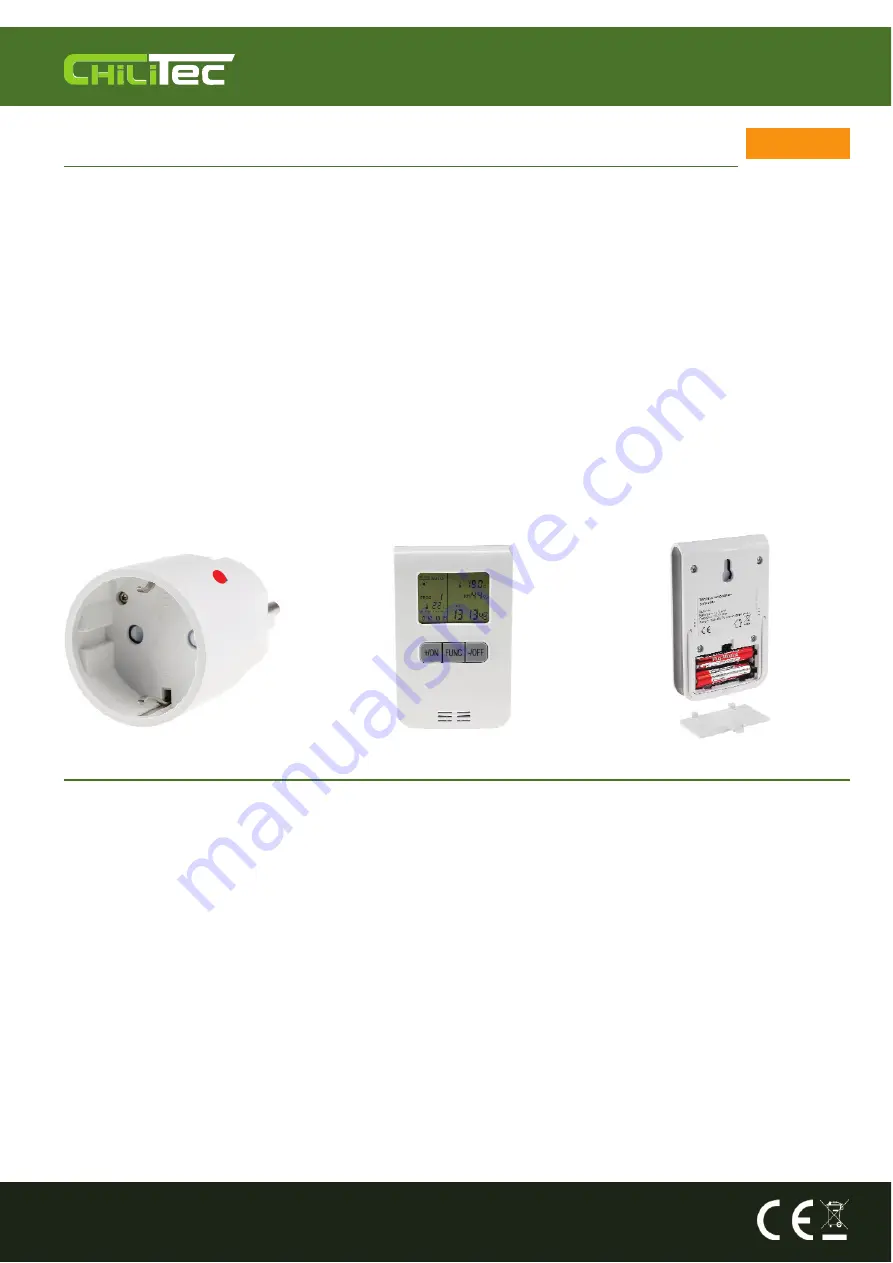
• Switch on the power for the receiver (or plug in the socket). After approx. 3 seconds the indicator LED (Fig. 2
red) starts to flash (only in the factory state automatically when plugged in for the first time!).
The flashing signals the registration mode. If the LED does NOT flash (approx. Every second) - Press and
hold the ON / OFF switch of the receiver (Fig. 2 red) for approx. 3 seconds.
• The indicator LED flashes for approx. 12 seconds. During this time, new switching components (up to 10
different transmitters for one receiver) can be trained.
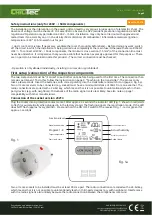
• During the 12 seconds in which the indicator LED is flashing, press the teach-in button (Fig. 3 ON button) on the
desired transmitter and hold it down until the indicator LED (Fig. 2) goes out. The two components are now
"married" and you can now operate the receiver (Fig. 2) via the transmitter (Fig. 3), or switch it on or off (with
the thermal switch in "Canecel" mode!)
• The programming is retained permanently, even in the event of a power failure. The same principle applies to all
other transmitter components such as the remote control. Learning a wall switch works in the same way, but to
log off press the OFF button "0" of the respective transmitter or "OFF" on the remote control or thermal switch.
• The learning (Fig. 3 OFF / 0 buttons) of BWMs / magnetic switches works in the learning mode of the receiver
(receiver button> 3 seconds no OFF button available) by also holding down the learning button of the transmitter
for 3 seconds. • Please note that reinforced concrete, stone, glazing and other radio components reduce the range
of the radio link.
Fig. 2
Fig. 3
Fig.3a
- Programming the transmitter (wireless thermal switch), explanation of the modes and functions
The two possible modes are heating or cooling function by default. In heating mode (sun), the OFF signal is sent when the preset temperature is
reached, and the ON signal when the temperature falls below this. In cooling mode (snowflake) it is exactly the other way round, since the ON signal
is sent when it is exceeded. To pre-set the mode (heating or cooling), go to the "CANCEL" function level by pressing the function key (FUNC) several
times. By simultaneously holding down the ON & OFF button (approx. 2 seconds), you switch the mode between sun & snowflake in the display. In
the "CANCEL" function level, you also set the day of the week and the time. To do this, select "CANCEL" and hold down the FUNC key for approx. 3
seconds. The day of the week over the time starts to flash. Make your choice using the + / ON and - / OFF buttons. A short press on FUNC then moves
on to the hours afterwards to the minute setting. In the "CANCEL" function level, you can use the + / ON and - / OFF buttons to operate a receiver that
has already been taught in. Another short press on FUNC changes to the next function level "MANU". In the "MANU" function level, you can set the
target temperature by holding down the FUNC key for approx. 3 seconds (.. and + / ON and - / OFF). When the target temperature is reached, the ON
or OFF signal is sent in the "MANU" function level, depending on the preselection mode (sun or snowflake). If you leave the thermal switch in the
"MANU" function level, this state repeats itself continuously (sending the ON or OFF signal). "MANU" is therefore actually the "constant temperature
monitoring" function without any week, day or time specifications. Briefly press FUNC to switch to the "AUTO" function level. Here you can switch
through the programs 1-8 with the + / ON and - / OFF buttons. For each of the 8 programs you can set separate target switching temperatures, days
of the week and start and end times (again by holding down the FUNC button for approx. 3 seconds). Since the navigation in all function levels is
carried out using just 3 buttons (pressed briefly and long), programming is much easier than it would appear after reading this text ;-) 1-8 switch
through. For each of the 8 programs you can set separate target switching temperatures, days of the week and start and end times (again by holding
down the FUNC button for approx. 3 seconds). Since the navigation in all function levels is carried out using just 3 buttons (pressed briefly and long),
programming is much easier than it would appear after reading this text ;-) 1-8 switch through. For each of the 8 programs you can set separate
target switching temperatures, days of the week and start and end times (again by holding down the FUNC button for approx. 3 seconds). Since the
navigation in all function levels is carried out using just 3 buttons (pressed briefly and long), programming is much easier than it would appear after
reading this text ;-)
Reproduction only with permission from
ChiliTec GmbH, Bäckerberg 12, 38165 Lehr
EAR (WEEE): DE25841852
LUCID Packaging Act: DE5562476395648
GRS (UBA register) no .: 21003466


