4
CAUTION: FAILURE TO ABIDE BY ABOVE PROCEDURE MAY INCUR PHYSICAL DAMAGE TO THE CHILLER’S
COMPRESSOR.
TO PROPERLY DISPOSE OF YOUR CHILLER - Your old Chiller may have used a regulated refrigerant in its cooling
system. These refrigerants are believed to harm stratospheric ozone. If you are throwing away your old Chiller,
make sure the refrigerant is removed and recovered for proper disposal by an EPA-certified technician. If you
intentionally release this refrigerant, you can be subject to fines and imprisonment under provisions of
environmental legislation.
7.
QUICK CONNECTOR UNION FITTINGS
¼” x ¼”
First you must remove the temporary “Connector Plugs” from the water Inlet and Outlet ports of the Quick
Connector Unions when installing the Chiller. See Step # 4 below for Tube & Plug removal instructions for Quick
Connector fittings.
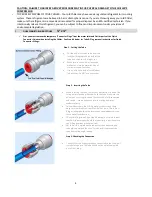
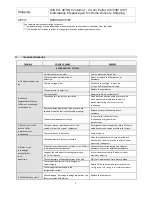
Step 1. Cutting the Tube
•
Cut the end of the tube to be inserted
into the fitting to make the end of the
tube be a smooth and straight cut.
•
Make sure to start with a clean tube
without any foreign material, free of
score marks and scratches.
•
Use a utility knife with a fresh blade or
Tube Cutter. Do NOT use a hacksaw.
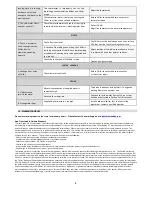
Step 2. Inserting the Tube
•
When inserting the tube, remove any obstructions inside of the
fitting before inserting the tube. Push the tube firmly into the
quick connect fitting to ensure that the tube is fully connected
and sealed. Inserting the tube into the fitting only takes
moderate force.
•
To avoid damage to the O-Ring, make sure burrs and sharp
edges are removed from the cut end of the tube. The tube, O-
Ring or fitting should not be scratched or damaged as this can
cause water leaks later on.
•
The collet clip (gripper) (see Step 4 drawing) has stainless steel
teeth which permanently hold the tube firmly in position while
the O-Ring provides a leak proof seal.
•
For soft or thin walled plastic tube other than standard poly
tube we recommend the use of a tube insert to prevent the
tube from collapsing & leaking.
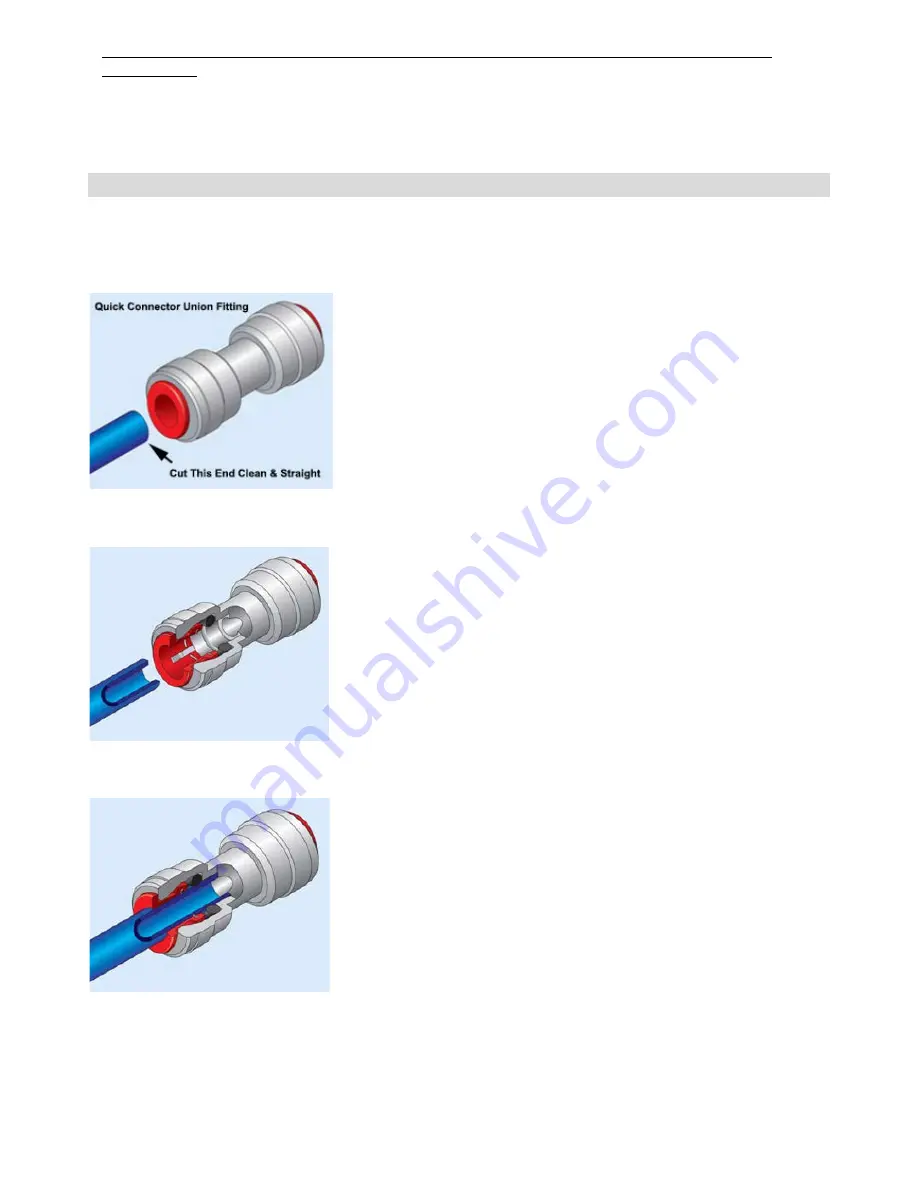
Step 3. Checking the Connection
•
To check that the fitting is properly connected to the tube, pull
it moderately once. The tube should not be able to be pulled
out of the fitting.


