Chiltern Invadex LiteTrack Portable Gantry
6
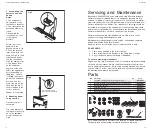
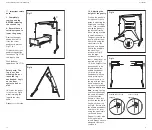
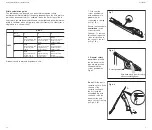
6. Attaching beam
to leg section
Please note prior to
assembly:
Top catch bracket on
the leg section should
be on the
inside
to
accept the beam as
Fig 6.
Top catch bracket on
leg section facing inward
Fig 6
B
A
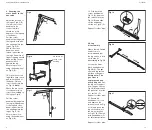
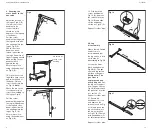
5. Assembling the
cassette and end
beams
Notes:
1. The end beams
which attach to the
cassette are identical.
2. The cassette can be
positioned either way
round.
3. Assemble the
cross beam as close
to the legs as
possible.
Rotate the corner
quadrant to the
position shown in Fig
5. Push the release
lever down with one
hand as Fig 5 (A) and
slide the end beam
into the cassette as
Fig 5 (B) having let go
of the release lever
as the end beam
begins to slide, and
select the appropriate
hole (depending on
lifting task - see p14
for Width calculation
guide). The end beam
will then ‘click’ into
place (the pin will be
flush with the top of
the block when in the
correct position).
Repeat for other side.
Fig 5
User Guide
15
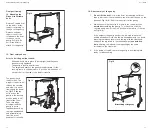
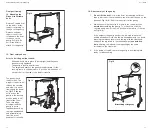
Servicing and Maintenance
Based upon EN10535:1998 and Health and Safety Executive guidance
Chiltern Invadex recommend that hoists and gantry systems are fully
serviced, including a load test, at least every 12 months with an interim
six monthly inspection to LOLER requirements. Prices are available from
Chiltern Invadex Service Offices. The frequency of servicing should be
increased in areas where the environment or heavy usage may cause
deterioration of the equipment. Further details can be obtained from any
Chiltern Invadex Office, shown on the back of this booklet.
Chiltern Invadex and its Authorised Dealers are able to carry out all
aspects of servicing and maintenance work.
Maintenance of this equipment should only be conducted by engineers
trained and certified by Chiltern Invadex.
Keep the service record (at the back of this booklet) up to date.
DO NOT USE IF:
1. There is any damage to the hoist or gantry.
2. There is fraying or stitch damage to the lifting tape, or slings.
3. Any of the gantry parts are missing or damaged
To ensure maximum cleanliness
Wipe with a dry cloth (Gantry and hoist). For stubborn marks use a damp
cloth and a mild cleanser. Always read the manufacturers instructions
prior to applying the cleanser. Avoid using cleaning agents which contain
chlorine, carbolic acid or other strong chemicals as these may damage
the metalwork and plastic components.
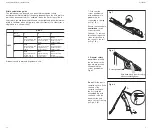
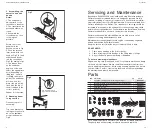
Parts
item
description
qty
part no
1
Upright mouldings kit (all mouldings for legs)
1
360-80001
2
Beam mouldings kit (all mouldings for horizontal beam)
1
360-80002
3
Hand Wheel (Black)
1
COM0081
4
Levelling Foot Kit
1
360-80011
5
Spirit Level spares kit (x4 spirit levels)
1
360-80003
6
Gas strut assembly spares kit (x1)
1
360-80004
1
4
Note: Replacement parts should only be installed by trained personnel.
The gantry then needs testing once parts have been replaced.
6
5
2
3


