INST No INE -403-0P0
−
38
−
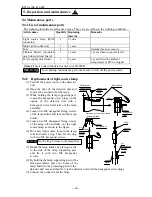
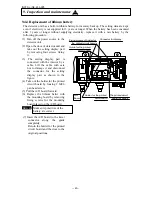
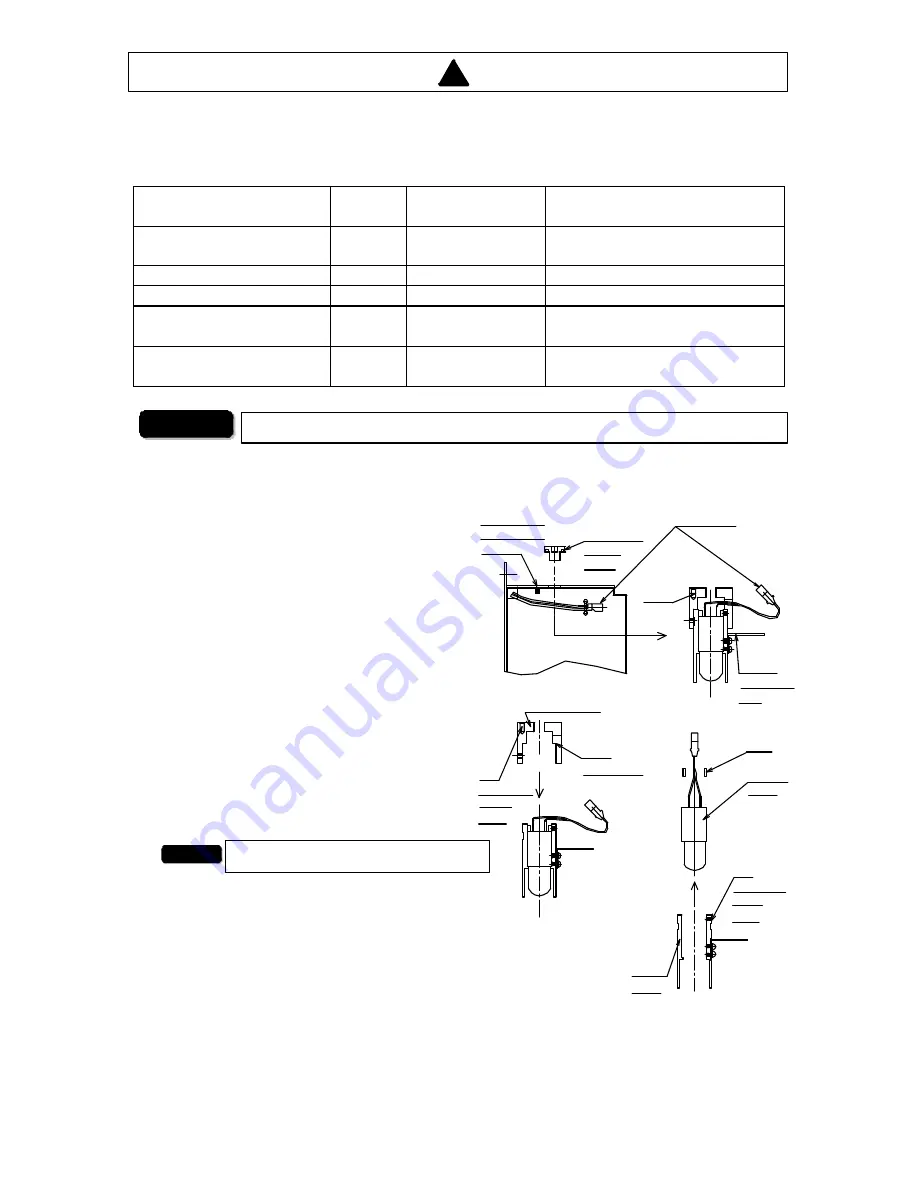
Protrusion
department
of case
Hexagonal
screw
plugs
Connector
Hole
Detector (A view from side)
Lamp
suppoting
part
Lamp holder
M4
Hexagonal
screw
plugs
Dent
department
Ring
Source
lamp
M3
Hexagonal
screw
plugs
Lamp
plate
9.4 Maintenance parts
9.4.1 List of maintenance parts
The replacing intervals are reference values. They vary according to the working condition.
Article name
Quantity Replacing
interval
Remarks
Light source lamp (With
connector)
1
5 years
Motor (with connector)
1
3 years
Fuse
2
Attached as an accessory
Lithium battery (mounted
on a printed circuit board)
1
3 years
3 years when no power is fed
Power supply unit (Note)
1
5 years
3 years when the ambient
temperature is 40
°
C or higher
(Note):
This is built in the detector unit. (not IR-WEP)
9.4.2
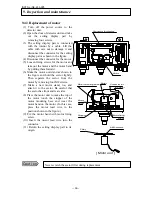
Replacement of light source lamp
(1) Turn off the power source to the detector
unit.
(2) Open the door of the detector unit and
remove the connector for the lamp.
(3) While holding the lamp supporting part,
loosen the hexagonal screw plugs on the
upside of the detector unit with a
hexagonal wrench and take out the lamp
assembly.
(4) Loosen two M4 hexagonal fixing screws
of the lamp holder and take out the la mp
holder.
(5) Loosen two M3 hexagonal fixing screws
of the lamp tube and take out the light
source lamp as shown in the figure.
(6) Put a new light source lamp in the lamp
tube and insert a ring. Then, fix the ring
with two M3 hexagonal screws.
(7) Mount the lamp holder by placing its slit
to the side of the lamp supporting part
and fix it with two M4 hexagonal
screws.
(8) By holding the lamp supporting part of the
lamp assembled, place the holes of the
lamp holder to the projecting parts of the
detector unit case and then fix it to the detector unit with the hexagonal screw plugs.
(9) Connect the connector for the lamp.
W a rn i n g
For replacing maintenance parts, make sure to turn off the power source.
Fix the ring to close to the lamp side.
W a r n i n g
9. Inspection and maintenance
!

