Page 42 Copyright CPS America Co., Ltd.
7. Connecting the PV Inverter
7.1 DC Wire Connections
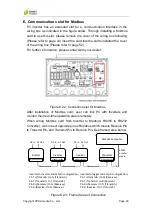
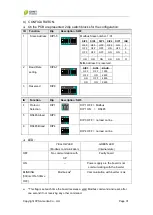
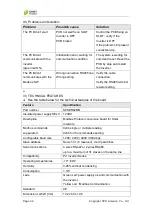
Since the wiring box has been opened during mounting procedures, use
the necessary tools to knock out an opening hole in the desired location
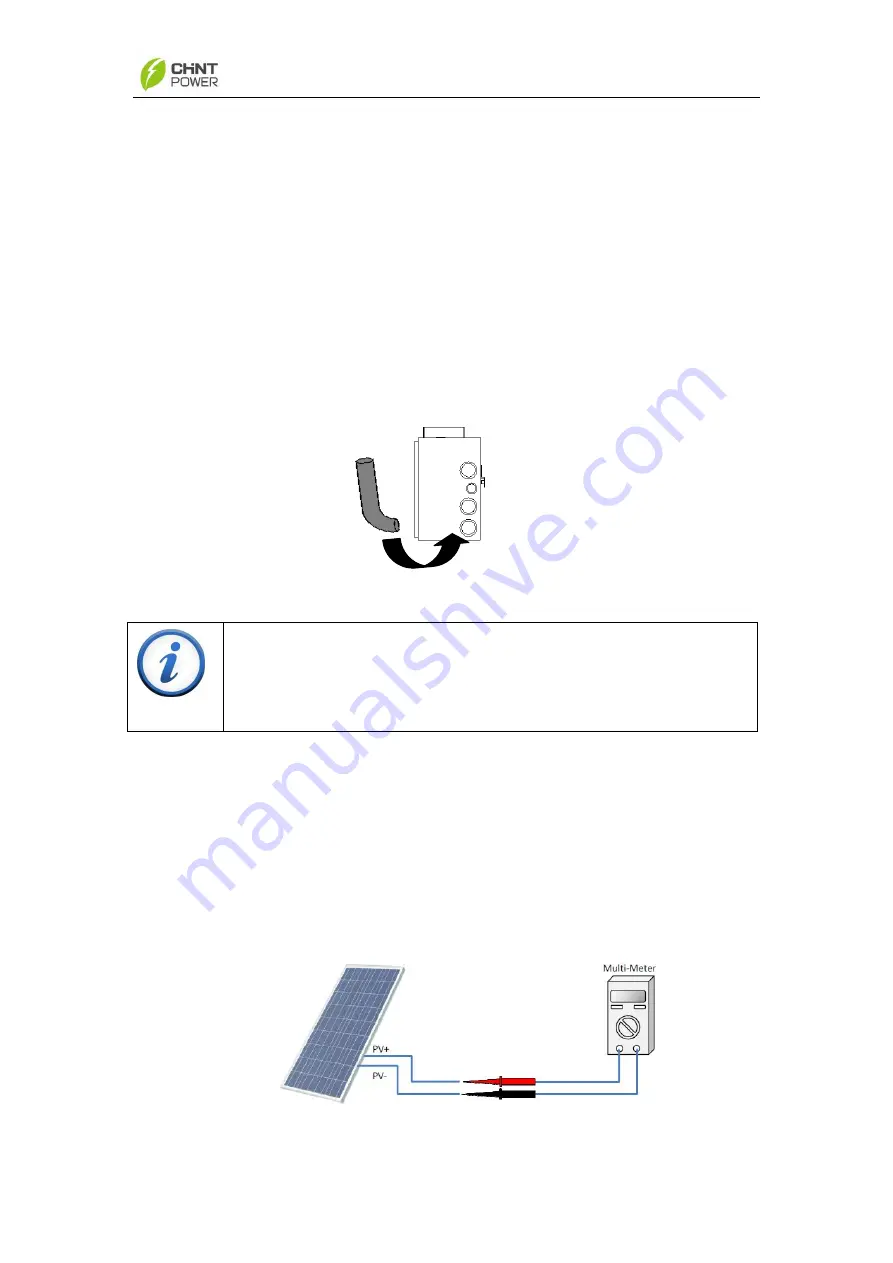
on the wiring box for AC cables and insert a conduit as shown in figure
7.1.1. Second, remove the top cover of wiring box before this procedure
started. Please refer to the configuration diagram in Appendix I and
ensure a correct connection for the DC side of PV system.
Figure 7.1.1: Insert a conduit to the wiring box
A)
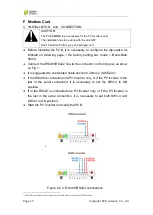
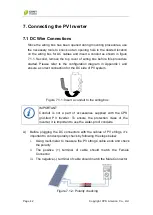
Before plugging the DC connectors with the cables of PV strings
, it’s
important to conduct polarity check by following the steps below:
i.
Using multi-meter to measure the PV strings
’ cable ends and check
the polarity
ii. The positive (+) terminal of cable should match the Female
Connector
iii. The negative (-) terminal of cable should match the Male Connector
Figure 7.1.2: Polarity checking
IMPORTANT
Conduit is not a part of accessories supplied with the CPS
grid-tied PV Inverter. To ensure the protection class of the
inverter, it is important to use the water-proof conduits.


