ChipBLASTER Inc
38
18.0. BELT INSTALLATION:
18.1. Align Sprockets:
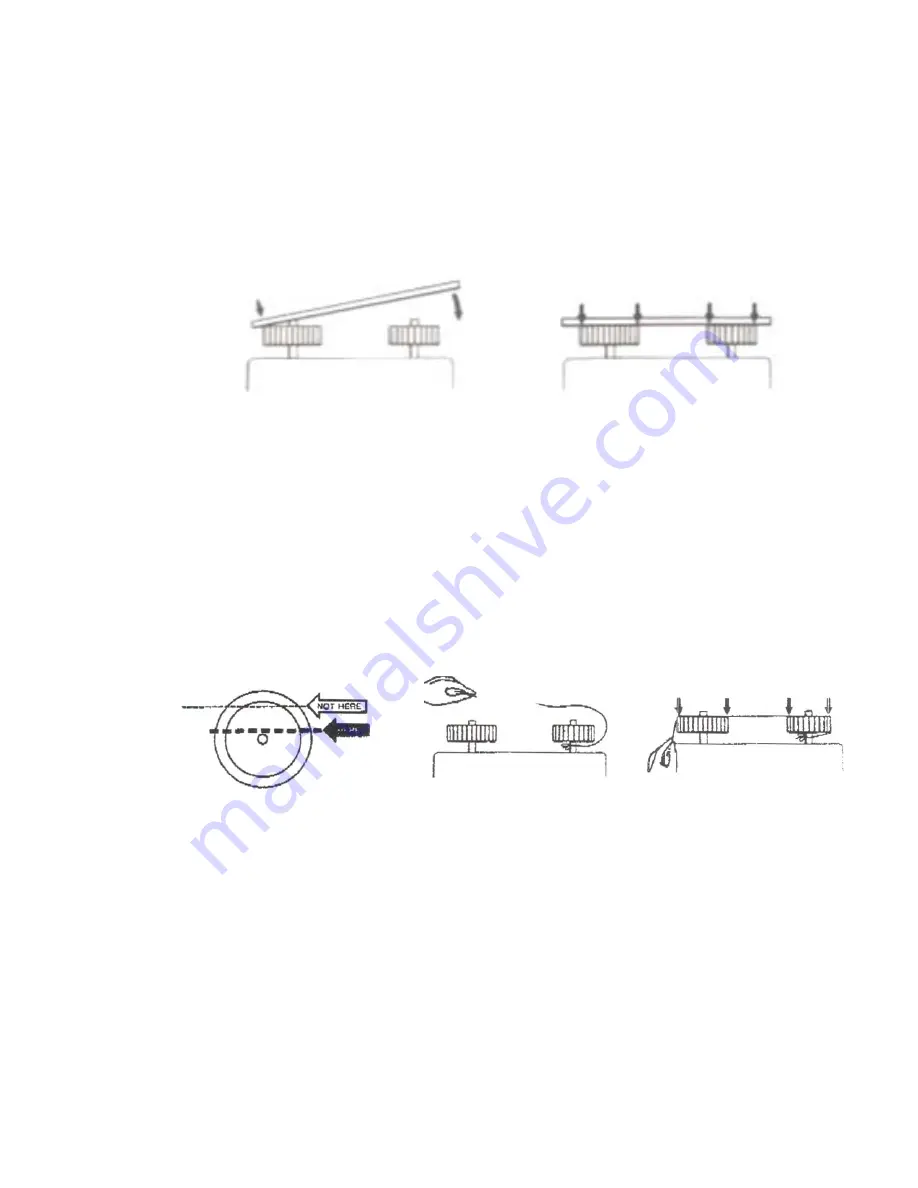
18.1.1. Sprocket alignment and parallelism of the shafts is very important. Proper
alignment helps to equalize the load across the entire belt width, thereby reducing
wear and extending belt life. The sketches below show how to align a
Synchronous drive properly. PLACE A STRAIGHTEDGE against the outside
edge of the sprockets as shown in Figure 11; Figure 12 shows the four points
where the straightedge should touch the sprockets.
Figure
11
Figure12
18.1.2. The straightedge should cross the sprockets at the widest possible part. (See
Figure 13.) OR USE A STRING. Tie a string around either shaft (Figure 14) and
pull it around and across the outer edge of both sprockets. Figure 15 shows how
the string should touch four points when the drive is properly aligned. After
aligning the sprockets, check the rigidity of the supporting framework. Shafts
should be well supported to prevent distortion and a resulting change in the center
distance under load. Do not use spring-loaded or weighted idlers. Idler sprockets
or pulleys must be locked into position after adjusting belt tension. Please note:
At least one sprocket must have a flange.
Figure
13
Figure
14
Figure
15
18.2. Install Belt:
18.2.1. Do not pry or otherwise force the belt onto the sprockets, as this can result in
permanent damage to the belt. Either remove the sprocket's outside flange or
reduce the center distance between the sprockets so that the belt can be easily
installed.
18.3. Belt Tensioning - General Method
18.3.1. This method of tensioning Synchronous belts should satisfy most drive
requirements.
18.3.1.1. Reduce the center distance so that the belt can be placed onto the
sprockets without forcing or prying it over the flanges.
18.0


