background image


INSTRUCTION MANUAL 


Model No.: CQFU13Y1GD1W 


Summary of Contents for CQFU13Y1GD1W

Page 1: ...1 INSTRUCTION MANUAL Model No CQFU13Y1GD1W...

Page 2: ...reparations for use 5 IV Functions 6 V Instructions for food storage 6 VI Tips for special needs 7 VII Maintenance and cleaning 7 VIII Simple fault analysis and elimination varying with different prod...

Page 3: ...andle the plug with wet hands This could result in an electric shock 15 Unplug the power cord by holding the plug never by pulling the cord 16 Turn off your refrigerator before unplugging it 17 Refer...

Page 4: ...ounding wire with a grounding plug The plug must be inserted into an outlet that is correctly installed and grounded Incorrect use of the grounding plug can result in a risk of electric shock Consult...

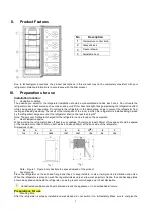
Page 5: ...or can be found on the nameplate 2 Heat dissipation space When working the refrigerator gives off heat to surroundings Therefore at least 300mm of free space should be spared at the top side more than...

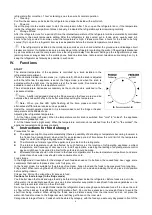
Page 6: ...ion temperature 1 At the fridge mode left area When the temperature control knob is switched from cold to coldest the appliance temperature gradually drops 2 At the freezer mode right area When the te...

Page 7: ...Guidelines on the packaging You will be able to store each item of frozen food for the period shown against the star rating This is usually the period stated as Best to use them before found on the fr...

Page 8: ...he time for fresh food to be stored Note Once the refrigerator is used you d better use it continuously and under normal circumstance do not stop its use so as not to affect the service life Defrostin...

Page 9: ...le for your socket outlets it should be cut off and carefully disposed of To avoid a possible shock hazard do not insert the discarded plug into a socket This product complies with the EEC directives...

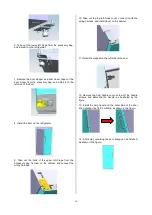
Page 10: ...ory bag fix them on the cabinet and connect the wiring harness 10 Take out the top left hinge cover connect it with the wiring harness and install them on the cabinet 11 Install the magnet on the left...

Reviews: