background image

10

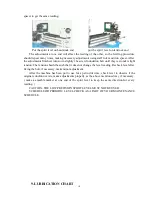
spacer to get the same reading.

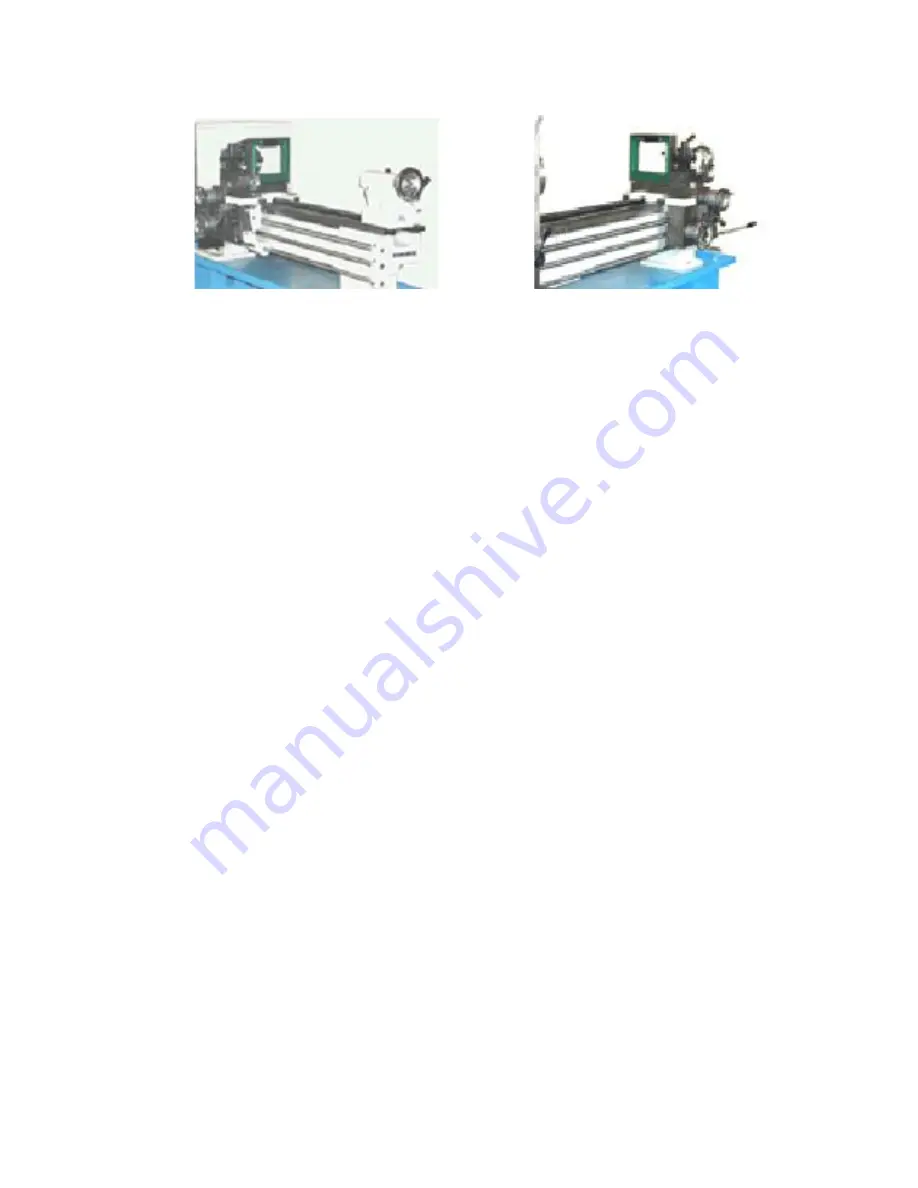
Put the spirit level on headstock end                    put the spirit level on tailstock end

The adjustments  at  one end  will  affect  the  reading  of the  other,  so  the leveling  procedure

should repeat many times, making necessary adjustments using staff ruler and iron spacer. After
the adjustments finished, turn sown slightly t he screw foundation bolt until they rest under slight
tension. The tension should be such that it does not change the level reading. Recheck level after
fixing the bolt, if necessary, make minor adjustment.

After  the  machine  has  been  put  to  use  for  a  perio d  of  time,  check  level  to  observe  if  the

original condition exists, make adjustments properly as the above mentioned way if necessary.
(  make  a  erasable  marker  at  one  end  of  the  spirit  level  to  keep  the  same  direction  for  every
reading. )

CAUTION: THE LOW PRECISION SPIRIT LEVEL MUST NOT BE USED.
SCHEDULE OR PERIODIC LEVEL CHECK AS A PART OF YOUR MAINTENANCE

SCHEDULE.

9. LUBRICATION CHART

Summary of Contents for CZ1224

Page 1: ...1237 BENCH LATHE OPERATING MANUAL CHIZHOU JOUSEHOLD MACHINE TOOL CO LTD THE PEOPLE S REPUBLIC OF CHINA ADDRESS 8 BLOCK A CHIZHOU INDUSTRIAL ZONE ANHUI PROVINCE P R CHINA TEL 0566 2612032 2612048 FAX 0566 2612035 ...

Page 2: ...tenance the lathe will give you a long and précised service Before operating please study the manual carefully When working please operate according to requirement and procedure described in the manual Besides please keep the manual in good condition so that you may look it up all the time ...

Page 3: ...ory 4 3 Optional accessory 4 4 Electrical system 4 5 General dimension 6 6 Open case 7 7 Installation 7 8 Leveling 9 9 Lubrication chart 11 10 Operation instruction 12 11 Protection instrument 20 12 Check problems and repairing 20 13 Maintenance 21 ...

Page 4: ... 520mm 850mm 12 Taper of spindle hole M T 5 M T 5 13 Taper of center M T 3 M T 3 14 Range of spindle speed 12changes 50 1160rpm 12changes 50 1160rpm 15 Diameter of lead screw 22mm 22mm 16 Diameter of feed rod 19mm 19mm 17 Thread of lead screw 8T P I inch 3mm metric 8T P I inch 3mm metric 18 Thread can be cut Metric 24 kinds 0 25 7 5mm Inch 50 kinds 4 112T P I 19 Motor power 1 1Kw 1 1Kw 20 Net weig...

Page 5: ...r connection can be made as customers requirements The electrical system in the lathe has been installed and adjusted in the factory Generally please don t open the electrical box Before operating wire the proper power source to lathe and connect the ground wire Turn on the power and check turning direction of spindle if wrong first turn off the motor and cut off the poser source then change the w...

Page 6: ...OION THAT ALL KINKS OF PROTECTION INSTALLATIONS SUCH AS CHUCK MICROSWITCH MAIN COVER MICROSWITCH TOOLPOST PROTECTION MICROSWITCH NO VOLTAGE PROTECTION HAVE BEEN FITTED PROTECTION INSTALLATIONS ARE OF SPECIAL REQUIREMENTS IF YOU DON T NEED OR REQUIRE YOUR MACHINE SHOULD BE WITHOUT THEM BUT ELECTRICAL WIRING CHANGE SEPARATELY ELECTRIC PRINCIPLE CHART THREE PHASES 220V 380V 440V SINGLE PHASE 110V 220...

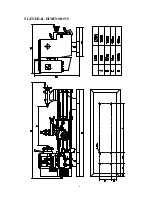
Page 7: ...6 5 GENERAL DIMENSIONS ...

Page 8: ...ccordance with its overall dimension and installa tion dimension of the machine so that the operating and repairing is convenient If you use our stand optional accessory please first make mark and drill eight holes in the eight fitting hole position of base according to fitting dimension of the sta nd secondly cover eight foundation bolt in the base note position precision when determining the fit...

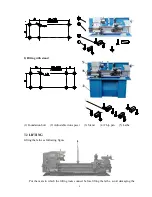
Page 9: ... stand 1 Foundation bolt 2 Adjustable iron spacer 3 Stand 4 Chip pan 5 Lathe 7 2 LIFTING Lifting the lathe as following figure Put the mats in which the lifting tools connect before lifting the lathe avoid damaging the ...

Page 10: ...ensure the removal of any foreign particles and prevent the way scoring Lubricate the ways when clean finished 8 LEVELING The lathe should be kept perfectly level at all times LEVELING PROCEDURE A Longitudinal leveling After the bed ways are dry after cleaning back off the base screws place a 6 precision machinist spirit level over working table along longitudinal direction bed length direction mo...

Page 11: ...er slight tension The tension should be such that it does not change the level reading Recheck level after fixing the bolt if necessary make minor adjustment After the machine has been put to use for a perio d of time check level to observe if the original condition exists make adjustments properly as the above mentioned way if necessary make a erasable marker at one end of the spirit level to kee...

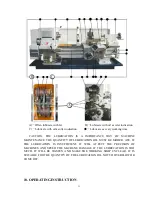
Page 12: ...TANCE WAY OF MACHINE MAINTENANCE THE QUANTITY OF LUBRICATION OIL MUST BE MODER ATE IF THE LUBRICATION IS INSUFFICIENT IT WILL AF FECT THE PRECISION OF MACHINES AND SPEED THE MACHENE DAMAGE IF THE LUBRECATION IS TOO MUCH IT WILL BE WASTEN AND MAKE THE WORKING SHOP UNCLEAR IT IS SUITABLE FOR THE QUANTITY OF THE LUBRICATION OIL NOT TO OVERFLOW OR COME OFF 10 OPERATING INSTRUCTION ...

Page 13: ...ongitudinal feed lever 25 Cross slide handwheel 26 Saddle handwheel 27 Control rod 28 Feed rod 29 Lead screw 30 Micro switch box 31 Feed rod and lead screw exchange lever 32 Change gear lever 33 Change gear lever 34 Gear box 35 End face cover 36 Thread indication plate 37 Cover locking lever 38 Indication light 39 Change direction lever 40 Emergence push button 41 Start button 42 Name plate 10 1 C...

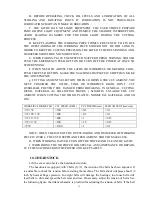
Page 14: ...LOAD PREVENT THE DANGER FROM BREAKING IN GENREAL CUTTING METAL MATERIAL AS FOLLOWING FIGURE SLIGHTLY ENLARGE THE CUT AMOUNT WHEN CUTTING THE WOOD PLASTIC NONME TAL MATERIAL AND SO ON WORKPIECE DIAMETER CUT SPEED RPM CUT DEEPTH mm FEED AMOUNT mm turn Φ150 160 0 5 0 1 Φ100 150 200 0 5 0 1 Φ50 100 400 1 0 15 Φ30 50 100 1 5 0 15 Φ30 1300 1 0 1 NOTE WHEN THE RATE OF THE OUTSTANDIN G AND DIAMETER OF WOR...

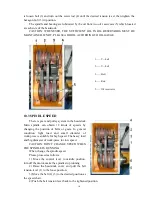
Page 15: ... of speeds by changing the position of belts or gears In general condition light load and small diameter of work piece is suitable for high speed The heavy load and big diameter of work piece for low speed CAUTION DON T CHANGE SPEED WHEN THE SPINDLE IS RUNNING When change the spindle speed Please proceed as follows 1 Move the control lever to middle position turn off the motor make the spindle sto...

Page 16: ...le will be reverse rotation Control lever middle the spindle will stop If the motor is one phase and need to change the direction of the spindle Firstly please move the control lever from one side to middle a little stop till the motor stop then move up or down if move control lever from one side directly to another side the direction of the spindle don t change 10 5 GEAR BOX Quick change gear sys...

Page 17: ...en the cutting is finished every time firstly please make the tool back and reverse the motor then make the tool to the original start cutting position and begin the next process and working many times at the same until the thread is finished CAUTION CAN NOT CHANGE THE HANDLE 1 2 3 WHEN THE MACHINE IS RUNNING A THREAD AND FEED TABLE FOR IMPERIAL LEAD SCREW THREADING THREADING FEEDING INCHES mm FEE...

Page 18: ...ternal turning and facing please turn the lever 1 on the gear box to left and make the feed rod rotation Need to power feed in longitudinal direction up engage the cross longitudinal feed lever 2 Need to power feed in cross direction down engage the cross longitudinal feed lever 2 1 Feed rod lead screw changing 2 Cross longitudinal Feed changing 3 Half nut lever While the cross longitudinal feed l...

Page 19: ...crew The threading dial is located on the right or left side of the apron It performs the important function of indicating the proper time to engage the half nut lever so that the tool will enter the same groove of the thread on each successive cut The dial is marked with lines numbered 1 2 3 4 and in between are lines with no number These are half lines and are called unnumbered lines The dial wh...

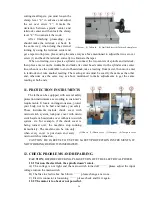
Page 20: ...ng correctly please fix the tool If need to turn the tool post turn the tool post locking handle counter clockwise to loosen the locking handle and turn the tool post to the position you needed and then turn the tool post lock handle clockwise to make tool post lock 10 8 COMPOUND SLIDE Using the compound slide can cut taper When cutting taper please loosen the screw on the saddle round the compoun...

Page 21: ...t both ends 11 PROTECTION INSTRUMENTS The lathe can be equipped with several safety protection instruments as according to customer s requirements It locate on dangerous area protect your body not to be hurt and make you safety These instruments include chuck cover with micro switch system tool post cover with micro switch system headstock cover with micro switch system etc For example if the chuc...

Page 22: ...enter please loosen the lock screw of headstock and adjust the spindle center to required and locked 12 6 During proceeding the surface of work piece is very rough A The space of the spindle bearing is too big adjust it to correct or change a new one B The space between the saddle and the gib is too big adjust them to correct C The tool is not sharp please sharpen it D The work piece does not lock...

Page 23: ...e pouring into the oil if the lubricating is not sufficient 13 3 Monthly maintenance A Adjust all the gib space of the saddle B Lubricate the worm gear half nut and bearing in order to prevent wearing 13 4 Yearly maintenance A Level the machine in order to keep the accuracy B Check the cable terminal switch and other electrical components not less one time per year in order to prevent loosening pl...

Reviews: