Chloride Active and E-Series UPS User Manual
33
Chapter 13 E-Series Installation and Commissioning
Upon receipt of your UPS, carefully examine the packing containers for any sign of physical damage. Notify
the carrier immediately if damage is present. Carefully unpack the UPS. Retain the packaging for reuse or
dispose. Check the packing for damages.
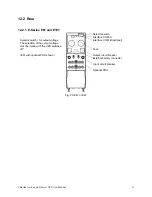
NOTE:
If damages are detected, please inform the shipping agent immediately.
UPS includes:
• UPS device
• A recharging cable is connected to external battery cabinets BPE61.
13.1 Installation of the E-Series (Hardwired)
WARNING:
Only qualified electricians should install an Chloride E-Series E61 (E41), E101,
(E81)or E203 (E153) hardwired UPS. When installing the unit, follow applicable local and national
regulations (such as the U.S. National Electric Code), good wiring practices and this manual.
1. Unpack and move E-Series UPS and battery cabinet(s), if supplied, into desired installation location.
2. Adjust leveling jacks under the UPS and battery cabinet(s) to remove wheels of the units from the floor
and avoid movement of connections.
3. Turn off input and output breakers on the back of the UPS and any battery cabinets to be used.
4. Turn off and isolate the power source to be used for the UPS input using proper lock-out/tag-out
procedures.
5. Confirm that the power source to be used for the UPS is 208 V (208/120 3
φ
for E203).
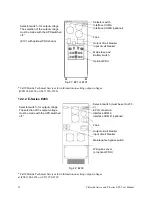
6. Remove the connection plate on the back of the UPS to expose connection terminals.
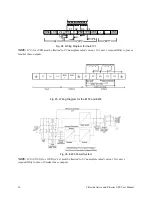
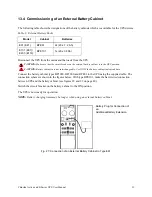
7. Wire input of the UPS by first connecting ground (earth) wire to GND (ground) terminal. Next, connect
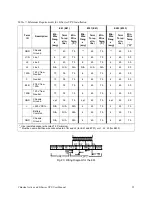
the input power leads to L1/N and L2 (for E61 and E101) or L1, L2, and L3 (for E203). See Table 10,
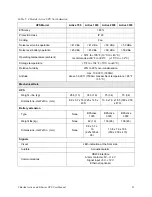
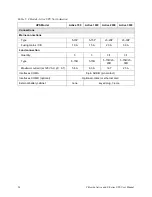
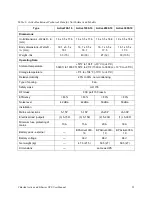
“Minimum Requirements for E-Series UPS Installation,” on page 40 for minimum wire gauge, wire
temperature and screw torque requirements.
NOTE:
Always use grounding conductor that is equal to or larger in size than the current carrying
conductors.
8. If the UPS does not have an attached Power Distribution Unit (PDU), wire the output of the UPS to
appropriate load as follows:
Wire 208 V load between terminals marked 120A (x1) and 88B (x3).
Wire 120 V loads between terminals marked 0 (x2) and 120A (x1) or 0 (x2) and 120B (x4).
CAUTION:
The load connected to 120A and 120B must each be no more than 1/2 the nameplate rated 120 V current.
User must properly fuse these outputs to this rating.
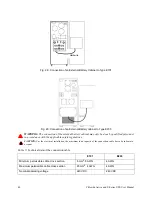
9. Connect the UPS to the battery cabinet(s) (if required)
See Table 10, “Minimum Requirements for E-Series UPS Installation,” on page 40 for minimum wire
gage, wire temperature and screw torque requirements.
For model E61 (if using an external battery cabinet), first remove the connection plate from the rear
of the battery cabinet, then connect the battery cable (supplied with the battery cabinet) from the
battery connector on the UPS to the terminals on the battery cabinet. Confirm that (+), (-) and GND
terminals are connected to proper wires. Connect any additional battery cabinets in a “daisy-chain”

