5-2
M Series User Manual
020-100009-05 Rev. 1 (09-2010)
Section 5: Maintenance
Replace Filters:
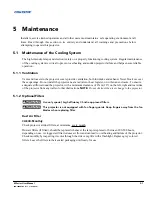
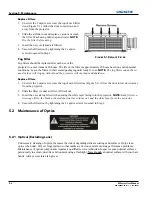
1. Unscrew the 2 captive screws at the top of each filter
door (Figure 5-1). Allow the door to rest down and
away from the projector.
2. Slide the air filter out and replace, vacuum or wash
the filter. Wash using mild soap and water.
NOTE:
Dry the filter before using.
3. Insert the new or cleaned air filter(s).
4. Secure the filter door by tightening the 2 captive
screws loosened in Step 1.
Fog Filter
Fog filters should be replaced after each use of the
projector to a maximum of 20 hours. The life of the filter is approximately 20 hours based on environmental
conditions. Leave the filters in their sealed packaging until ready for use
.
NOTE:
The fog filters cannot be re-
used or they will clog up with oil and the projector will overheat and shutdown.
Replace Filters:
1. Unscrew the 2 captive screws at the top of each filter door (Figure 5-1). Allow the door to rest down, away
from the projector.
2. Slide the filter (or dust air filter, if fitted) out.
3. Insert the new air fog filter with ensuring the white layer facing into the projector.
NOTE:
Each filter is a
two-stage filter; the black activated charcoal layer faces out, and the white layer faces the projector.
4. Secure the filter door by tightening the 2 captive screws loosened in Step 1.
5.2
Maintenance of Optics
5.2.1 Optical (Excluding Lens)
Unnecessary cleaning of optics, increases the risk of degrading delicate coatings and surfaces. Only clean
optics when dust, dirt, oil, fingerprints or other marks are obvious and are causing performance problems.
Maintenance of optical components requires a qualified service technician. Inspect exposed optical surfaces
periodically in a clean, dust-free environment using a flashlight.
Never touch
an optical surface with your bare
hands. Always wear latex lab gloves.
F
IGURE
5-1 R
EPLACE
F
ILTER
Summary of Contents for M Series
Page 1: ...M Series U S E R M A N U A L 020 100009 05 ...
Page 2: ......
Page 3: ...M Series U S E R M A N U A L 020 100009 05 ...
Page 14: ......
Page 46: ......
Page 120: ......
Page 131: ...Section 6 Troubleshooting M Series User Manual 6 7 020 100009 05 Rev 1 09 2010 FIGURE 6 1 ...
Page 132: ......
Page 148: ......
Page 152: ......
Page 167: ......

