B-2
M Series User Manual
020-100009-05 Rev. 1 (09-2010)
Appendix B: GPIO
Configuring the GPIO
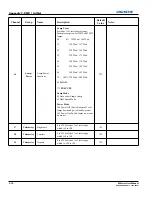
The GPIO connector can be configured to automate any number of events using the serial command code
GIO
.
Each Pin is defined as either an
input
or
output
depending on the desired outcome. Configure the pin as an
input if you want the projector to respond to something the device does and as an output if you want the
external device to respond to an action taken by the projector. For example, configure the pin as an output if
you want the lighting in a room to automatically dim when the projector is turned on.
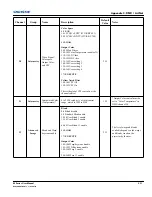
By using the GIO command, you can also set the state of each output pin as
high
or
low
. By default, the state of
each pin is
high
. The voltage applied to pins in the high state is +3.3V.
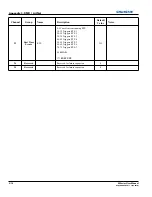
A low state (or value of 0) will be read on an input pin if the circuit attached to the pin is open. A high state (or
value of 1) will be read on an input pin if the circuit attached to the pin is shorted to ground. This corresponds
to a switch closing event.
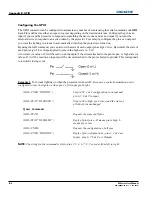
Example 1.
Turn room lighting on when the projector is turned off. (
Assumes a control/automation unit is
configured to turn the lights on when pin 2 of its input goes high.
)
NOTE:
The strings in the commands refer to pins 2, 3, 4, 6, 7, 8, 9 in order from left to right.
(GIO+CNFG “OOOIIII”)
Set pin #2, 3 & 4 configuration to output and
pin 6, 7, 8 & 9 to input
(GIO+STAT “HLXXXXX”)
Set pin #2 to high, pin 3 to low and the state of
all other pins unchanged
Query Command
(GIO+STAT)
Request the state of all pins
(GIO+STAT “HLLHLLH”)
Reply of pin states - H means pin is high, L
means pin is low
(GIO+CNFG)
Request the configuration of all pins
(GIO+CNFG “IIIOOOO”)
Reply of pin configurations - pins 2, 3 & 4 are
Inputs, pins 6, 7, 8 & 9 are Outputs
Summary of Contents for M Series
Page 1: ...M Series U S E R M A N U A L 020 100009 05 ...
Page 2: ......
Page 3: ...M Series U S E R M A N U A L 020 100009 05 ...
Page 14: ......
Page 46: ......
Page 120: ......
Page 131: ...Section 6 Troubleshooting M Series User Manual 6 7 020 100009 05 Rev 1 09 2010 FIGURE 6 1 ...
Page 132: ......
Page 148: ......
Page 152: ......
Page 167: ......

