2-26
M Series User Manual
020-100009-05 Rev. 1 (09-2010)
Section 2: Installation and Setup
2.3
Connecting Sources
Sources are connected to the
Input Panel
located at the back of the projector.
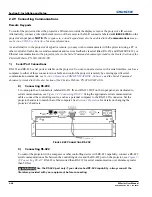
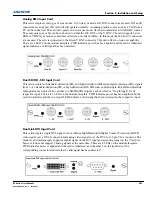
Figure 2-28 Input Panel
. The
Input Panel allows one image processor board and up to 4 input cards to be inserted. The input cards are hot
swappable i.e. they may be plugged in and out while the projector is running. The image processor should only
be replaced when the projector is off or when it is in standby mode.
There are 6 option Input cards available:
• High-Definition Multimedia Interface/Twin HDMI (High-Definition Multimedia Interface)
• Analog BNC
• Dual SD/HD-SDI (Serial Digital Interface)
• Dual Link DVI
• Video Decoder
• DMX512 Interface
These cards slide into the option slots, shown in
Figure 2-28 Input Panel
. The option cards can be used in any
slot. One or more of the option slots may be used with any combination of option cards, including multiples of
the same card type. There may be up to 2 active inputs being displayed at any time, either from one card or
from 2 cards. These 2 inputs can be routed to outputs or to the main or PIP video image.
NOTE:
See
Section 7
Specifications
for more details.
LEDS
LEDs are located on the faceplate of each input card and indicate the following:
• Power ON - Green
• Signal Valid - Green
• Signal Invalid - OFF
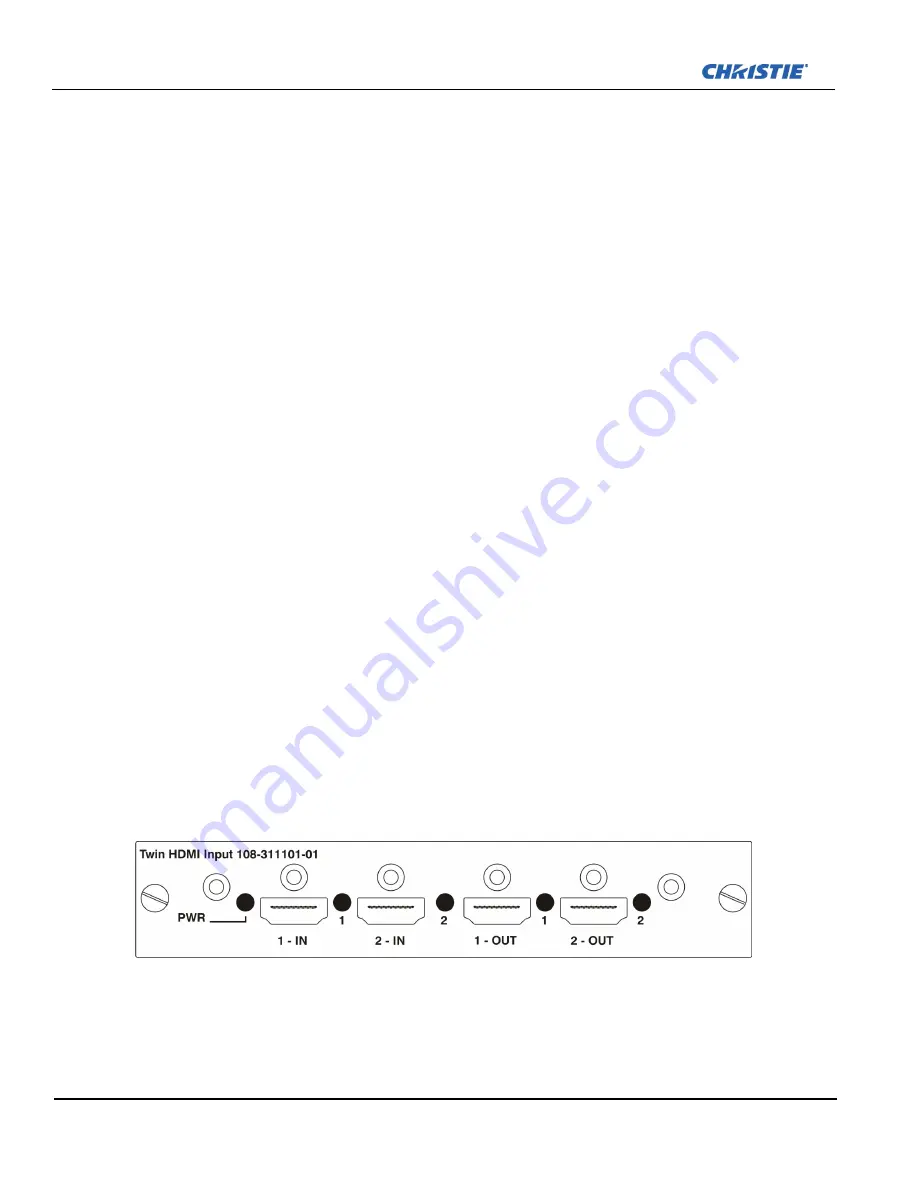
Twin HDMI Input Card
This card accepts one or two HDMI inputs, and can route one or both inputs to the card’s outputs. Any input
from any card can be looped out of this card. The output label ‘1-OUT’ loops out the main image being
displayed on the projector. The output labelled ‘2-OUT’ loops out the image displayed in the picture in picture
(PIP). Any input from any optional input card can be looped out of this card. There are 5 LEDs on the module
faceplate. The PWR on the left side indicates power is applied, and that the card is initialized. The LEDs to the
right side of the corresponding connectors indicate that a valid signal is detected. In the case of the output’s, the
LED indicates a signal is currently being looped out.
Summary of Contents for M Series
Page 1: ...M Series U S E R M A N U A L 020 100009 05 ...
Page 2: ......
Page 3: ...M Series U S E R M A N U A L 020 100009 05 ...
Page 14: ......
Page 46: ......
Page 120: ......
Page 131: ...Section 6 Troubleshooting M Series User Manual 6 7 020 100009 05 Rev 1 09 2010 FIGURE 6 1 ...
Page 132: ......
Page 148: ......
Page 152: ......
Page 167: ......

