Section 3: Operation
M Series User Manual
3-5
020-100009-05 Rev. 1 (09-2010)
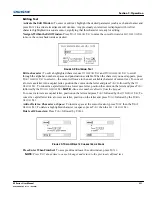
The best auto setup will be obtained under the following conditions:
• Input levels, it is best to have an image with saturated (very bright) colors.
• Phase, high contrast edges are needed.
To determine active window size:
• Video images should have whites and blacks in the image.
• Wide range video images should have content (including white) that extends to all edges of the image.
Refer to Section
3.5 Adjusting the Image
for further details about the Auto Setup function.
Channel
Select a specific source setup (channel) defined and stored in projector memory. Once you enter a two-digit
channel number (or, if there is a list displayed, highlight it and press
E
NTER
), the display will automatically
change and update according to the numerous setup parameters defined for that channel.
NOTE:
A new channel
is automatically created if you adjust an image from a new source.
NOTE:
C
HANNEL
key behavior during a presentation depends on whether or not the Display Channel List
option is enabled in the
Menu Preferences
menu. You can choose to use a scrollable list of channels when
you press
C
HANNEL
,
or you may prefer to enter the desired channel number “blind”, i.e., without on-screen
feedback. See
Menu Preferences
later in this section.
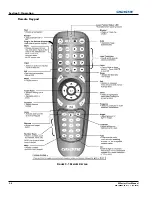
Slot 1, 2, 3, 4
Press to display the next active input on the card in the slot.
Input
Displays all inputs in all slots, both active and inactive. Scroll through the list to select an input for the main
image. Press Input again to show the list and select the picture-in-picture (PIP) image.
PIP
Turns PIP ON or OFF.
Swap
Swaps the main and PIP images.
Contrast
Changes the level of peak white in your images. Use
L
EFT
/R
IGHT
A
RROW
K
EY
until you reach the desired level
of contrast—for best results, start low and increase so that whites remain bright but are not distorted or tinted
and that light areas do not become fully white (i.e., “crushed”). Conversely, low contrast causes dim images.
Bright
Increases or decreases the black level in the image. Use
L
EFT
/R
IGHT
A
RROW
K
EY
until you reach the desired
level of brightness. For best results, start high and decrease so that dark areas do not become fully black (i.e.,
“crushed”). Conversely, overly high brightness changes black to dark grey, causing washed-out images.
Summary of Contents for M Series
Page 1: ...M Series U S E R M A N U A L 020 100009 05 ...
Page 2: ......
Page 3: ...M Series U S E R M A N U A L 020 100009 05 ...
Page 14: ......
Page 46: ......
Page 120: ......
Page 131: ...Section 6 Troubleshooting M Series User Manual 6 7 020 100009 05 Rev 1 09 2010 FIGURE 6 1 ...
Page 132: ......
Page 148: ......
Page 152: ......
Page 167: ......

