Installation & Setup
2-6
Roadster & Mirage S+/HD User Manual
020-100002-04 Rev. 1 (12-2008)
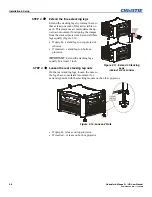
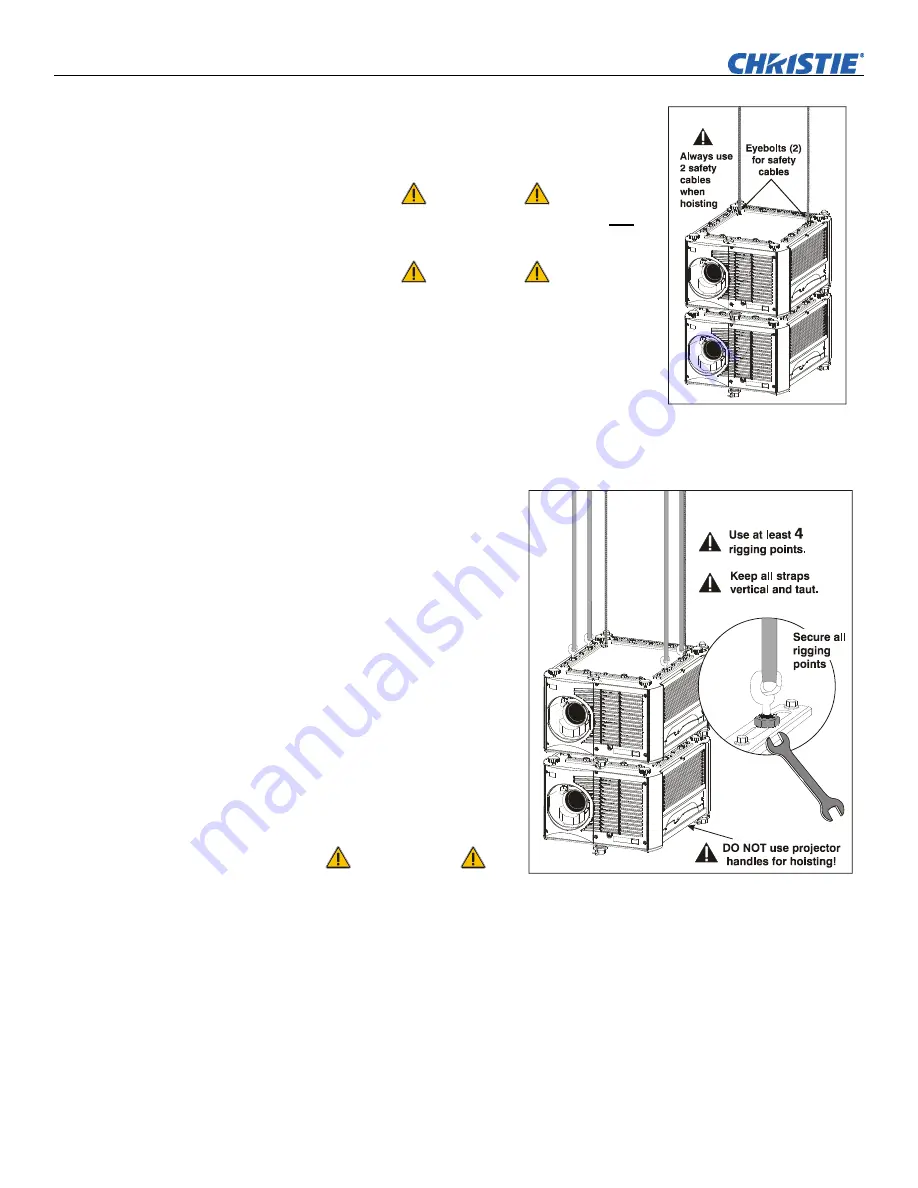
Attach safety cables
Attach a safety cable to each of the two eyebolts
mounted on the bottom of the projector (Figure 2.8).
WARNING
Always use at least two safety cables for
any
hoisting.
WARNING
Attach safety cables to the two eyebolts.
NOTE:
When hoisting a non-inverted projector or
stack, add two safety eyebolts in the front and rear
threaded holes provided on the top of the projector.
Ensure the eyebolts have an adequate rating for the
load. Secure safety cabling to both eyebolts.
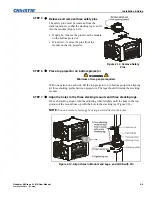
Attach rigging hardware
Secure your rigging components
to the appropriate rigging
points—eight sliding points are
provided on the bottom. Tighten
the nut at each required location
(Figure 2.9) to prevent sliding.
NOTES:
1)
Use
at least four
rigging points for all hoisting.
2)
Use straps, clamps or cabling
with load capacity adequate for
the total projector weight. See
Section 6
.
3)
Do not join the
rigging straps or cables to a
common point—keep separated
as shown.
WARNINGS
• Maximum stack = three
projectors.
• Stack first, then hoist.
NOTES: 1)
Requires stacking hardware provided standard with
Roadsters
only.
Available separately for
Mirage Series.
2)
Installation requires at least two people.
Roadster and Mirage projectors can be stacked in either the upright or inverted
position. Do not mix orientations—i.e., inverted with upright—in a stack. Secure a
maximum of three projectors with the stacking mounts as described below.
Figure 2.8. Attach Safety
Cables
NOTE: ADD EYEBOLTS (2)
IF NON-INVERTED
STEP
3
STEP
4
Figure 2.9. Using the Rigging Hardware
Stacking Procedure


